
For comfortable operation through the proxy server, its proper configuration is important. In this article, we offer a detailed guide on how to set up a proxy server in Windows 10 to protect your computer from possible threats when working on the Internet.
No extra software is needed to configure proxy settings on Windows 10 because these native interfaces handle everything you need.
A Windows 10 proxy server can be connected in two ways: automatically or manually. In the case when the proxy server is configured manually, you need to provide the proxy server address as well as the port. If it is set automatically, such actions will not be required.
Windows 10 proxy settings include an automatic detection feature called WPAD (Web Proxy Auto-Discovery Protocol). WPAD helps your system find proxy settings automatically, which simplifies connecting to networks that require proxy servers without manual input.
An automatic configuration script is a proxy script address, usually a URL like http://my.proxy.server:8000/, pointing to a PAC (Proxy Auto-Configuration) file. PAC files contain JavaScript that tells your device how to handle web requests through proxies.
Here’s how you set it up:
To disable this setup, simply switch off “Use Setup Script.” If you notice proxy issues or stuck settings, clear cached scripts with these steps:
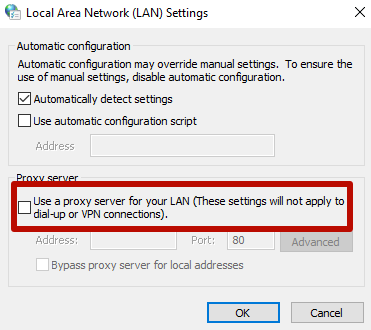
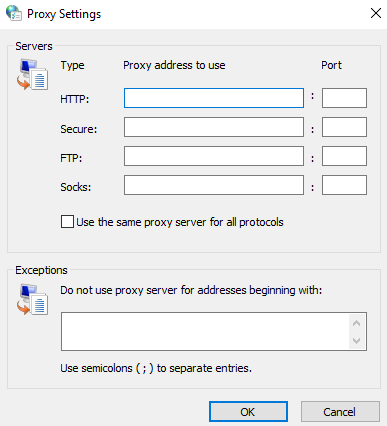
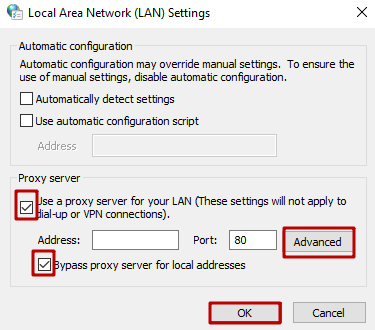
Manual proxy setup requires you to enter the proxy server’s IP address and port number. This setup is common for fixed proxy servers or explicit configurations.
Proxy settings in Windows 10 support both IPv4 (e.g., 192.168.1.211) and IPv6 addresses. Port numbers are usually 80 for HTTP, 443 for HTTPS, or 8080 for alternate proxies. Always get the correct IP and port from your IT department to avoid connection problems.
Follow these steps to configure manual proxy settings:
To disable manual proxy settings, just switch off “Use a Proxy Server.”
To test if your manual proxy settings work, try these simple steps:
For reliable proxy servers to use in your manual setup, consider Proxy-Seller. They offer a wide range of proxy IPs, including residential, ISP, datacenter (IPv4/IPv6), and mobile proxies. These proxies support both HTTP(S) and SOCKS5 protocols and are fully compatible with Windows 10 proxy server settings.
Proxy-Seller provides:
Windows 10 has built-in tools for configuring proxy settings that cover both automatic and manual options. The primary interface is the Settings app:
For advanced users, proxy settings are stored in the Windows Registry under HKEY_CURRENT_USER\Software\Microsoft\Windows\CurrentVersion\Internet Settings. Always back up the registry before making changes to avoid system issues.
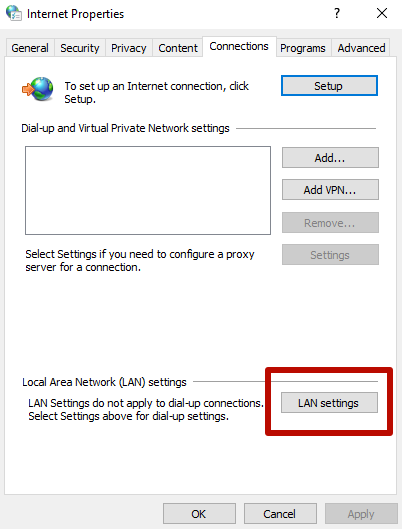
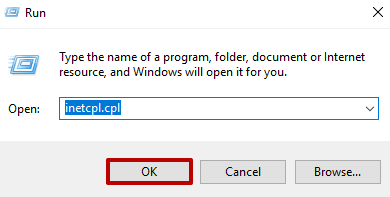
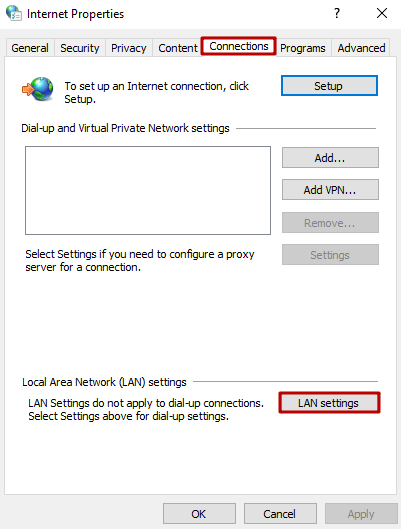
Another option is the Internet Options dialog, accessible by typing inetcpl.cpl in the search bar or through the Control Panel. Under Connections > LAN Settings, you can configure proxy settings here. Changes in Internet Options are system-wide, affecting all compatible apps. This legacy interface is useful if you prefer a classic view.
For automation or enterprise-level scripting, use PowerShell cmdlets like "Set-ItemProperty" or "netsh" commands (for example, netsh winhttp set proxy). This allows for fast, repeatable proxy configurations across multiple systems.
To change the proxy settings and to configure the new connection configuration on Windows 10, follow these steps:

An important step is to save edits by clicking "OK".
Proxy settings in Windows 10 can cause internet problems if configured incorrectly. Common signs of issues include:
Here’s a checklist to troubleshoot proxy problems effectively:
The Windows Network Diagnostics tool can automatically detect and fix common proxy-related problems. Run it by right-clicking your network icon and selecting Troubleshoot problems.
To check your current proxy status from the command line, use "netsh winhttp show proxy".
If problems persist, gather detailed information: screenshots of proxy settings, error messages, and logs. Provide this to your network or IT support team for faster resolution."
You can disable the proxy server on Windows 10 by resorting to the method that is used specifically for the updated version, paying attention to all parameters.
All browsers today use the OS proxy system, so disabling it in Windows is equal to disabling it in the browser (except for Mozilla Firefox).
The reasons for such an act may be:
Proxy settings in Windows 10 are duplicated in the updated interface. Next, we suggest that you familiarize yourself with the instructions for disabling proxy settings in more detail:
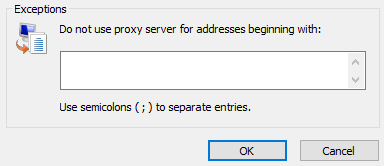
Important! In the settings of Windows 10, proxies can be disabled only for local Internet addresses and left enabled for the rest.
The proposed way to disable proxy settings in Windows 10 disables the settings in the browser. After eliminating the reasons that provoked the decision to disconnect, the proxy server can be connected again by following the recommendations provided in the article.
Learn more about proxy settings for different sites through the Proxifier program.

 PHP
PHP Node.js
 Python
 Java
Java Golang
 en
en  Español
  中國人
中國人  Tiếng Việt
  Deutsch
  Українська
  Português
  Français
  भारतीय
  Türkçe
  한국인
한국인  Italiano
  Gaeilge
  اردو
اردو  Indonesia
  Polski
Comments: 0