To the great joy of users, the Telegram messenger has already built-in support for working through a proxy server. This means that the proxy setting in the Telegram is not at all complicated, and thanks to this article you will learn how to do this on different types of devices. A step-by-step guide on configuring Telegram through proxy for PC, browser and phone will be different, as for different types of servers. In the framework of this article, we will not explain the technical differences between the different types of proxies. It is enough to know that when you bypass the Telegram block all of them perfectly cope with their task.
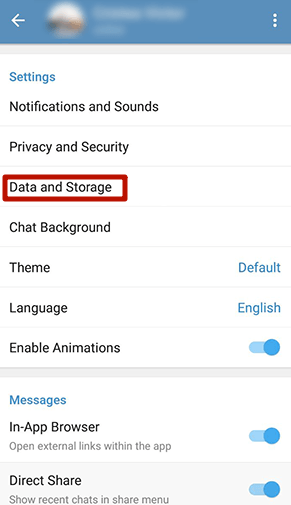
Setting up the Telegram proxy server on Android is performed in a few clicks. If you have prepared proxy server of the form 0.0.0.0:0000, for example, 192.151.40.4:3128, you need to launch the Telegram application on your android device and go to the settings.
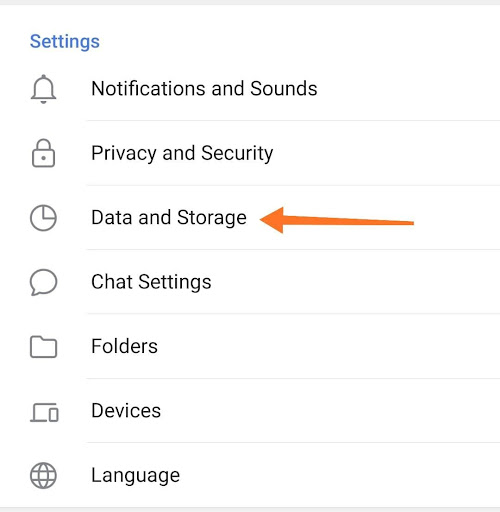
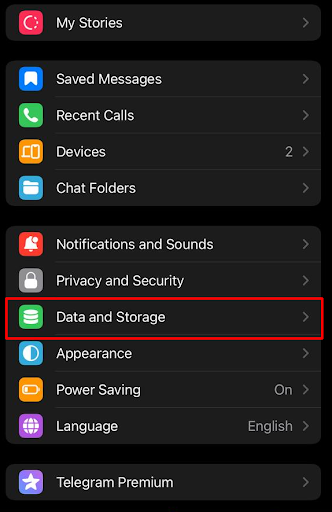
Then, slightly scrolling down, you should find the "Data and disk" item and click on it.
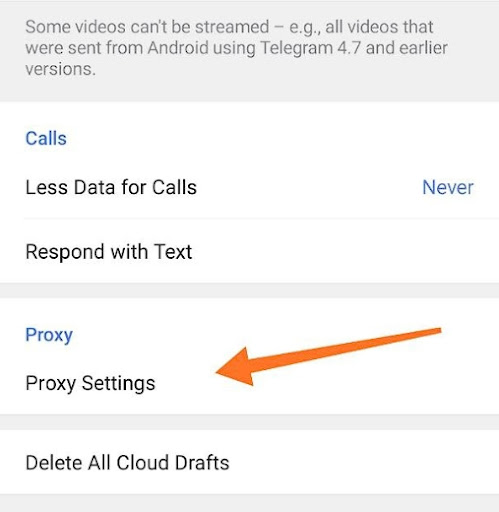
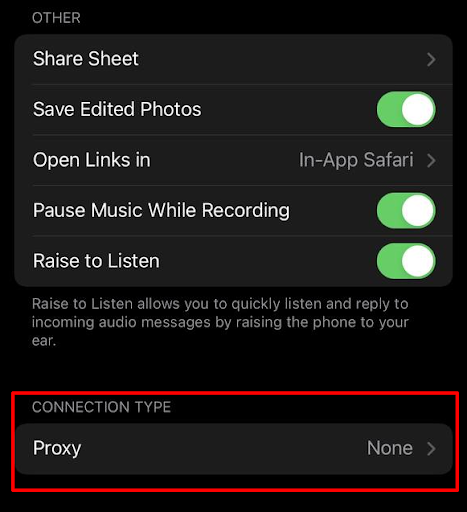
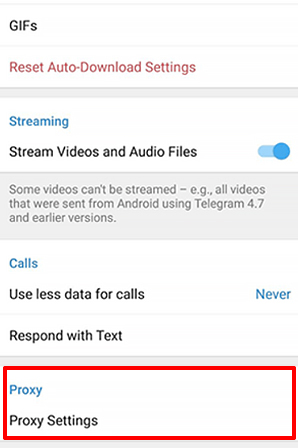
After opening the "data and disk" menu, scroll to the bottom and click on the most recent item in this menu, which will be called "proxy settings".
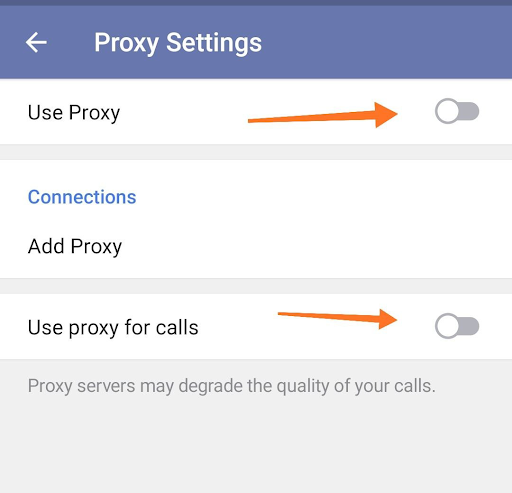
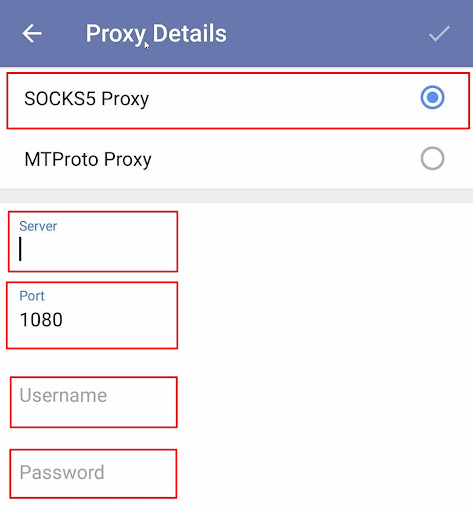
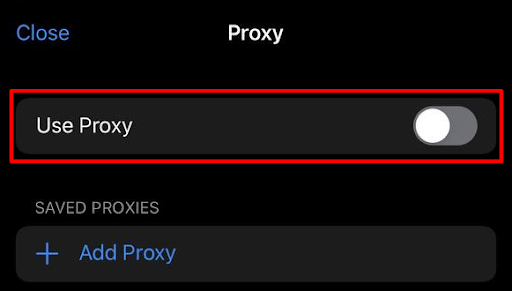
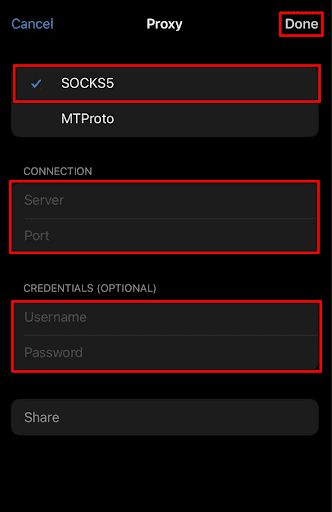
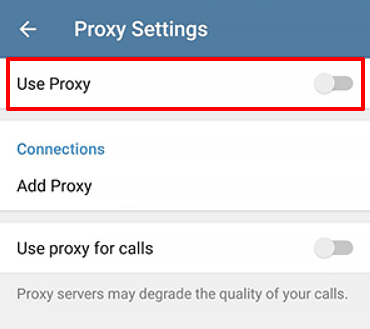
By opening this menu, you begin to enter the proxy data. First of all, you need to switch the "use proxy settings" lever to the "turn on" mode by click on it. In the server field, you need to enter 4 digits separated by dots of the form 0.0.0.0. In this case after the colon, you do not need to enter the server in the field, since this is a port, and it is entered into another field. In the next line you need to enter the port. These are the numbers that follow after the colon. It can be two-digit, or four-digit (both options are acceptable). For example, the port can be: 80, 3132, 7800, 22, etc.
Sometimes it happens that the setting of socks5 Telegram proxy implies the presence of a login and password in order to have to connect to this proxy server. If you use a private proxy, after you bought it, you are sure to receive a login and password to access it, which only you will know.
If you received this data, you need to enter the login in the "login" field and enter the password in the "password" field. If you did not receive this data from the proxy, it means they are not required for connection. In this case, you must leave the "login" and "password" fields empty.
If you are having problems using the voice calling function without a proxy's work, you will probably want all the audio calls to go through the proxy as well. To do this, you need to activate the corresponding lever, as shown in the screenshot.
After you complete this procedure and pressed "back" your proxy connection will already work, and the application will bypass all sorts of blocks.
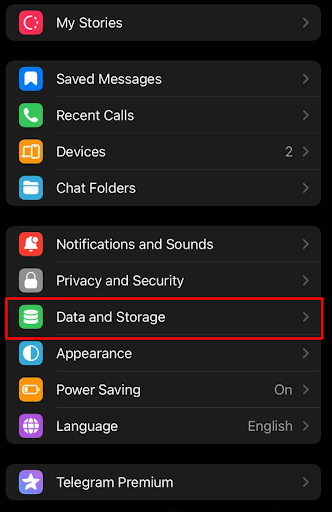
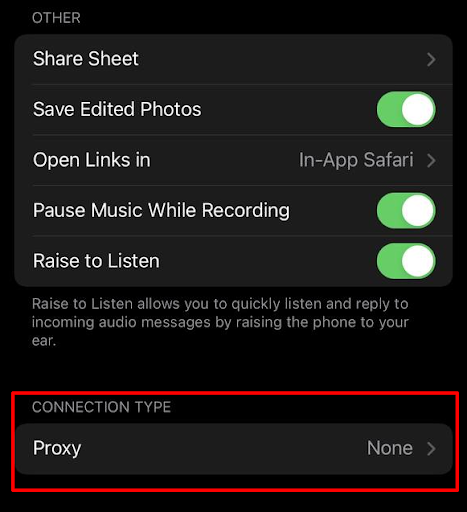
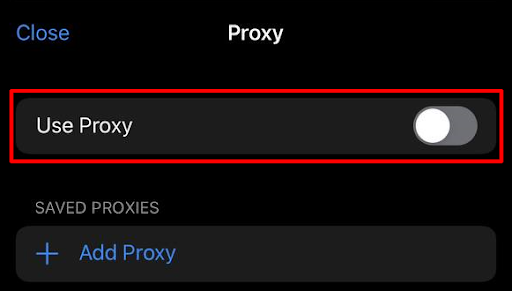
Many users already guessed how to enable the proxy in the Telegram, and how to enable the proxy on the iOS. In general, setting up a proxy for the iOS is identical to configuring the proxy server for the android.
We must do the following:
In the port field, you enter digits which are going to be after the colon in the proxy server, but you do not need to enter colons, only digits. After adding all the data, you need to click "ready" and all changes will take effect instantly, and all your Telegram traffic will go through the proxy you configured.
An important reminder for Telegram and Telegram X users is that it does not matter which application you use. Their interface in the proxy section is absolutely identical, the names of the buttons are exactly the same. Therefore, the question of how to use the proxy in the Telegram will be the same from users of both applications, as well as the response to it.
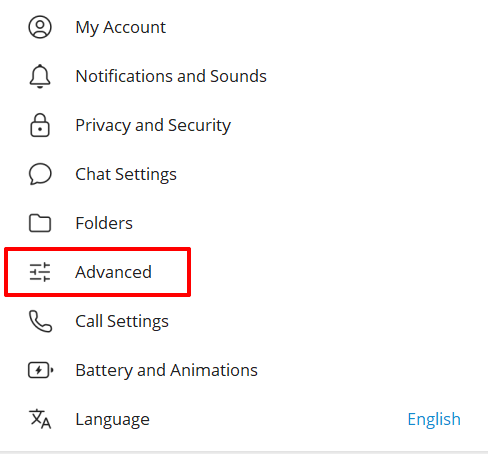
Setting up a proxy for a web application or computer version is practically no different from mobile devices. Telegram is convenient because its interface on any device seems familiar and understandable. So, to change the proxy in the Telegram, you will need to re-open the settings.
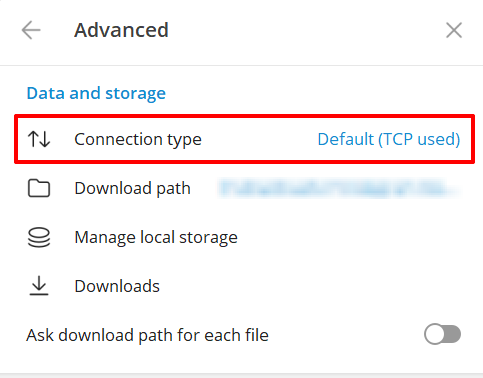
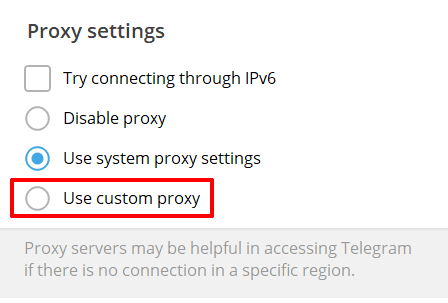
Next, we scroll down to the bottom. We are interested in the string "Connection type". If you have not used a proxy yet, then most likely you will have the same message as in the screenshot.
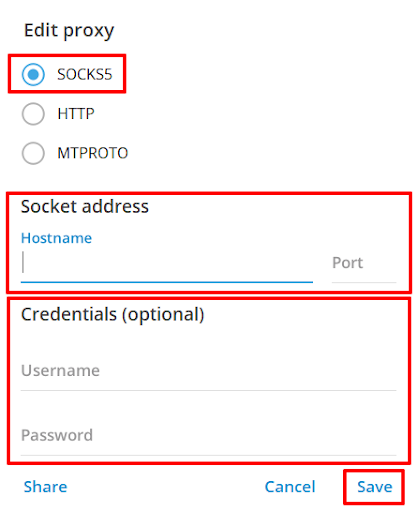
By clicking on "Default" (TCP used), you immediately get into the data entry window of the proxy server. First of all, you need to choose which type of proxy you use: HTTP or Socks 5 by selecting a specific check box. Buying a private proxy, you will immediately know what type you have.
By clicking on the desired checkbox, we proceed to enter data from the proxy server. In the field "Hostname" we set ip proxy server. Four digits of the form 0.0.0.0. In the port we enter the numbers that follow after the colon, the colon itself does not need to be written. If you have a login and password to access the proxy, then they need to be entered in the appropriate fields, as shown in the screenshot.
After making all the necessary manipulations, click on the "save" button for the changes to take effect. After clicking, the connection through the proxy will be installed, and your application will start to work through it. To change the proxy, or to disable the proxy in the Telegram, you can simply change the data to others, or select the "Auto (TCP if available or HTTP)" check box.
We hope that this article was useful for you, and you have successfully configured your proxy connection so that your Telegram works as it should. Use good programs and good proxies!
Disabling the proxy in Telegram today is not the right decision since the locks that regularly “hit” this application can be dangerous both for its operation as a whole and for the personal data of a specific user. Therefore, it is recommended to disconnect only temporarily and in the most extreme cases.
Мы получили вашу заявку!
Ответ будет отправлен на почту в ближайшее время.
С уважением proxy-seller.ru!
Comments: 1