
 en
en  Español
  中國人
中國人  Tiếng Việt
  Deutsch
  Українська
  Português
  Français
  भारतीय
  Türkçe
  한국인
한국인  Italiano
  Gaeilge
  اردو
اردو  Indonesia
  Polski
 This article provides a detailed guide on how to enable or disable proxies in Android OS version 13, complete with illustrative screenshots. Follow these steps to configure a proxy on your Android device. While the process may vary slightly across different Android versions and interfaces, the basic instructions remain similar.
To configure a proxy on Android version 13, follow these steps:
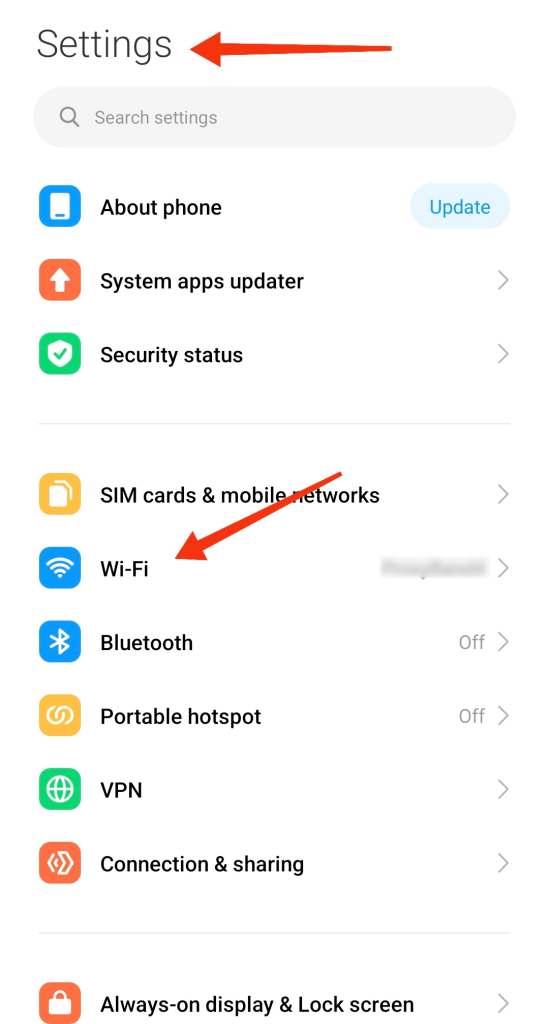
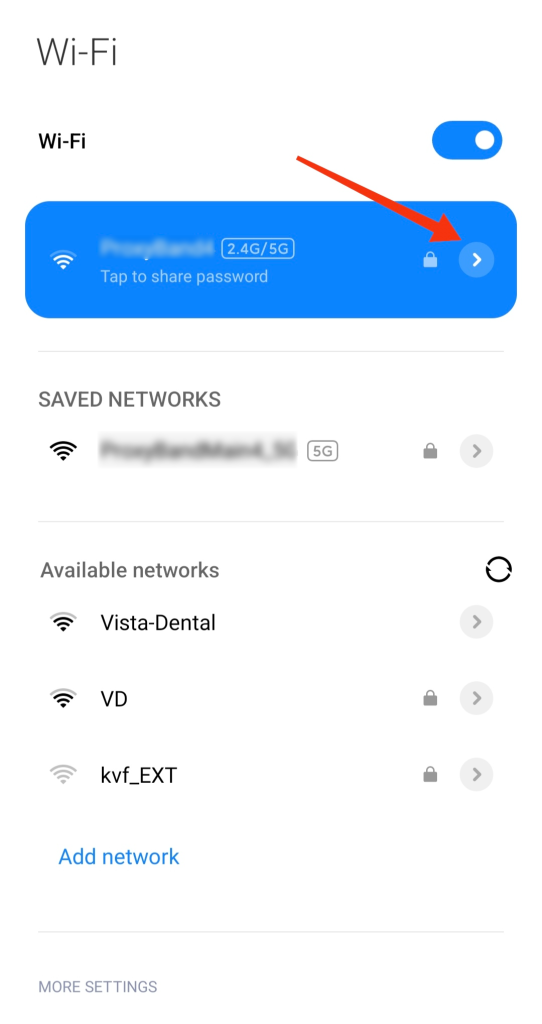
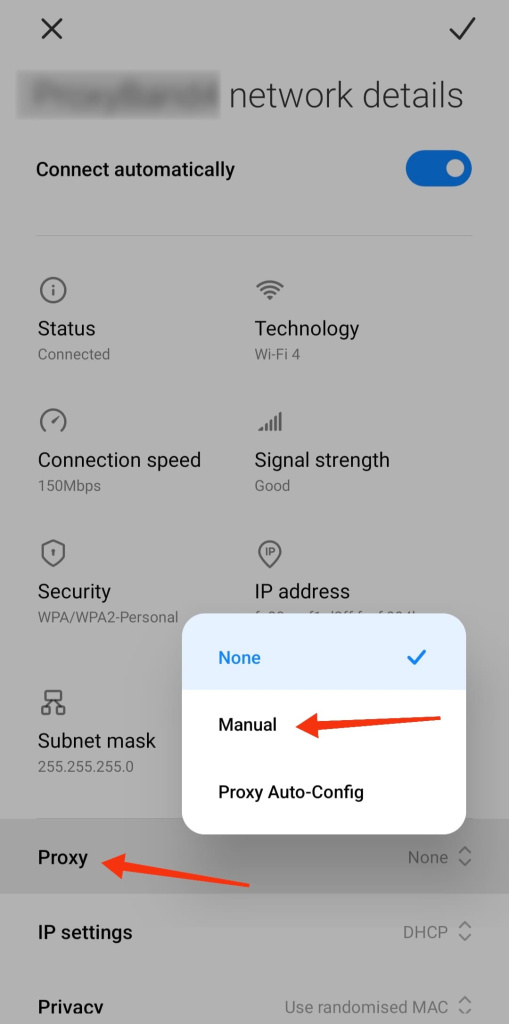
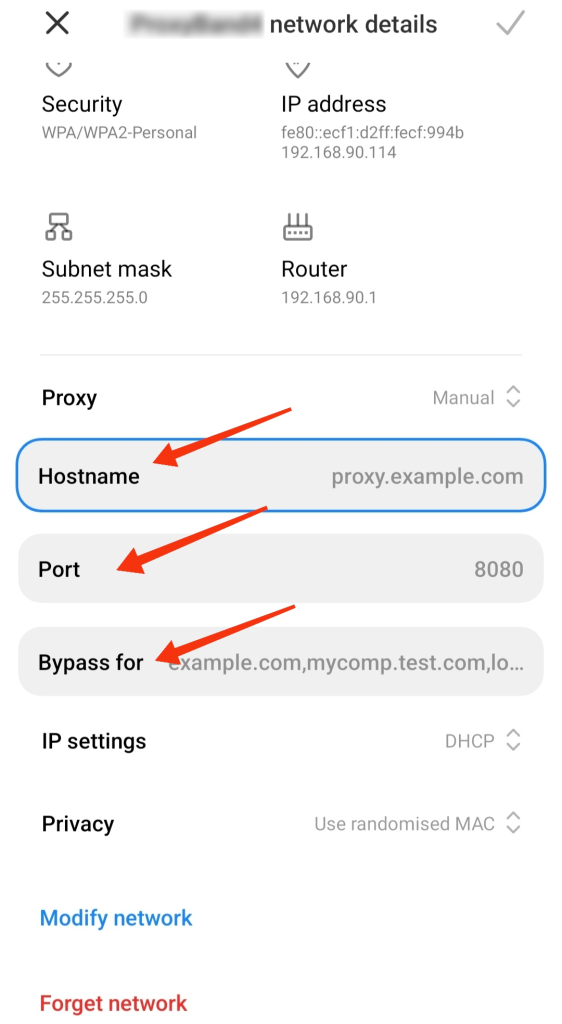
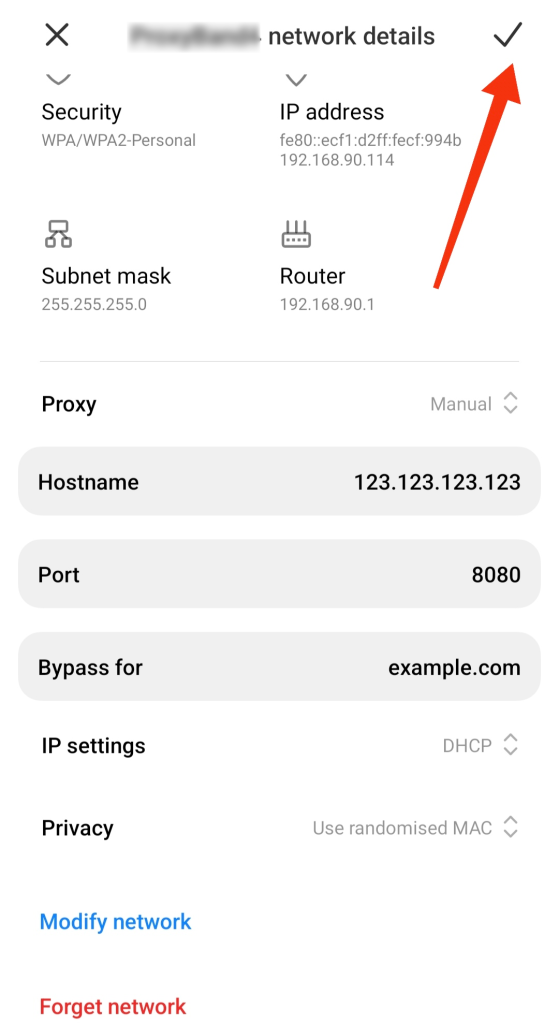
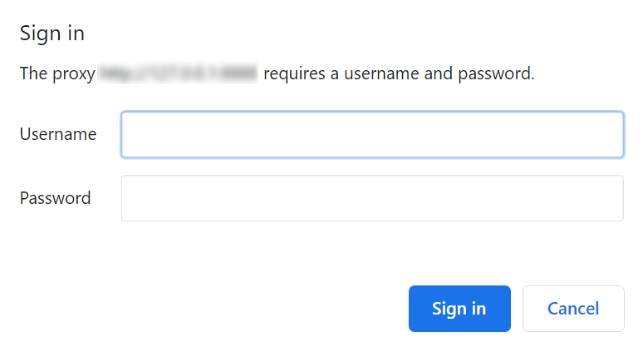
Following these steps will route your device's traffic through the configured proxy server.
To effectively set up a proxy on an Android device without root access, use the Drony application by following these steps:
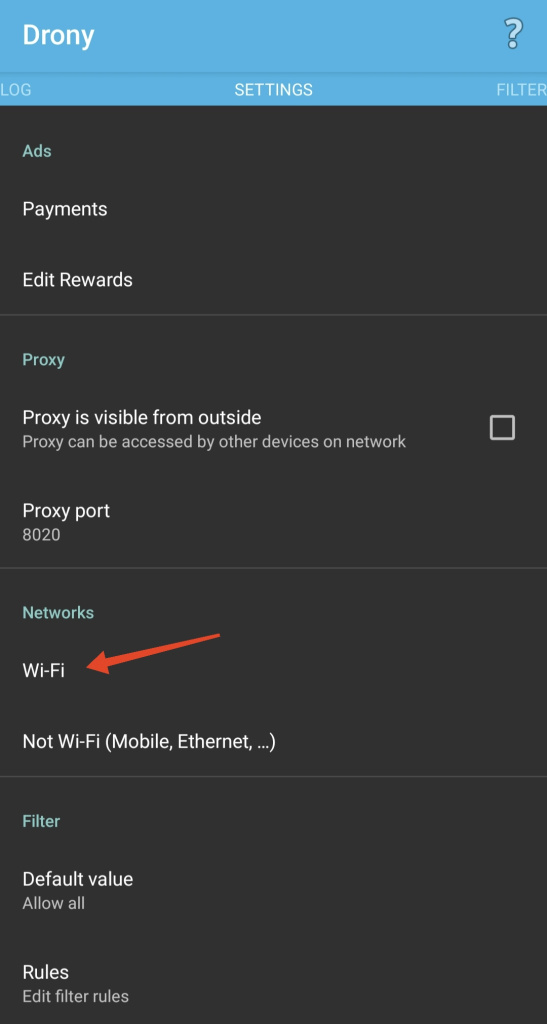
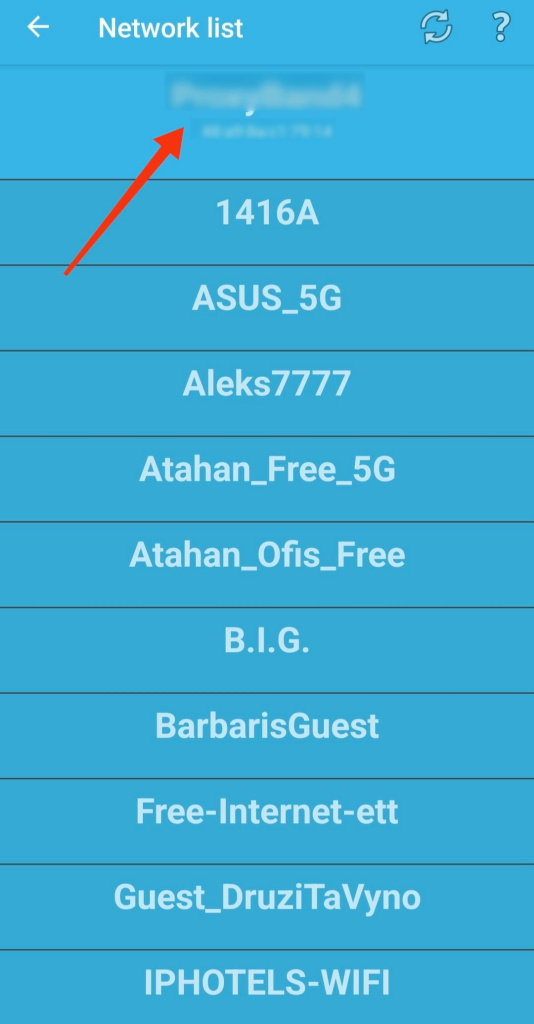
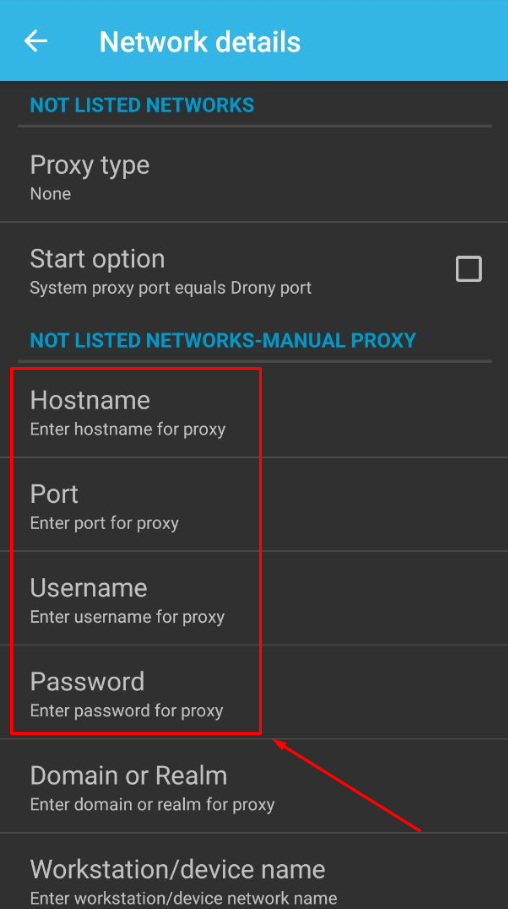
Verify the proxy connection on any validation website.
For mobile networks, the setup is similar. Adjust settings in the “Settings for not listed networks” tab. For 3G and other networks, download a proxy-compatible browser and enter the server details in its settings.
Check the presence of the proxy connection on your Android using services like whoer.net.
You can also read our article about proxy setup on iOS.
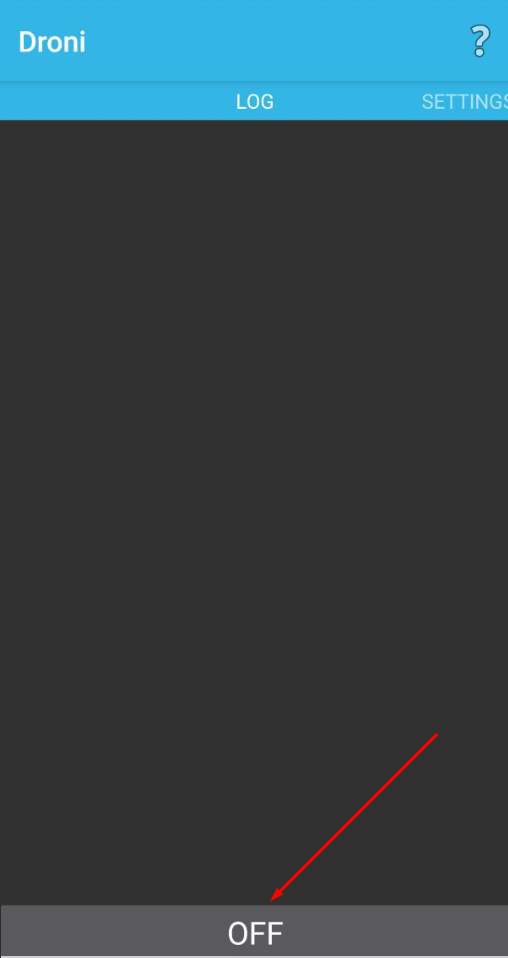
When the tasks that required connecting the proxies have already been completed, they could be disabled. If you configured a proxy through Droni, then simply click the “OFF” button in the “Log” tab. If the configuration was performed for the entire system, then to disable it you must perform the following steps:
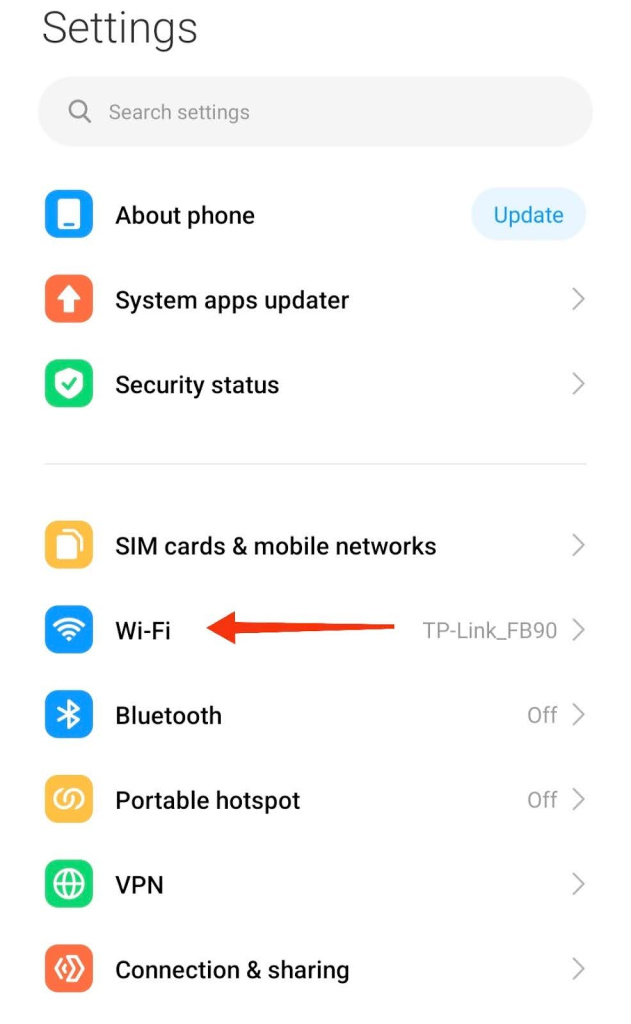
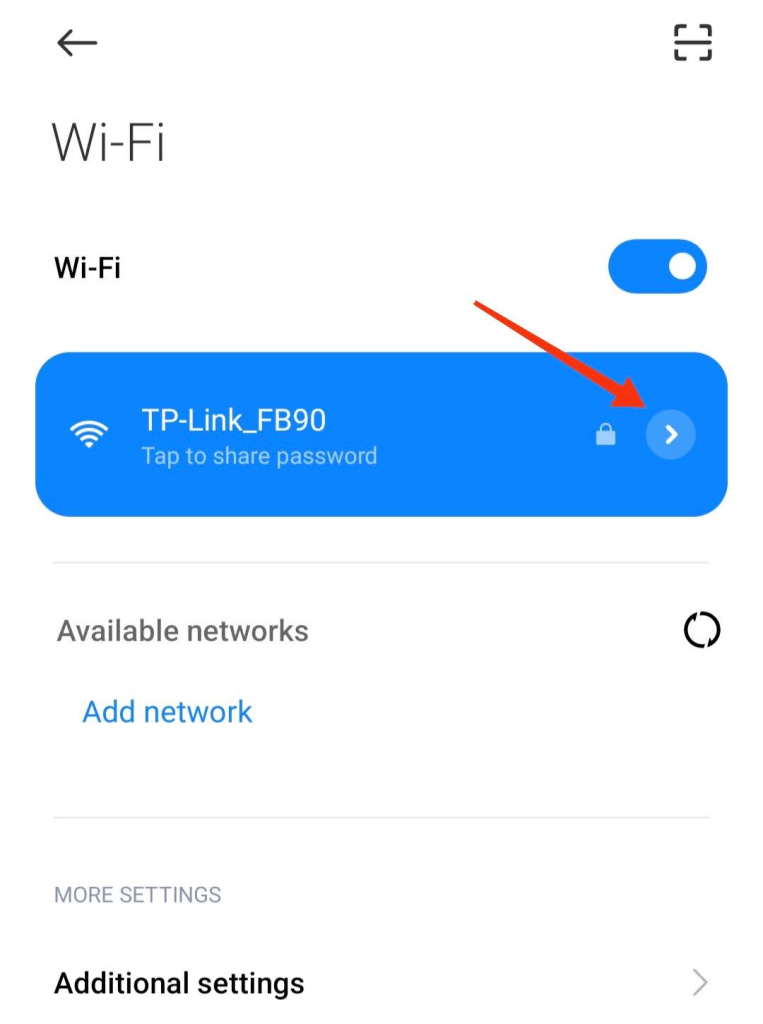
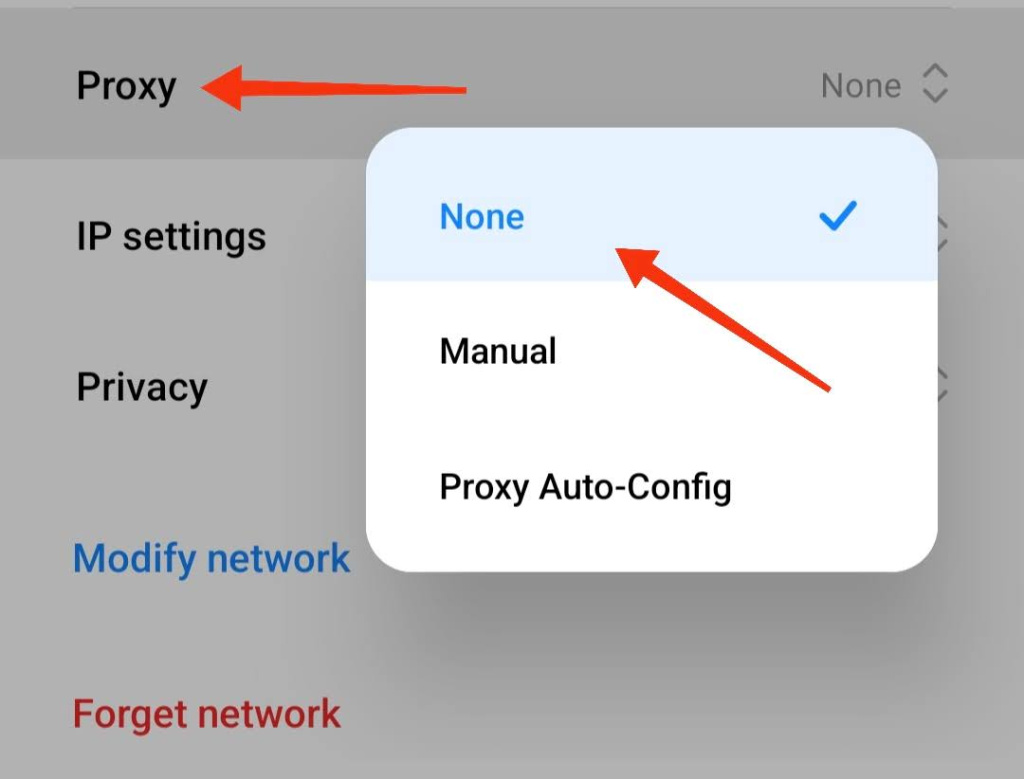
Following these steps, the proxy on your Android device will be disabled.
Additionally, besides setting up a proxy on your phone, you can also configure a proxy server for your computer's browser. For example, you can refer to our instructions for connecting a proxy server in Internet Explorer. This allows you to have greater control over your online activities and privacy.
Comments: 0