
 en
en  Español
  中國人
中國人  Tiếng Việt
  Deutsch
  Українська
  Português
  Français
  भारतीय
  Türkçe
  한국인
한국인  Italiano
  Indonesia
  Polski
 ZennoPoster is an advanced tool and a must-have for SEO experts since it allows them to automate everything in the browser using free templates. Users can also build an array of bots and scripts without the need for any coding skills.
The setup of a proxy server in ZennoPoster increases the automation of completing tasks. Using a proxy allows for faster parsing of the search engines, better file hosting service interactions, and faster social media account registrations while avoiding abuse controls. With this setup, that can be done more effectively and without most of the barriers.
The program gives you multiple ways of how to configure a proxy, and we will analyze both of them in this guide.
Let’s start off with configuring a proxy server using the Templates section inbuilt into ZennoPoster.
Launch “Project Maker” application and click on “New Project” located under the “Start” section.

In the new project window, right click anywhere in the available space and go through the following: “Add action” > “Browser” > “Settings”.
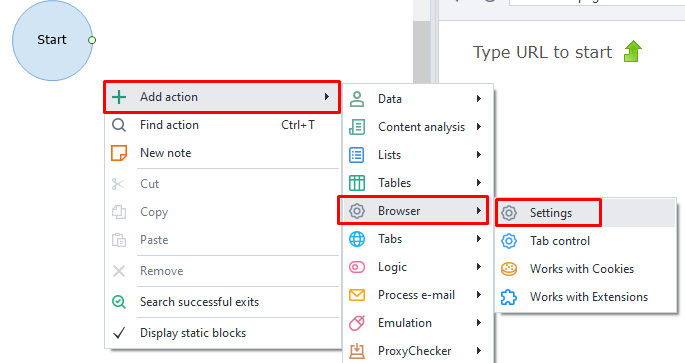
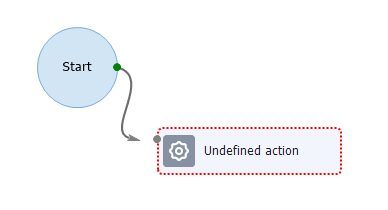
Connect the “Start” element to the newly created settings element.
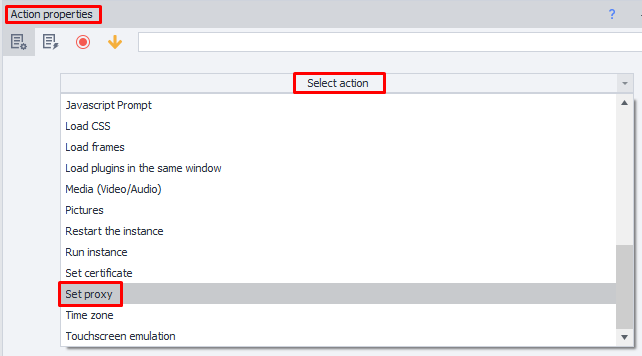
In the “Action Properties” window, choose “Set Proxy” under “Select an action” from the drop-down selection.
Depending on the type of your proxy, ZennoPoster has different formats: “protocol://username:password@IP-address:port” for private proxies and “protocol://IP-address:port” for public proxies. Do not forget to toggle the additional options that allow for pulling up further information about the proxy server.

This is how you set a proxy for a template in ZennoPoster, also, you can create various launch rules and the relevant proxy settings will be set automatically in the built in browser configurations.
Now, we will show another method which involves using an inbuilt ProxyChecker.
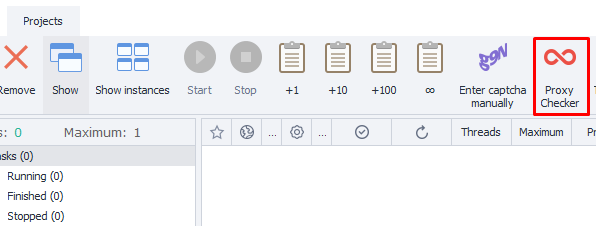
Launch ZennoPoster and click the “Proxy Checker” button located on the top panel.
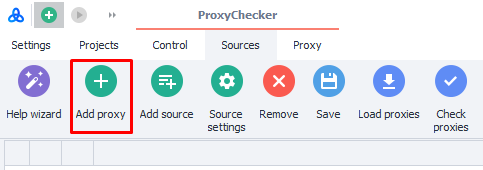
Navigate to the “Sources” tab and click “Add proxy”.
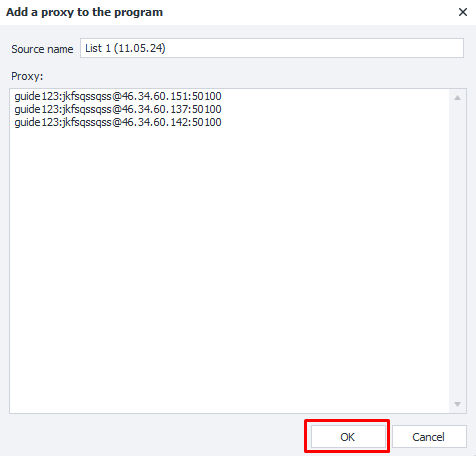
In the pop-up window, fill in the proxy details with format “username:password@IP-address:port” and press “ОК”.
Click “Check proxies” to verify if the proxy is in operation.
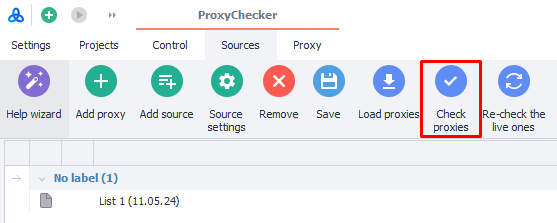
With this step, ProxyChecker is set up.
ZennoPoster can be enhanced when used in conjunction with proxies in many non standard but effective methods to reach its full potential. Here are examples of how proxies can serve a purpose for users looking to automate complex and ever changing web processes through ZennoPoster:
These specific use cases illustrate the need for capability enhancement of ZennoPoster integrating proxy servers so users can perform a wider scope of automated web activities more efficiently and stealthily.
Adding a proxy to ZennoPoster proxies is easy to do and can significantly improve web automation and data scraping. By creating a project and testing the proxies as instructed, users can incorporate proxy settings seamlessly into their ZennoPoster app. This integration helps maintain data integrity while increasing the overall effectiveness of the automation process.
Comments: 0