
 en
en  Español
  中國人
中國人  Tiếng Việt
  Deutsch
  Українська
  Português
  Français
  भारतीय
  Türkçe
  한국인
한국인  Italiano
  Gaeilge
  اردو
اردو  Indonesia
  Polski
 WinGate is a PC program that acts as a network router, allowing all computers on a network to use a single connection. It supports proxies, NAT, and LSP technologies, and includes a firewall for network protection against attacks. With WinGate, you can manage Internet access, monitor network traffic, and more.
Setting up a proxy in WinGate enhances security by routing all traffic through an additional server. This enables anonymous network access for all connected computers, bypassing geo-blocking and accessing previously unavailable web services.
Download the WinGate software from the official website and follow the installation instructions. Follow these steps to set up a proxy in WinGate:
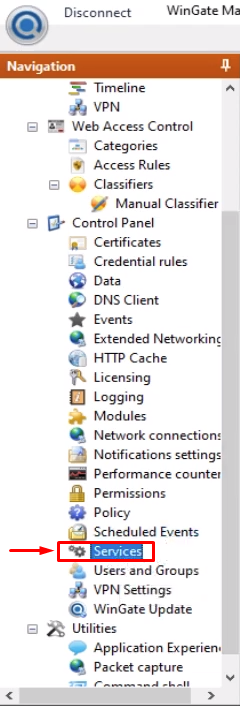

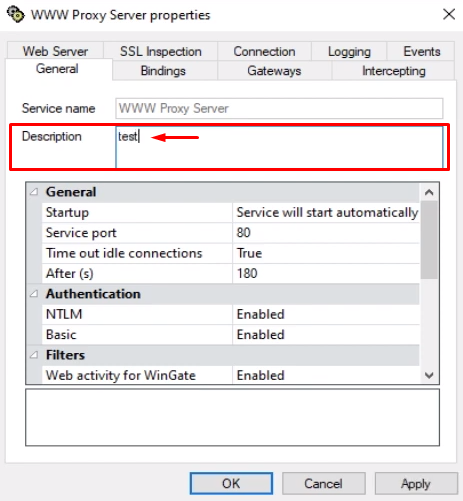
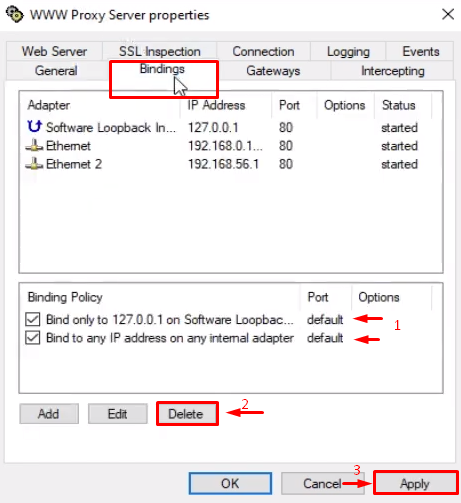
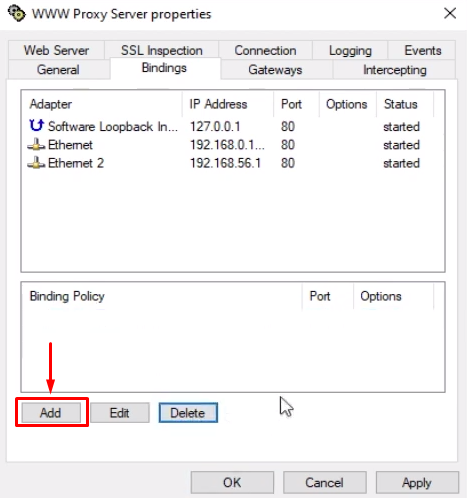
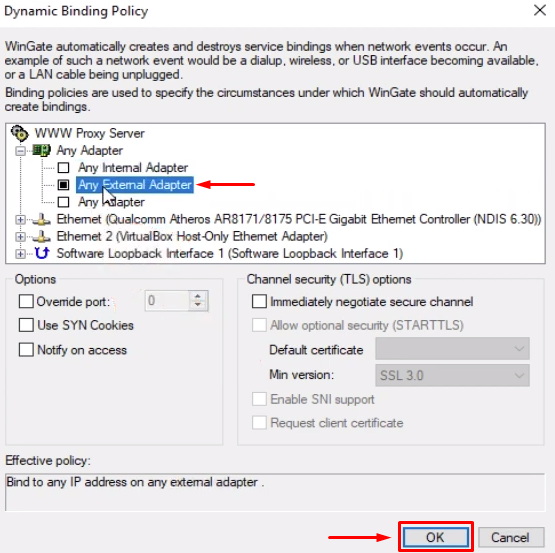
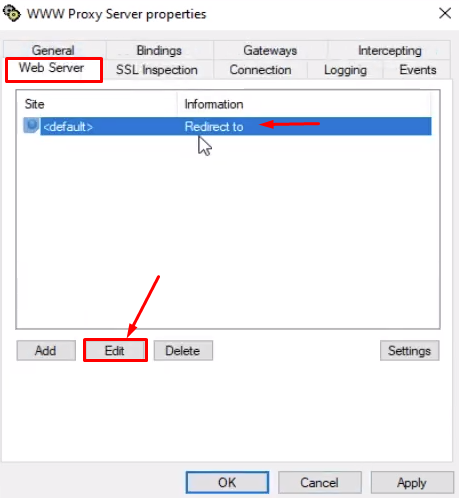
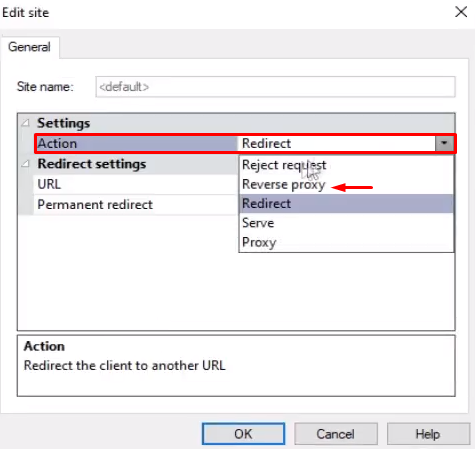
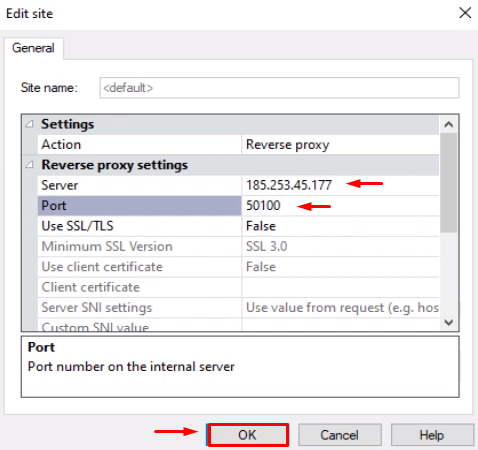
By following these steps, you can configure proxies in WinGate for safe online browsing, accessing previously restricted sites, and bypassing geo-blocking.
Comments: 0