Proxy tutorial for Jarvee

Comments: 0

Let`s understand what Jarvee is.

Jarvee is a bot known as well as automated social media software. It allows you to manage multiple Instagram, Twitter, LinkedIn, Facebook, YouTube or Tumblr accounts automatically.

Many marketers are using Jarvee to grow the audience in social networks.

Why do I need to use proxy servers in Jarvee

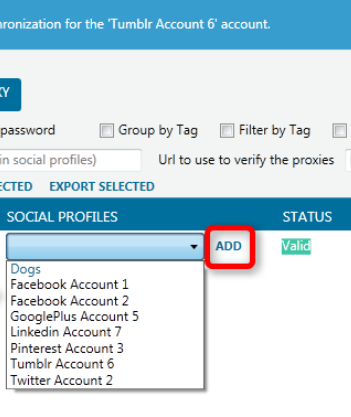
Adding your account into the Jarvee program is required to be verified. The program will log in automatically into your accounts and every account requires one proxy. Without proxy servers, the work may become an issue and also the possibility of getting blocked.

Proxy settings in Jarvee

  1. You should be logged in your account, and in the control panel press the "PROXY MANAGER" button.

    In the control panel press the «PROXY MANAGER» button

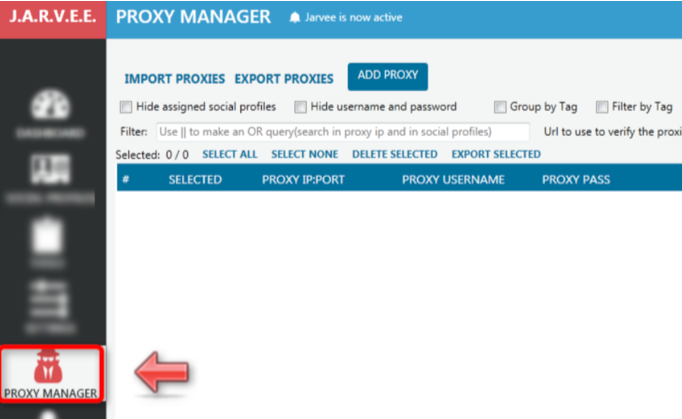
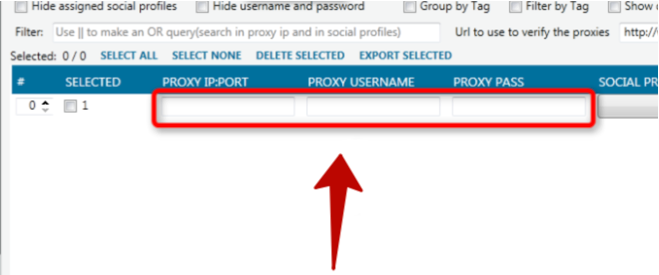
    There are 2 ways of adding a proxy. You can either import or manually add each proxy. Import Proxies - is a harder way to a newbie. You should create a .txt file in a format: 123.456.789.09:56:proxy_username:proxy_password 321.654.987.90:65:proxy_username:proxy_password , etc. We`ll take a look only at a manual configuration.

  2. To manually add a proxy click on the "ADD PROXY" button.

    Click on the «ADD PROXY» button

  3. Then the proxy fields are open. You can see the empty boxes "PROXY IP:PORT", "PROXY USERNAME" and "PROXY PASS".

    You can see the empty boxes «PROXY IP:PORT», «PROXY USERNAME» and «PROXY PASS»

  4. Proxy IP:Port - this field requires an input of your proxy IP and port specified in your order submission e-mail if you have bought the proxy servers from Proxy-Seller. The IP address should be put in a format 123.456.7890.1234:56 (the first part till : is the IP, and the after - port).
  5. Proxy Username and Pass - this data is always can be found in order submission mail. We`ll take as example login: jarvee and the password: jarvee1.

    Example login

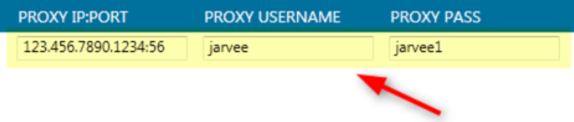
    Tip: If you have a statical home IP address and you have bought the proxy server with IP authentication, there is no need to add the proxy username and password.

  6. After entering the required data of the proxy server click on the "VERIFY PROXY" button.

    Click on the «VERIFY PROXY» button

  7. Under the "STATUS" field you will see the actual status of the proxy. Valid - is a good sign, Proxy Error - accordingly not.

    Actual status of the proxy

  8. If you have a Proxy Error status - confirm that you`ve entered the correct data of the proxy server ones again. If the problem with authentication via IP - try to check added IP(Google: "what is my IP").

    If you have a Proxy Error status - confirm that you’ve entered the correct data of the proxy ones again. If the problem with authentication via IP - try to check added IP

  9. Ones you get a Valid status of the proxy server - you may proceed to assign it to the proxy. You should click the drop-down box "SOCIAL PROFILES", select the required account and press the "ADD" button.

    Click the drop-down box «SOCIAL PROFILES», select the required account and press the «ADD» button

  10. After this, you can go to the Social Profiles menu and verify your account there via phone number or e-mail.

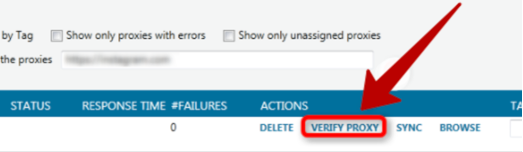
There you go. That`s all the steps to set it up. You can continue your work with the most efficient marketing tool.

Comments:

0 comments