Configure multiple proxies in one browser

Comments: 0

Many have thought about connecting more than one proxy server in a browser. This will help increase the speed of work, and, accordingly, earnings. This can be done using special software, but today we will tell you how to connect several proxies to one browser without third-party applications.

Step-by-step configuration of multiple proxies in Mozilla Firefox

Create a copy of your browser profile

  1. Install the Mozilla browser on your device.
  2. Next, start the profile manager with the following actions: Open "Start", "Run" or the key combination Win + R.
  3. Type the following text “firefox.exe -p”. The browser should be closed because the new tab of the browser will be opened instead of the profile manager!

    Type the following text «firefox.exe -p»

  4. In the opened window press on the “Create Profile” button.

    Press on the «Create Profile» button

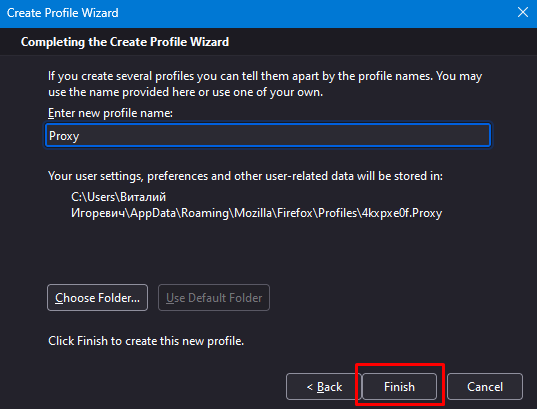
  5. To create a profile, click "Next" in a new window. In the next window, select the name for the new profile, the path to its storage and click "Finish".

    Click «Next» in a new window. Select the name for the new profile, the path to its storage and click «Finish»

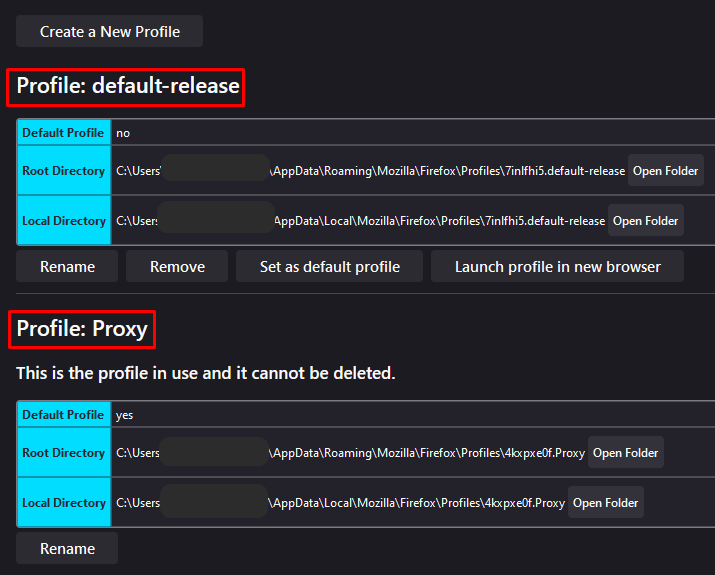
  6. That's it, the profile is created. Select the desired profile and click "Launch Firefox".

    Select the desired profile and click «Launch Firefox»

  7. Create an additional browser shortcut using the copy method.

    Create an additional browser shortcut using the copy method

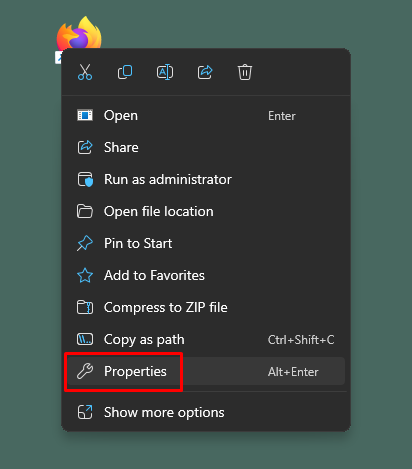
  8. Open the properties of the shortcut.

    Open the properties of the shortcut

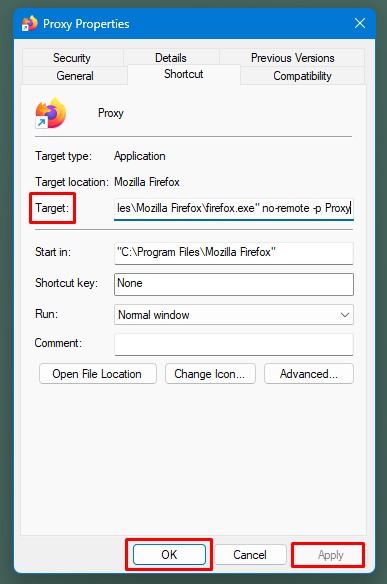
  9. In the file path, enter the following text no-remote -p profile_name;

    Enter the following text no-remote -p profile_name

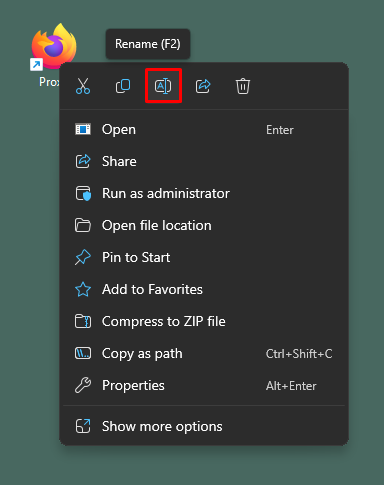
  10. Change the name of the shortcut for convenience.

    Change the name of the shortcut for convenience

Also, you can read detailed instructions for configuring up a proxy in Mozilla.

Proxy settings in Mozilla

  1. Launch the shortcut and configure one of the proxies on it! We do it as follows: In the browser menu, select "Options".

    In the browser menu, select «Options»

  2. On the page that opens, use the "Search" field and enter the word "Proxy". Open the setting.

    Use the «Search» field and enter the word «Proxy». Open the setting

  3. In the settings window, select the "Manual configuration method". In the HTTP proxy field, enter the data from the proxy and the HTTPS port 65233 Check the box "Use this proxy server for all protocols".
  4. перез.jpg

  5. Go down and put a checkmark on the menu "Do not prompt for authentication if a password is saved" and click "OK".

    Put a checkmark on the menu «Do not prompt for authentication if a password is saved» and click «OK»

  6. Open a new tab and search for anything in search engine, like “asd”. After that, the authorization windows will be opened and you should enter the required data of individual proxy. Enter the data and press “OK”.

    Open a new tab and search for anything in search engine, like «asd». Enter the required data of individual proxy. Press «OK»

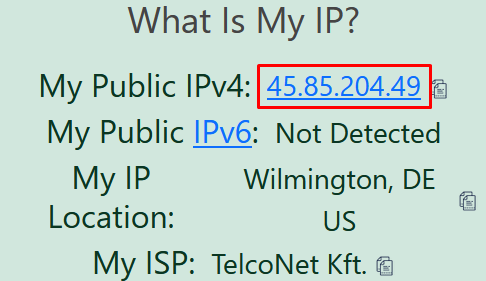
  7. After the changes enter the whoer.net website to check our IP address and open the second shortcut, that hasn’t been changed before! And enter the whoer.net too. Let’s check the difference between IP addresses.

    Enter the whoer.net website to check our IP address

    Open the second shortcut, that hasn’t been changed before! And enter the whoer.net too. Let’s check the difference between IP addresses

That’s it, settings are done. You can create an unlimited number of profiles and set them up for any number of proxy servers.

Comments:

0 comments