
 en
en  Español
  中國人
中國人  Tiếng Việt
  Deutsch
  Українська
  Português
  Français
  भारतीय
  Türkçe
  한국인
한국인  Italiano
  Gaeilge
  اردو
اردو  Indonesia
  Polski
 The Proxifier program is required to connect the proxy to software that does not support this feature. With its help, you can use any software that works via the Internet on the basis of intermediary servers: browsers, messengers, software for account promotion, etc. This proxy software will help you to secure the work on the network by using intermediary servers that hide valid data about your pc.
Proxifier supports multiple proxy types, allowing it to handle a wide range of tasks, from everyday browsing to automation and development.
Below you will find detailed step-by-step instructions for setting up proxies in Proxifier for all network connections or individual programs.
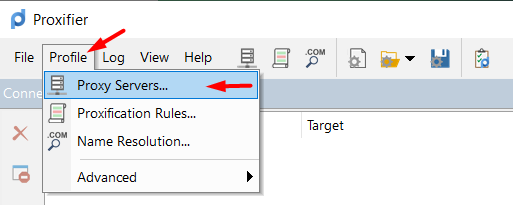
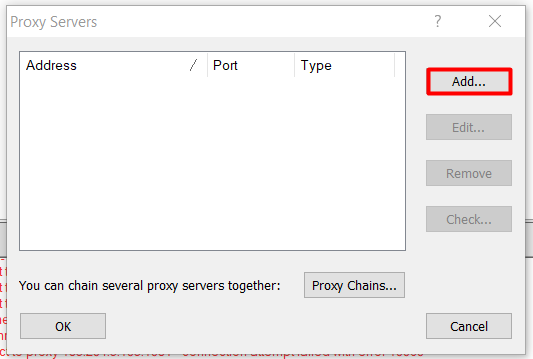
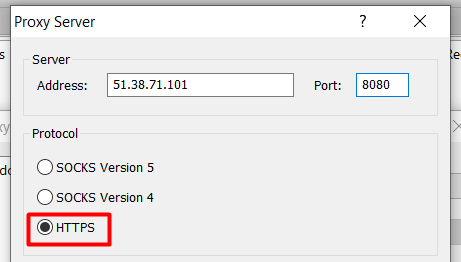
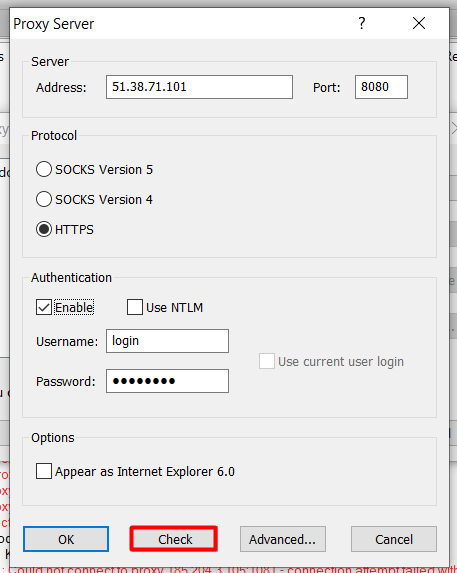
To get started with the Proxifier software, download it and launch it on your computer. You also need to buy proxy from a trusted provider—we recommend using private solutions to ensure greater operational stability. Follow this step-by-step instruction:

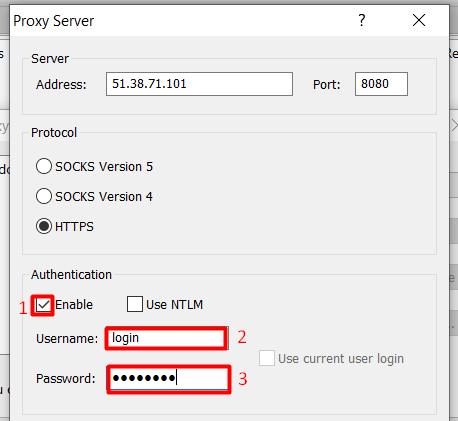
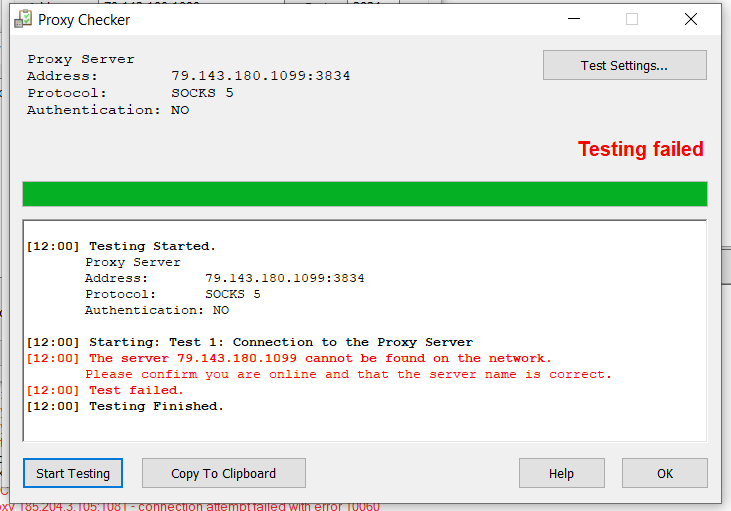
If you see a red message “Testing Failed” after doing the test, this means that the data is incorrect or the proxy is not working. You need to check the details of the proxy server, such as the IP address, port, username, and password.
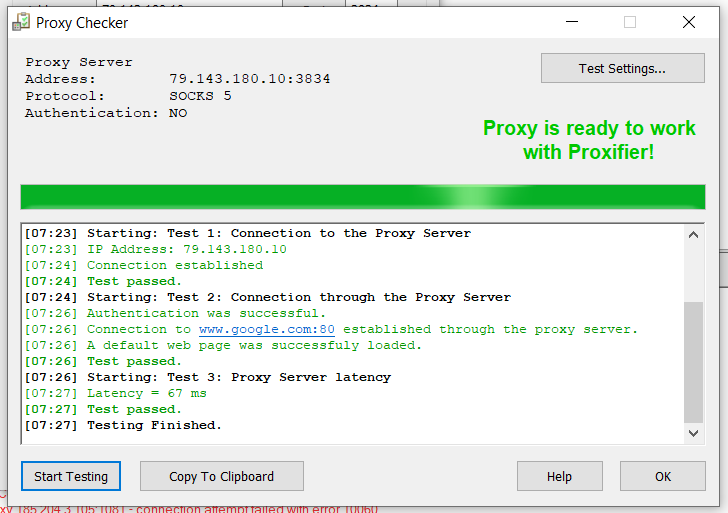
If the test passed successfully, then you will see the highlighted green inscription.
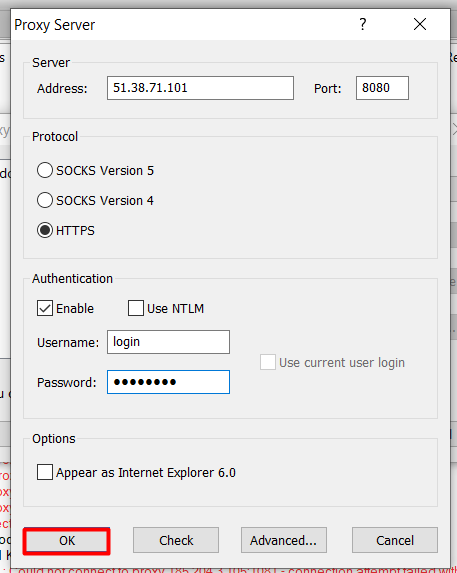
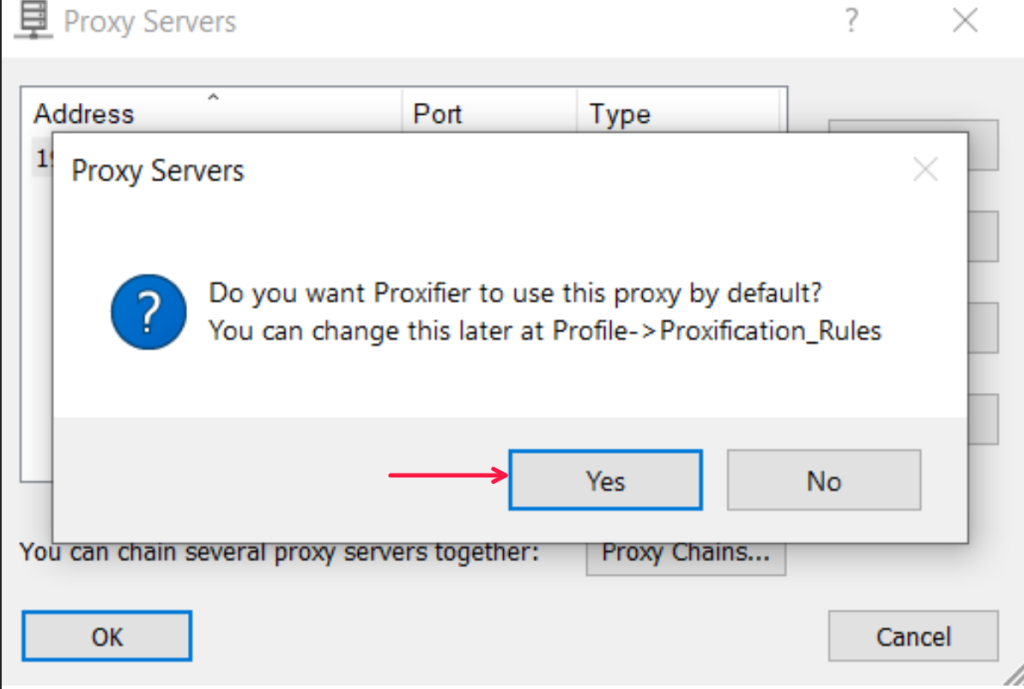
Now all the network connections will be transferred through the configured proxy server.
To set up the proxy in Proxifier for specific programs follow this step-by-step instruction:
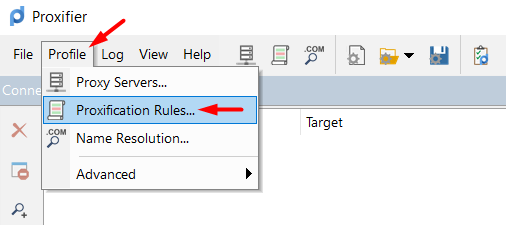
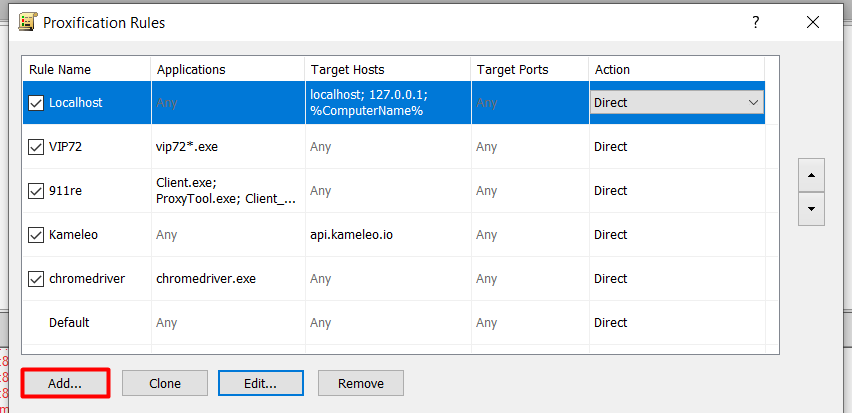

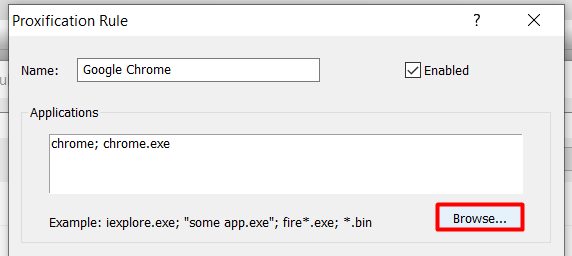
Also, read the detailed instructions on how to connect the proxy on the Google Chrome browser.
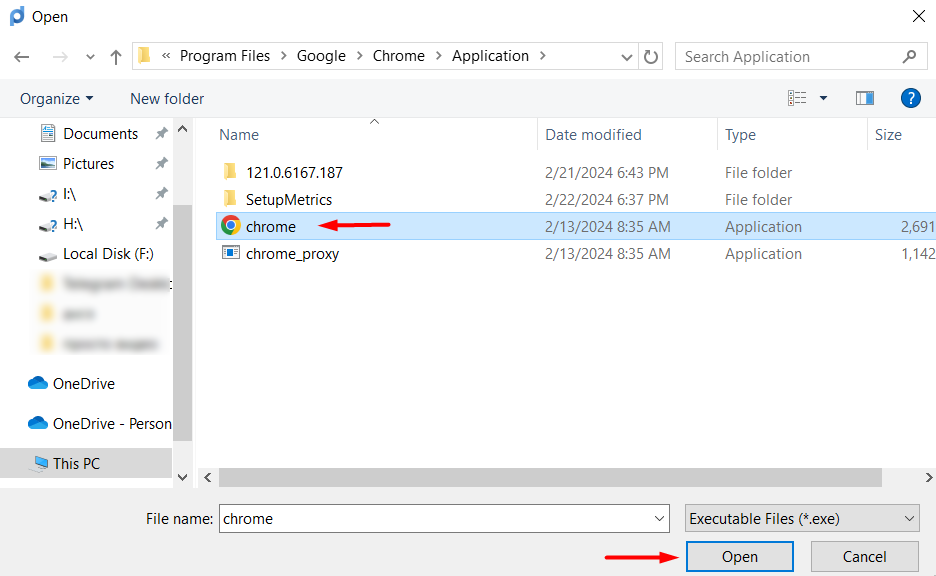
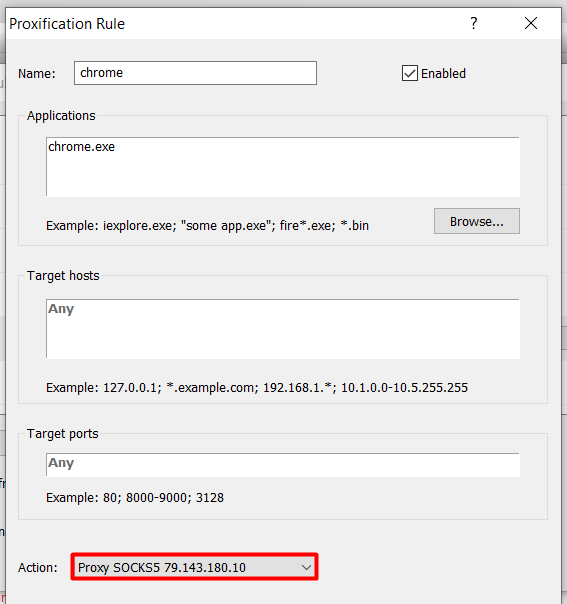
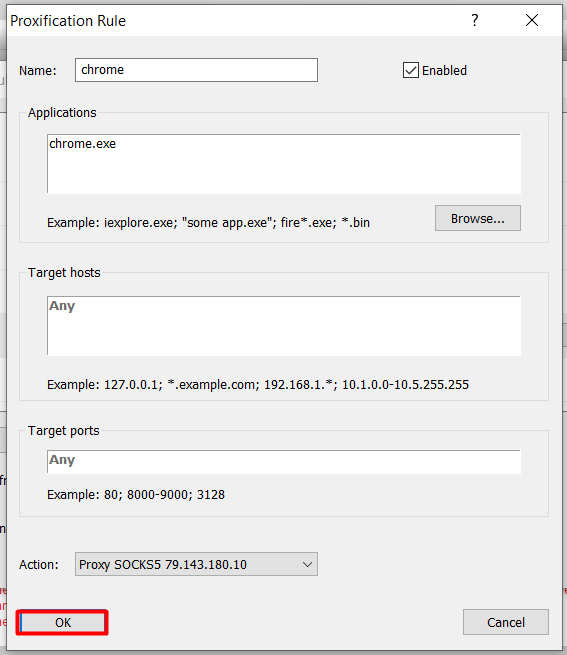
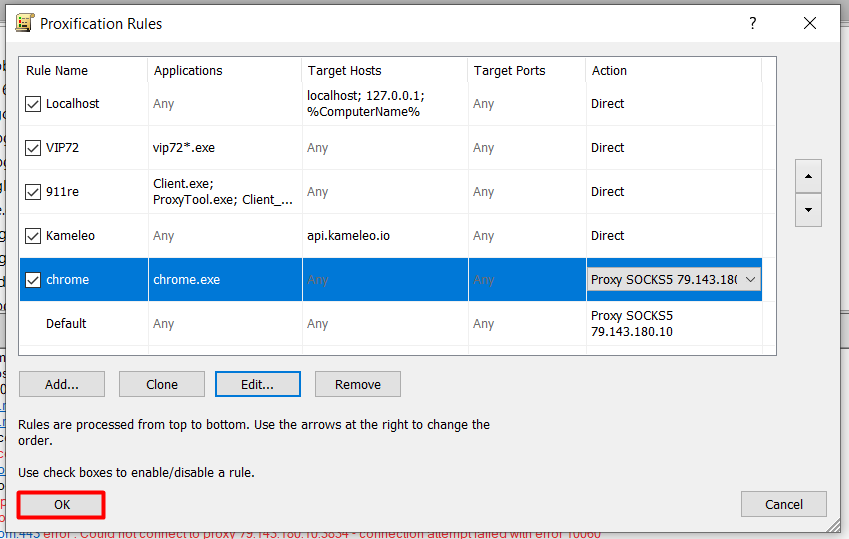
The proxy setup is completed. Run the program for which the proxy server was configured (in our case it was Google Chrome). To check the connection, go to the site that detects your IP address, for example, our tool for checking "My IP". Also, information about which proxy is used for the application used can be obtained in the main Proxifier window.

By the same principle, you can connect a proxy server to any browser, messenger, software for promotion or another program.
Comments: 0