How to set up a proxy in the Signal messenger

Comments: 0

The Signal messaging app is renowned for its robust data protection capabilities, safeguarding against interception and tracking to maintain user confidentiality and anonymity online. However, it's important to note that Signal does not offer features such as IP address masking or anonymous resource access within the app. To enhance privacy and circumvent regional restrictions, users can configure Signal via a proxy. This messenger is available at no cost across various platforms, including Android, iOS, Mac, Linux (Debian-based), and Windows.

Video guide for setting up a proxy in Signal

Step-by-step proxy setup in Signal on Android

To configure a proxy in Signal, follow these steps:
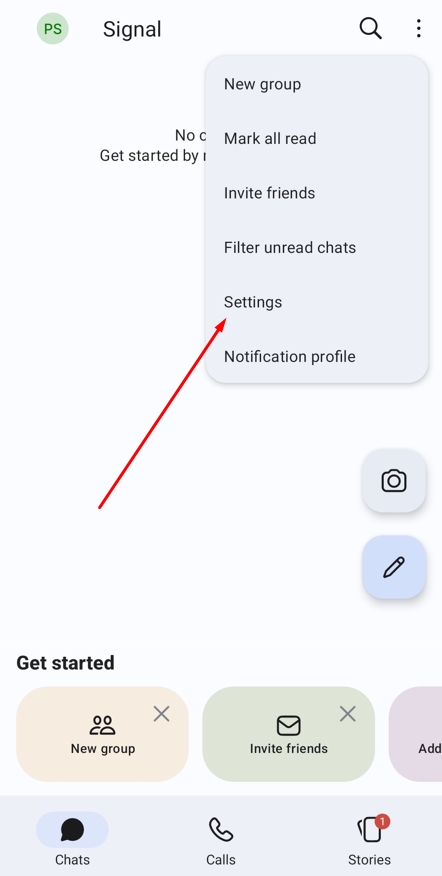
  1. Open the Signal app on your device. In the main window, tap the three dots in the upper right corner, then select the “Settings” option.

    1en.jpg

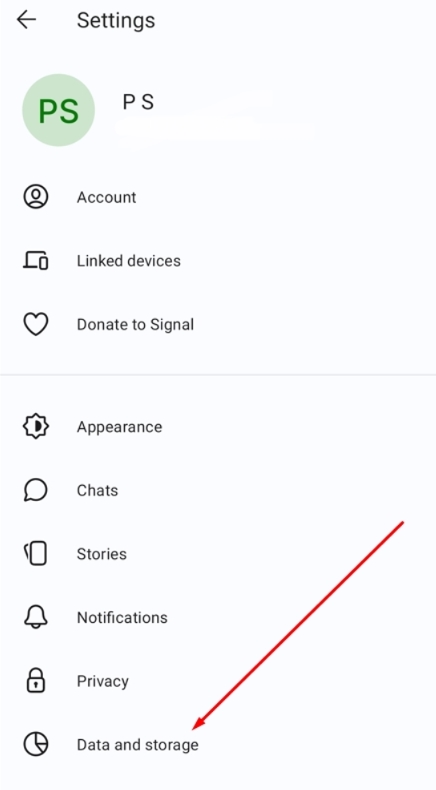
  2. In “Settings”, scroll to the “Data and storage” section and tap on it.

    2en.jpg

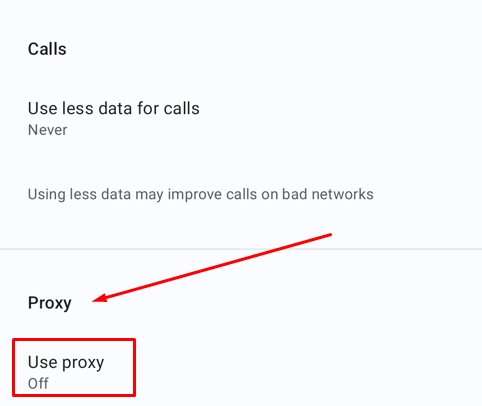
  3. At the bottom of the “Data and storage” section, you'll find a “Proxy” option. By default, the “Use proxy” setting is turned off. Tap on it to proceed.

    3en.jpg

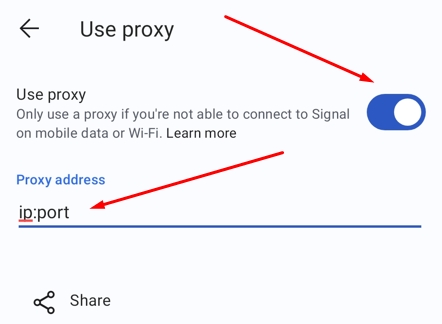
  4. In the proxy settings window, toggle the slider to the active position. Enter the proxy details in the “ip:port” format. After configuring the settings, hit the "Save" button. Note that if you're using private proxies, the app will prompt you to enter your username and password.

    4en.jpg

How to use Signal on iOS through a proxy

To set up a proxy for Signal on iOS, you can indeed follow the general instructions provided earlier. Additionally, you can configure a new proxy through the main iOS settings:

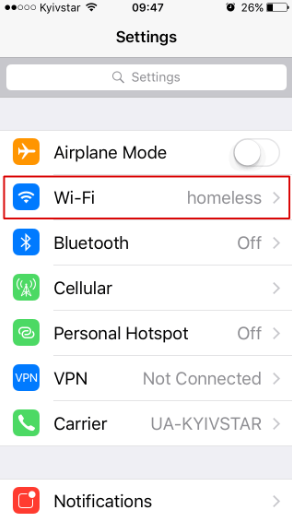
  1. Open the main settings on your iOS device and navigate to the “Wi-Fi” tab.

    image010.png

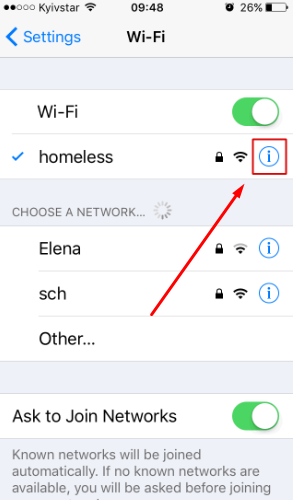
  2. Next to your active Wi-Fi connection, tap the circular icon with an "i" inside it.

    image012.png

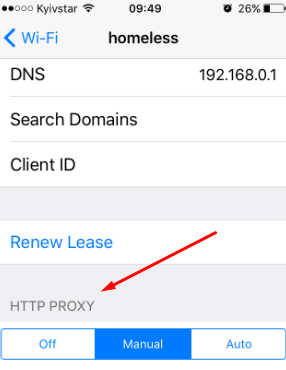
  3. Scroll to the “HTTP PROXY” section on this page. The exact name of this section might vary depending on your device's version. Tap on the “Manual” section here.

    image014.png

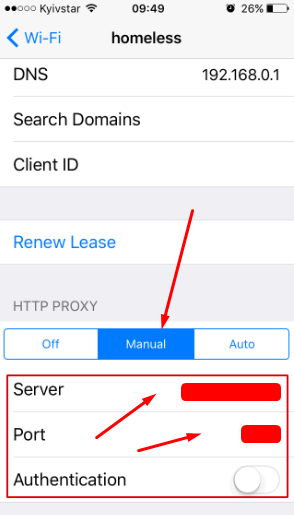
  4. Then, enter the server address and port to set up the proxy for Signal. If you are using private proxies, toggle the “Authentication” switch to the active position and enter the username and password provided by your proxy service.

    image017.png

Setting up a proxy in Signal Desktop

For the desktop version of Signal, which has limited settings and doesn't support a dedicated proxy option, you can use an external tool like Proxifier to encrypt messages via a separate IP. Here's how to set it up:
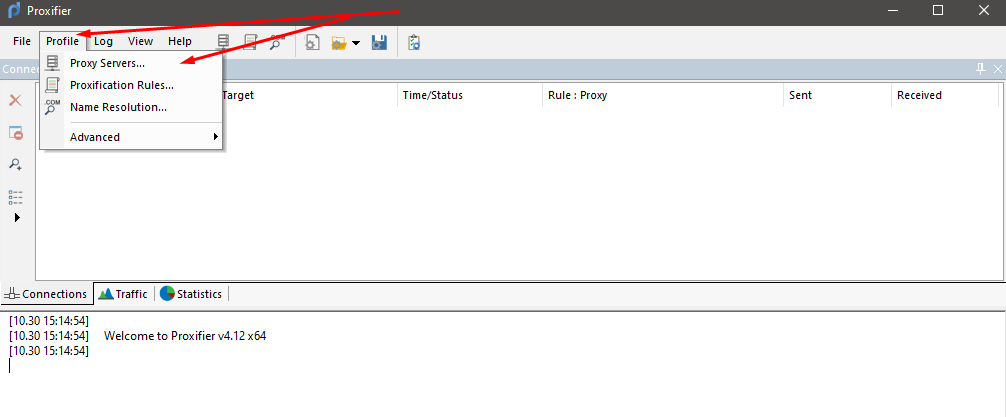
  1. Download and launch Proxifier. In the main menu, go to the “Profile” tab and select the “Proxy Servers” section.

    image018.png

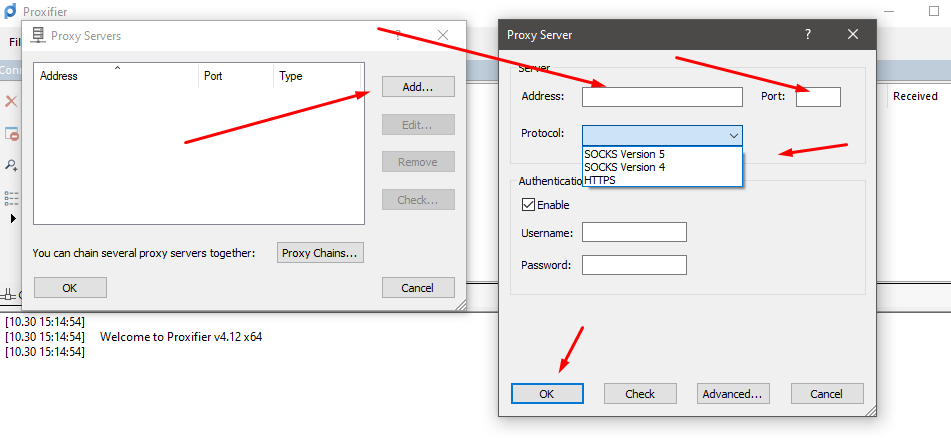
  2. Press the "Add" button. Enter the proxy server address and port in the provided fields. If necessary, choose the connection protocol and enable authentication for private proxies. After entering the details, click “OK”.

    image020.png

  3. Return to the main menu of Proxifier. Access the “Profile” tab again and go to the “Proxification Rules” section.

    image022.png

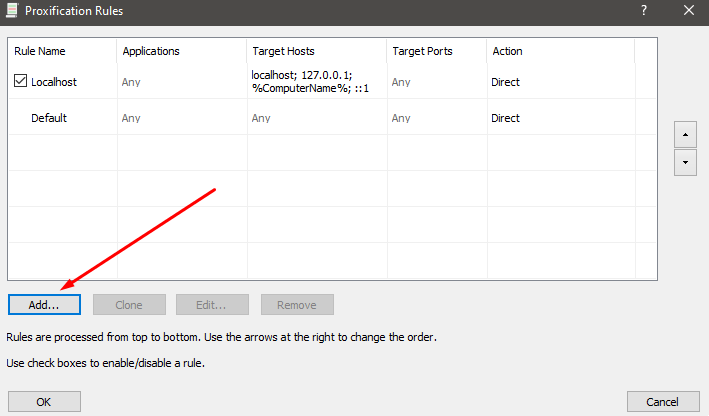
  4. Click the "Add" button.

    image024.png

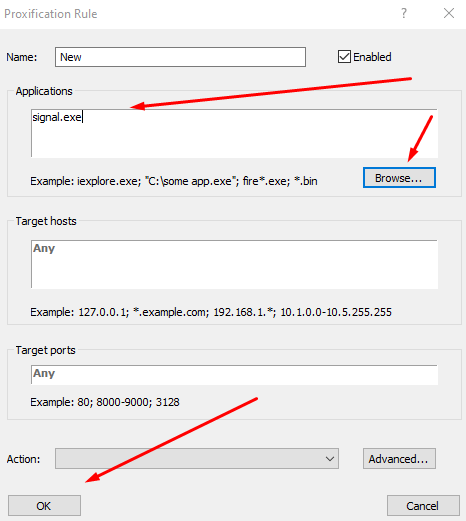
  5. In the “Applications” field, input the full path of the Signal desktop application’s executable file or locate it using the “Browse” button. Once done, click “OK”.

    image025.png

Remember, Signal Desktop requires a smartphone installation to function. If you enable IP spoofing via proxy on your mobile device but not on your PC, this could potentially compromise message encryption.

Comments:

0 comments