How to set up a proxy in AIOStream

Comments: 0

Content of the article:

    AIOStream is an advanced social media and networking automation tool designed to simplify content uploads and enhance online engagement. Key features of AIOStream include:

    • Support for multiple popular music and video platforms, such as Spotify, Soundcloud, Napster, Deezer, Iheartradio, and Tidal. It enables users to automate streaming across these services concurrently.
    • The ability to set up tasks and schedules for automatic social media postings, streamlining the content distribution process.
    • Tools to leverage social media for business growth, aiding in increasing subscribers and broadening the target audience on social platforms.

    To prevent account blocking during the automatic publication of podcasts and to ensure access to international resources, it's crucial to use a proxy with AIOStream. This approach enhances the tool's efficiency while safeguarding your online activities.

    Setting up a proxy in AIOStream for music platforms

    Setting up a proxy in AIOStream for various accounts across different platforms can help avoid user IP blocking and enhance automated marketing effectiveness. This is crucial for attracting an audience and increasing the profitability or popularity of your accounts. Here's a guide on setting up a proxy for a Spotify account in AIOStream:
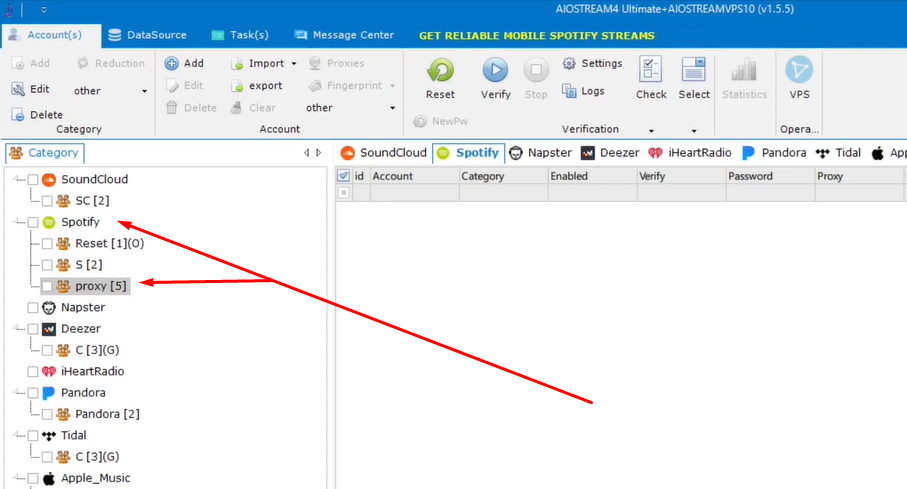
    1. Open the AIOStream application. The left sidebar lists all accounts previously connected. Expand the Spotify account group and select the desired account on the right, displaying its details in the work area.

      image001.png

    2. To change the proxy for a single account, select it in the working window and click the “Edit” button in the “Account” menu.

      image003.png

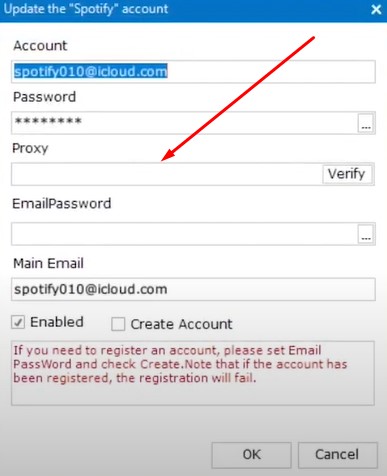
    3. In the new window, you'll see pre-entered account authorization information. Locate the proxy input line and enter the IP address and port in the “ip:port” format. For private proxies requiring authentication, include username and password in the “ip:port:username:password” format.

      Screenshot_1 (2).jpg

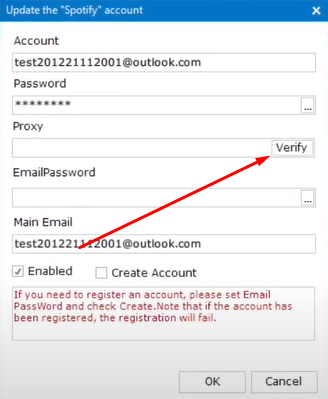
    4. After entering the data, click “Verify” to check the proxy's functionality.

      image006.png

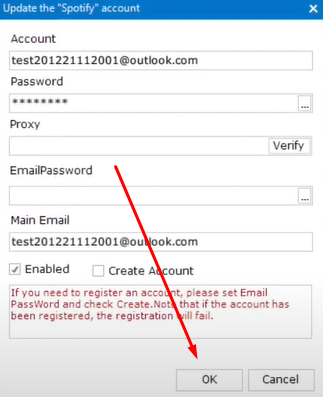
    5. Click “OK” to save the settings.

      image007.png

    6. To use a specific proxy for a group of accounts, go back to the main window and open the required account group.

      image001.png

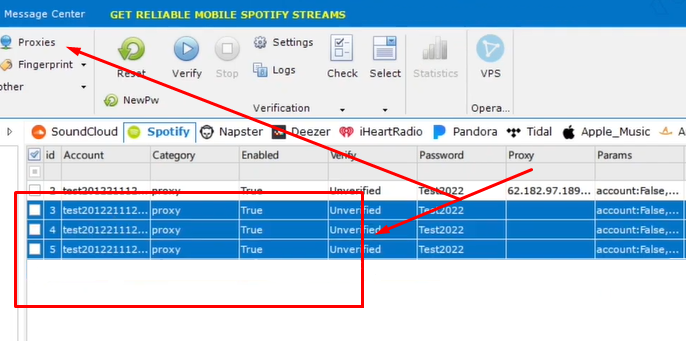
    7. In the work area, select the accounts you want to use with the proxy server. Then, click the “Proxies” button in the menu bar.

      image009.png

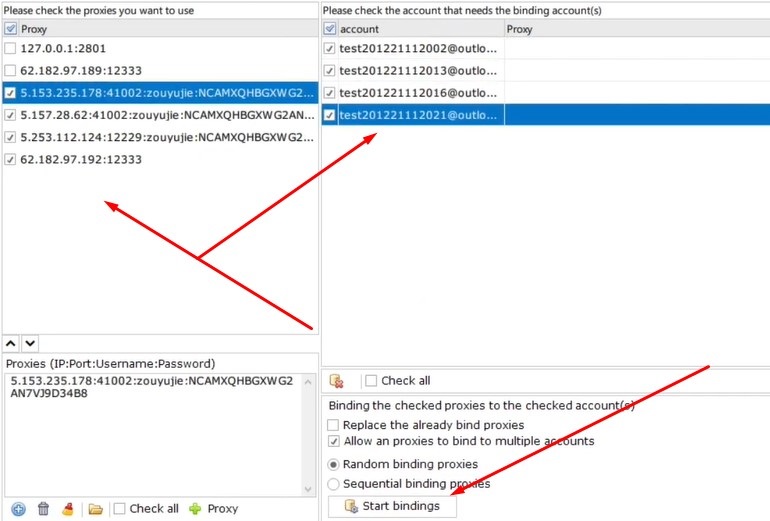
    8. In the opened window, you'll see a list of available proxies (if previously entered). Select the desired proxies on the left and check the accounts to be associated with these proxies on the right. Click “Start bindings” when done.

      image011.jpg

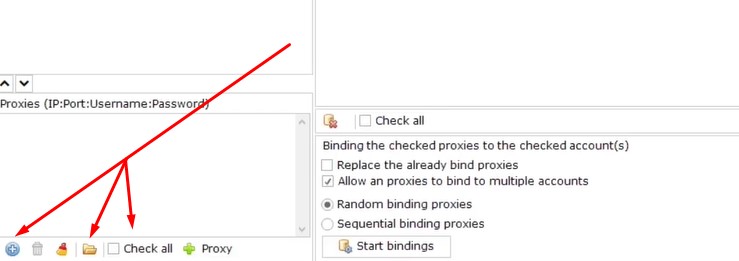
    9. To add new proxies, use the icons in the bottom panel: “Plus” to add a single IP manually and the “Folder” icon to upload a list from a file. The “Check all” option allows for functionality testing of proxies before adding them to the list.

      image012.jpg

    By creating individual proxy connections for each account, your traffic will automatically route through different IPs, enabling you to bypass geo-restrictions and launch extensive advertising campaigns to boost subscribers.

    Comments:

    0 comments