 en
en  Español
  中國人
中國人  Tiếng Việt
  Deutsch
  Українська
  Português
  Français
  भारतीय
  Türkçe
  한국인
한국인  Italiano
  Indonesia
  Polski
 Web scraping involves extracting data from websites for analysis, research, or automation. In this cURL Python tutorial, you'll learn how to perform web requests using PycURL with practical examples. We’ll also show how to convert a typical curl to Python request and compare it with libraries like Requests, HTTPX, and AIOHTTP.
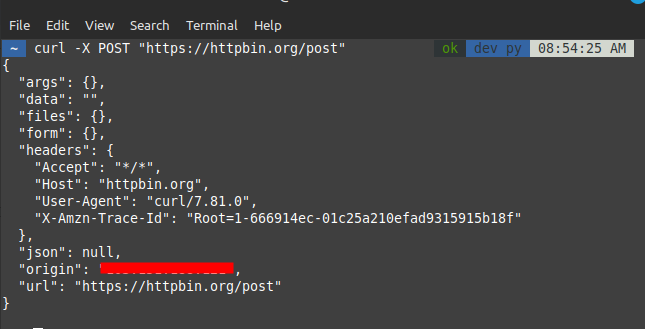
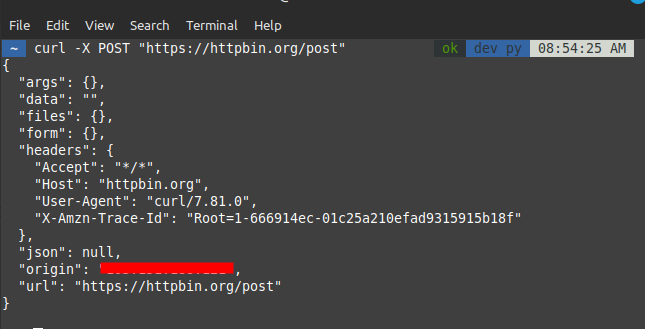
Understanding this concept is crucial to Python integration, so let’s begin with the basics. You can use Python cURL commands directly in the terminal to perform tasks like making GET and POST requests.
Example cURL commands:
# GET request
curl -X GET "https://httpbin.org/get"

# POST request
curl -X POST "https://httpbin.org/post"


To use cURL, install the Python PycURL library.
Installing:
pip install pycurl
Using curl in Python offers detailed control over HTTP requests. Below is an example demonstrating how to make a GET request with PycURL:
import pycurl
import certifi
from io import BytesIO

# Create a BytesIO object to hold the response data
buffer = BytesIO()

# Initialize a cURL object
c = pycurl.Curl()

# Set the URL for the HTTP GET request
c.setopt(c.URL, 'https://httpbin.org/get')

# Set the buffer to capture the output data
c.setopt(c.WRITEDATA, buffer)

# Set the path to the CA bundle file for SSL/TLS verification
c.setopt(c.CAINFO, certifi.where())

# Perform the HTTP request
c.perform()

# Closing the cURL object helps free up any resources it’s using
c.close()

# Retrieve the content of the response from the buffer
body = buffer.getvalue()

# Decode and print the response body
print(body.decode('iso-8859-1'))
Sending data with POST – curl to Python requests – is common. With the library, use the POSTFIELDS option. Here's an example of making a POST request with PycURL:
import pycurl
import certifi
from io import BytesIO

# Create a BytesIO object to hold the response data
buffer = BytesIO()

# Initialize a cURL object
c = pycurl.Curl()

# Set the URL for the HTTP POST request
c.setopt(c.URL, 'https://httpbin.org/post')

# Set the data to be posted
post_data = 'param1="pycurl"m2=article'
c.setopt(c.POSTFIELDS, post_data)

# Set the buffer to capture the output data
c.setopt(c.WRITEDATA, buffer)

# Set the path to the CA bundle file for SSL/TLS verification
c.setopt(c.CAINFO, certifi.where())

# Perform the HTTP request
c.perform()

# Close the cURL object to release system resources
c.close()

# Retrieve the content of the response from the buffer
body = buffer.getvalue()

# Decode and print the response body
print(body.decode('iso-8859-1'))
Custom headers or authentication are often required with HTTP requests. Handling custom headers: HTTP requests often require authentication tokens or custom headers. Handling custom headers can be done efficiently when you know how to use Python curl json parse techniques:
import pycurl
import certifi
from io import BytesIO

# Create a BytesIO object to hold the response data
buffer = BytesIO()

# Initialize a cURL object
c = pycurl.Curl()

# Set the URL for the HTTP GET request
c.setopt(c.URL, 'https://httpbin.org/get')

# Set custom HTTP headers
c.setopt(c.HTTPHEADER, ['User-Agent: MyApp', 'Accept: application/json'])

# Set the buffer to capture the output data
c.setopt(c.WRITEDATA, buffer)

# Set the path to the CA bundle file for SSL/TLS verification
c.setopt(c.CAINFO, certifi.where())

# Perform the HTTP request
c.perform()

# Once you're finished, close the cURL handle to clean things up
c.close()

# Retrieve the content of the response from the buffer
body = buffer.getvalue()

# Decode and print the response body
print(body.decode('iso-8859-1'))
Handling XML responses While working with XML parsing and dealing with various APIs, it is essential to handle XML responses. Below is an example of handling XML responses with PycURL:
# Import required libraries
import pycurl  # A library for sending HTTP requests
import certifi  # Library for SSL certificate verification
from io import BytesIO  # Library for handling byte streams
import xml.etree.ElementTree as ET  # Library for parsing XML

# Create a buffer to hold the response data
buffer = BytesIO()

# Initialize a cURL object
c = pycurl.Curl()

# Set the URL for the HTTP GET request
c.setopt(c.URL, 'https://www.google.com/sitemap.xml')

# Set the buffer to capture the output data
c.setopt(c.WRITEDATA, buffer)

# Set the path to the CA bundle file for SSL/TLS verification
c.setopt(c.CAINFO, certifi.where())

# Perform the HTTP request
c.perform()

# Close the cURL object to release system resources
c.close()

# Retrieve the content of the response from the buffer
body = buffer.getvalue()

# Parse the XML content as an ElementTree object
root = ET.fromstring(body.decode('utf-8'))

# Print the tag and attributes of the root element of the XML tree
print(root.tag, root.attrib)
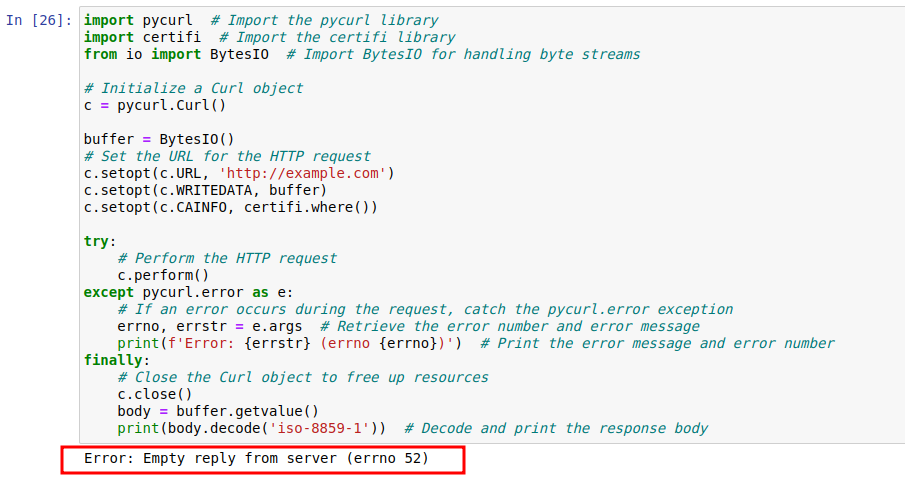
Handling errors for HTTP requests is an important aspect of working with external integrations. Here is an example of error handling using PyCURL:
import pycurl  # Import the pycurl library
import certifi  # Import the certifi library
from io import BytesIO  # Import BytesIO for handling byte streams

# Initialize a Curl object
c = pycurl.Curl()

buffer = BytesIO()
# Set the URL for the HTTP request
c.setopt(c.URL, 'http://example.com')
c.setopt(c.WRITEDATA, buffer)
c.setopt(c.CAINFO, certifi.where())

try:
    # Perform the HTTP request
    c.perform()
except pycurl.error as e:
    # If an error occurs during the request, catch the pycurl.error exception
    errno, errstr = e.args  # Retrieve the error number and error message
    print(f'Error: {errstr} (errno {errno})')  # Print the error message and error number
finally:
    # Close the cURL object to release system resources
    c.close()
    body = buffer.getvalue()
    print(body.decode('iso-8859-1'))  # Decode and print the response body
The corrected code adjusts the URL to https://example.com, resolving the protocol issue. After that, the author repeats the same steps of configuring the request, executing it, and handling errors as was done in the first snippet. Upon successful execution, the response body is again decoded and printed. This emphasizes the importance of constructing URLs correctly, maintaining a proper request flow, and, above all, implementing robust error handling when making HTTP requests with PycURL.

import pycurl  # Import the pycurl library
import certifi  # Import the certifi library
from io import BytesIO  # Import BytesIO for handling byte streams

# Reinitialize the Curl object
c = pycurl.Curl()

buffer = BytesIO()
# Correct the URL to use HTTPS
c.setopt(c.URL, 'https://example.com')
c.setopt(c.WRITEDATA, buffer)
c.setopt(c.CAINFO, certifi.where())

try:
    # Perform the corrected HTTP request
    c.perform()
except pycurl.error as e:
    # If an error occurs during the request, catch the pycurl.error exception
    errno, errstr = e.args  # Retrieve the error number and error message
    print(f'Error: {errstr} (errno {errno})')  # Print the error message and error number
finally:
    # Close the cURL object to release system resources
    c.close()
    body = buffer.getvalue()
    print(body.decode('iso-8859-1'))  # Decode and print the response body
When working with cURL request Python conversions, it's useful to know that cURL offers many advanced options to control HTTP behavior, such as handling cookies and timeouts. Below is an example demonstrating advanced options to run curl commands in Python.
import pycurl  # Import the pycurl library
import certifi  # Import the certifi library for SSL certificate verification
from io import BytesIO  # Import BytesIO for handling byte streams

# Create a buffer to hold the response data
buffer = BytesIO()

# Initialize a Curl object
c = pycurl.Curl()

# Set the URL for the HTTP request
c.setopt(c.URL, 'http://httpbin.org/cookies')

# Enable cookies by setting a specific key-value pair
c.setopt(c.COOKIE, 'cookies_key=cookie_value')

# Set a timeout of 30 seconds for the request
c.setopt(c.TIMEOUT, 30)

# Set the buffer to capture the output data
c.setopt(c.WRITEDATA, buffer)

# Set the path to the CA bundle file for SSL/TLS verification
c.setopt(c.CAINFO, certifi.where())

# Perform the HTTP request
c.perform()

# Close the cURL object to release system resources
c.close()

# Retrieve the content of the response from the buffer
body = buffer.getvalue()

# Decode the response body using UTF-8 encoding and print it
print(body.decode('utf-8'))
Four libraries are popular when working in Python with HTTP requests: PyCurl, Requests, HTTPX, and AIOHTTP. Each has its strengths and weaknesses. Here's a comparison to help you choose the right tool for your needs:
| Feature | PycURL | Requests | HTTPX | AIOHTTP |
|---|---|---|---|---|
| Ease of use | Moderate | Very Easy | Easy | Moderate |
| Performance | High | Moderate | High | High |
| Asynchronous support | No | No | Yes | Yes |
| Streaming | Yes | Limited | Yes | Yes |
| Protocol support | Extensive (supports many protocols) | HTTP/HTTPS | HTTP/HTTPS, HTTP/2, WebSockets | HTTP/HTTPS, WebSockets |
Advanced users will appreciate the custom controls offered with HTTP commands; they will find PycURL to exceed expectations in performance. On the other hand, Requests and HTTPX are better suited for simpler, more intuitive scenarios. AIOHTTP stands out in handling asynchronous tasks, providing effective tools for managing asynchronous requests.
As you can see, your choice can alter based on the scope of the project – flexibility versus speed. In advanced contexts, PycURL stands out as the preferred, if not sole, choice.
If performance and low-level control are your priorities when making HTTP requests, PycURL is a solid option. Learning how to use cURL in Python may not be the most beginner-friendly path, but it unlocks powerful capabilities that more abstract libraries often hide. From web scraping and XML handling to managing custom headers and cookies, PycURL handles it all with precision. However, for simpler tasks, asynchronous workflows, or ease of use, libraries like Requests, HTTPX, and AIOHTTP may be more appropriate.
Comments: 0