
 en
en  Español
  中國人
中國人  Tiếng Việt
  Deutsch
  Українська
  Português
  Français
  भारतीय
  Türkçe
  한국인
한국인  Italiano
  Gaeilge
  اردو
اردو  Indonesia
  Polski
 A proxy server is essential for managing multiple accounts securely in the Incogniton proxy browser. It assigns a unique IP address to each profile, helping avoid detection, bypass restrictions, and improve online privacy.
To complete the Incogniton proxy integration, users must log in, create a profile, and enter the correct details. This setup is required for tasks like social media management, scraping, and SEO monitoring, where anonymity and stability are important. The steps below explain how to configure settings in a clear and structured way.
Using an intermediary in the Incogniton proxy browser is necessary to ensure safe and anonymous account management. When managing multiple accounts from the same device, websites can detect and block activity without proper IP separation.
It assigns each profile a unique IP address. This helps prevent platforms from linking the profiles together, reducing the risk of bans or verification requests. It also allows users to simulate different locations, bypass geographic restrictions, and access region-locked content.
If you’re unsure how to use proxy in Incogniton, the main goal is to keep each browser profile isolated by assigning a dedicated IP. This method is especially useful for tasks like social media management or ad verification.
Overall, using proxy Incogniton improves privacy, protects sensitive data, and helps maintain stable access across multiple platforms. For anyone working with automation or scraping, a proper setup is essential for secure and uninterrupted operations.
To complete a secure and anonymous Incogniton proxy setup, each browser profile must be connected to a dedicated server. This ensures isolated IP addresses for every session, helping users avoid detection, access geo-restricted content, and manage multiple accounts efficiently. Below is a detailed walkthrough of the full configuration process.
Start by launching the browser and signing into your Incogniton account. On the left sidebar, go to Profile Management - this is where each session begins. If you are wondering why use a proxy in Incogniton, this step is key to keeping profiles fully separated and hidden from detection by assigning each one a unique IP address.
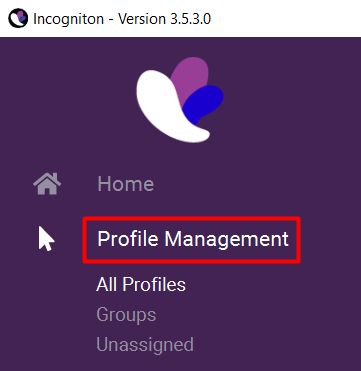
Click “New Profile” at the top-right of the Profile Management panel. Assign a name to the profile, then select the browser base and other parameters. Creating profiles is required to use proxy Incogniton effectively. Each profile operates independently, and each one must have its own IP for secure operation.

Within the profile creation screen, locate and open the Proxy tab. This area contains all configurable proxy settings Incogniton supports. It allows you to enter custom IPs, port numbers, and authentication fields, giving you full control over how each IP functions.
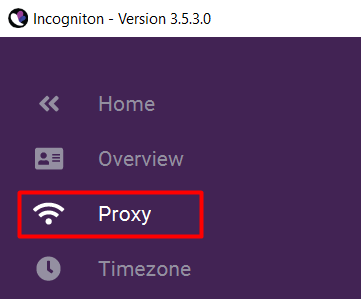
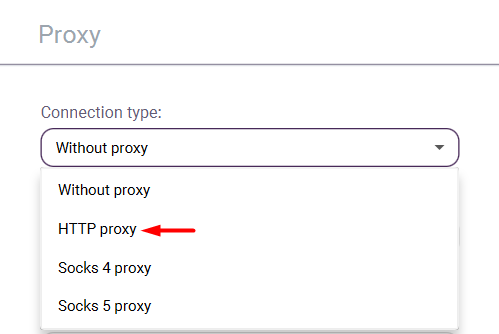
Choose your proxy server for Incogniton based on the available options:
Select the correct type from the dropdown menu according to what your provider offers.
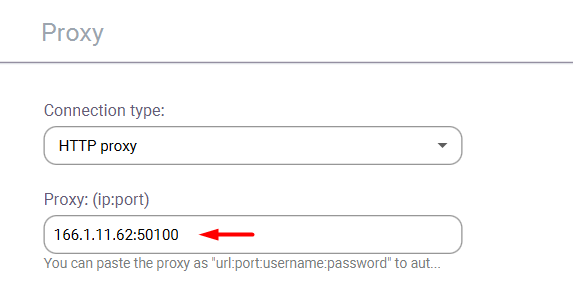
Below the type, input the IP and port using this format: IP:Port. This is a critical step in the Incogniton proxy configuration process, as entering the wrong data here will prevent connection. Make sure no extra spaces or characters are included.
If it requires login credentials, enter the username and password provided by your provider. This step secures the connection and prevents unauthorized access. Authentication details are typically included in the account dashboard or email from the best proxy for Incogniton services.

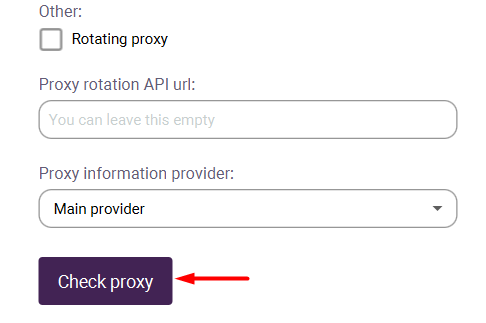
Click the “Check Proxy” button to test the connection. If the intermediary is working, a green confirmation will appear. If there’s an issue, such as an expired or low-quality server, a red error will display. This ensures that your new connection is valid before using it.
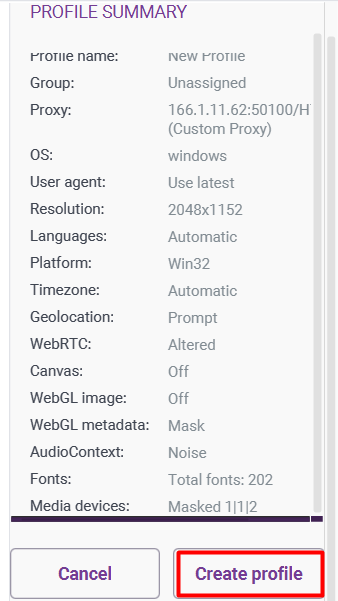
Once all fields are filled out, click “Create Profile”. This completes the Incogniton proxy setup. From here, the profile is ready to launch with its assigned one, ensuring a fully isolated session for secure and anonymous browsing.
Properly setting up an intermediary in the Incogniton proxy browser is essential for maintaining online security, preserving anonymity, and avoiding access restrictions. Assigning a separate IP to each profile ensures full isolation, allowing users to manage multiple accounts without detection or interference.
After completing all configuration steps, from creating a profile to testing the connection, users can safely and reliably use the proxies for tasks like data scraping, SEO monitoring, social media management, and regional content access.
Comments: 0