
 en
en  Español
  中國人
中國人  Tiếng Việt
  Deutsch
  Українська
  Português
  Français
  भारतीय
  Türkçe
  한국인
한국인  Italiano
  Indonesia
  Polski
 Installing CCProxy on your computer, you can immediately use it with the default settings. Nevertheless, detailed configuration settings will allow you to increase the comfort of using a proxy server and its performance.
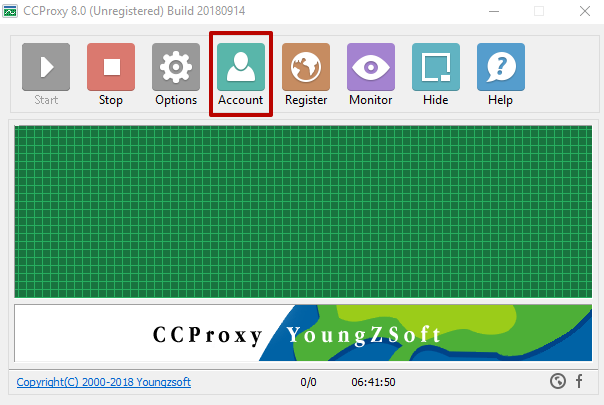
Run the program. In the main window of CCProxy, you will see the "Options" section. Go to it to do detailed configurations.
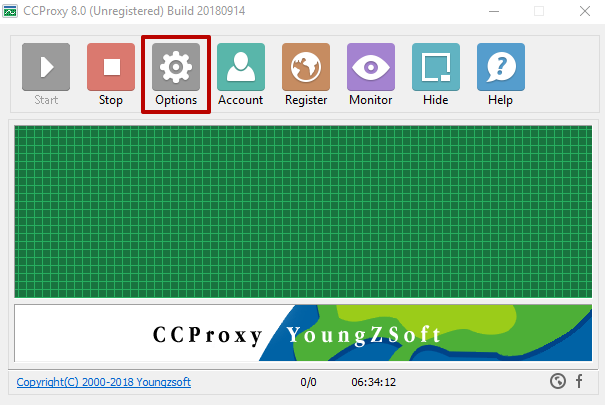
Follow the instructions below:
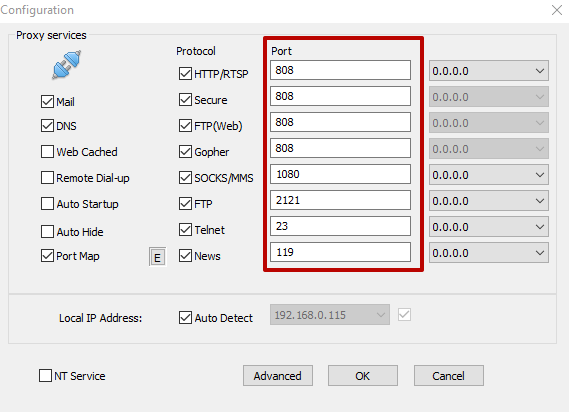
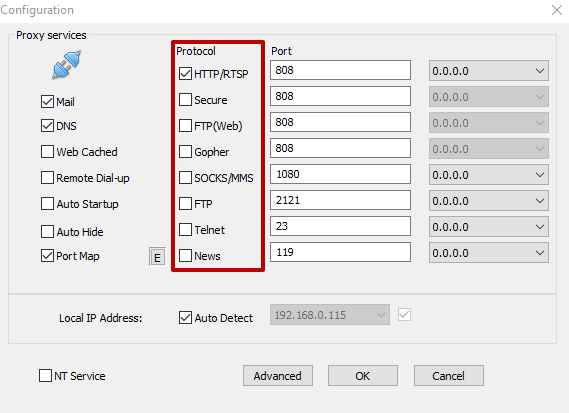
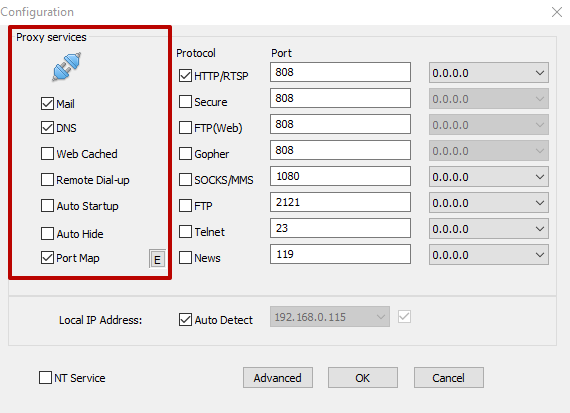
The system is already ready to start, but if you will not create restrictions for using the server, then anyone can use the proxy with you.
That the server could not be used by another user, you need to create a special pass. This is done as follows:
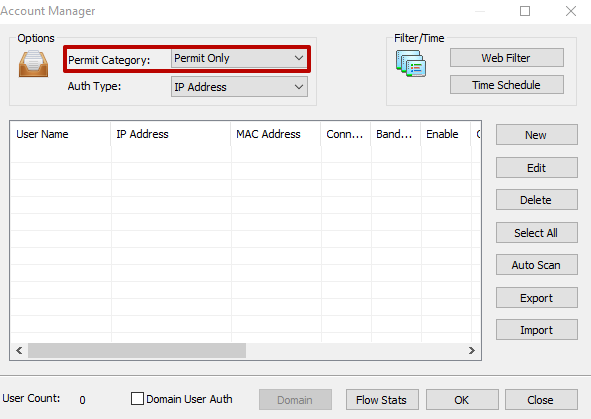
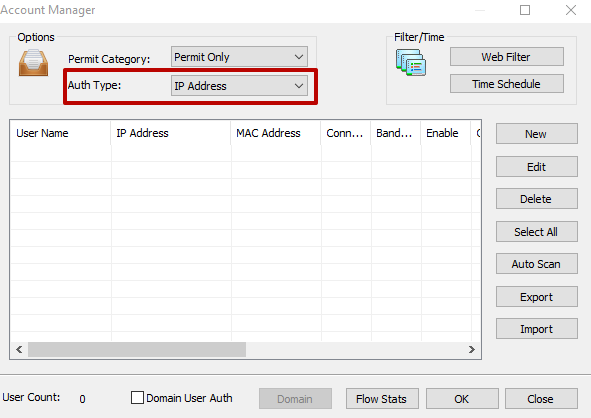
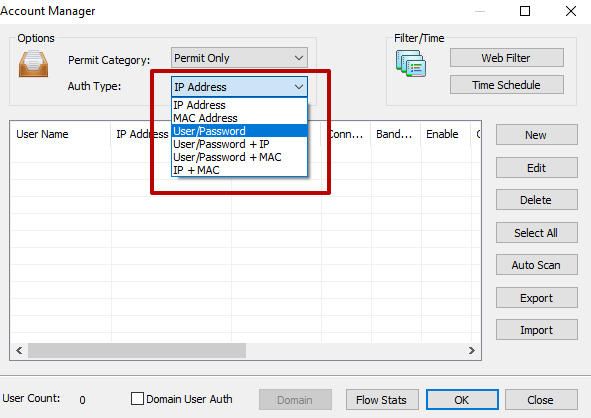
There are 6 possible types of authorization:
If you prefer authorization by IP address, MAC address, or both of them, then you can find out these values by clicking on the question icon. It is located next to the input field.
After choosing the appropriate authorization format, click the "New" button, and then a new window with user settings will open.
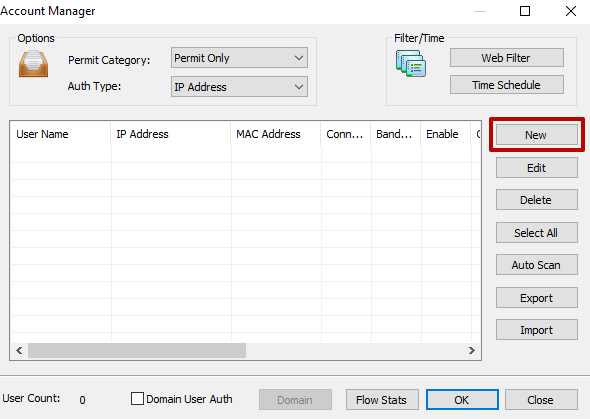
In it, you will see certain fields depending on the type of authorization selected. Fill in only the main field, the rest of the lines can not be touched. If you selected authorization by IP, then enter only the IP address in the corresponding field. If login and password, then enter this data, etc.
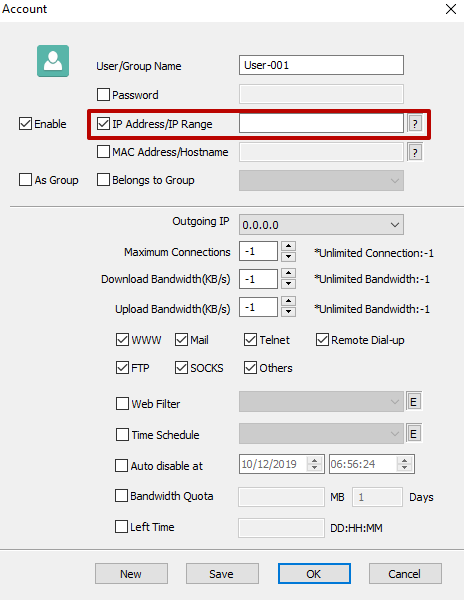
The program provides for setting restrictions on the use of protocols for each individual user. You can also set a certain number of connections at one time and access speed.
When user settings are completed, click "Save".
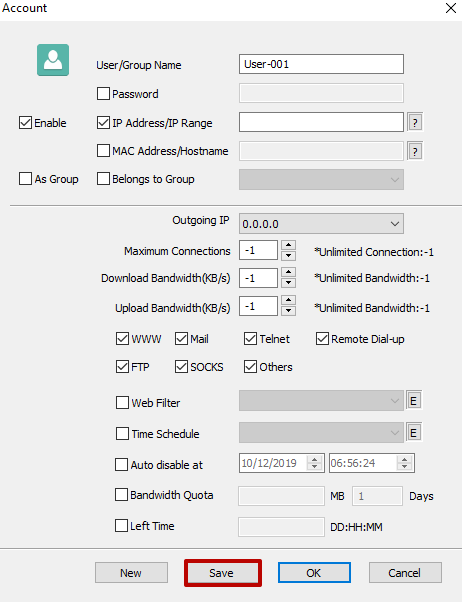
If you need to create another user, click "New". When setup is complete, click "OK".
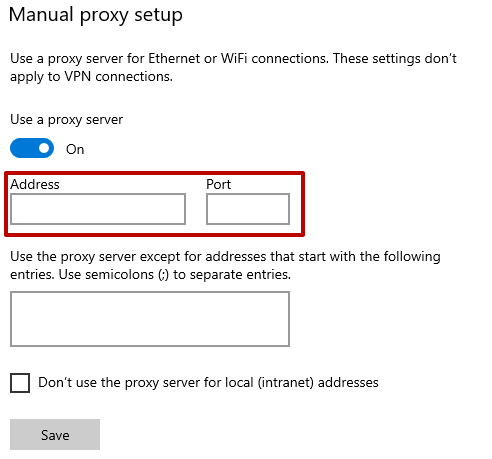
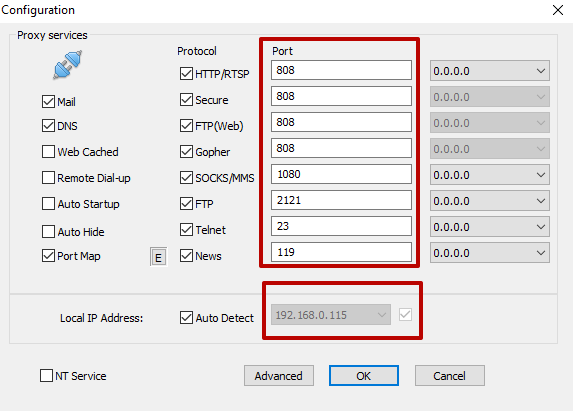
For the user to be able to use your proxy, the user needs to configure it in the browser settings IP:PORT, where IP is the IP address of your machine, and PORT is the value set in the options of the protocol you need. That is, in the case of HTTP, this input will look something like this: 99.199.199.99:8080.
In order to find the necessary parameter in the browser settings, enter "proxies" in the search window.
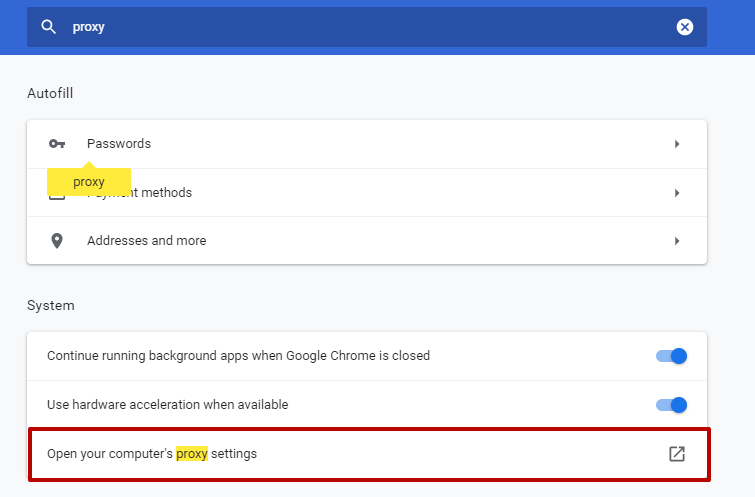
After this, the system redirects you to the proxy settings on the computer. If you have Windows, the popup will look like the image below. Click on the slider to enable the use of a proxy server.
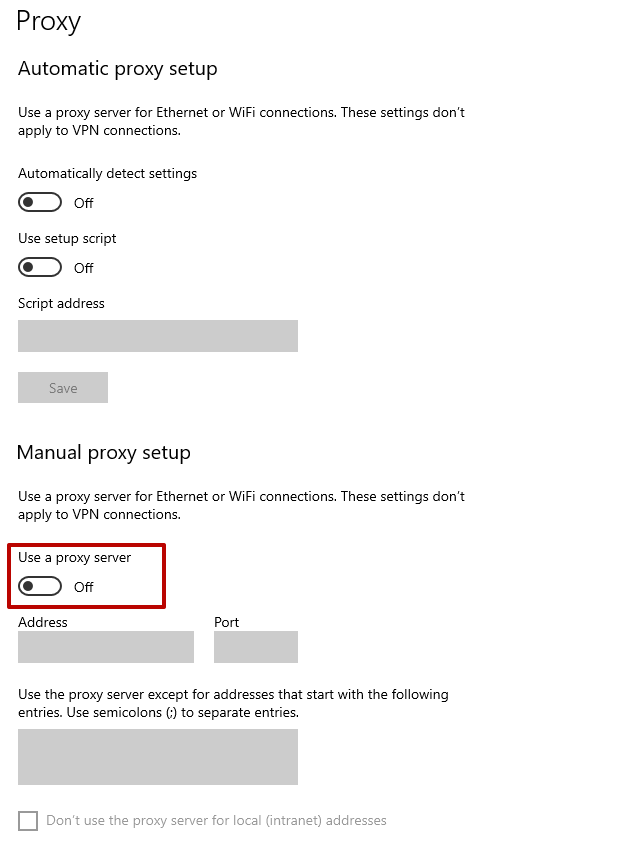
Enter the required data in the appropriate fields.
You can view the IP address and port (depending on the protocol used) of your proxy in the CCProxy program in the "Options" menu.
Comments: 0