Setting up a proxy in Tube Assist Pro

Comments: 1

Tube Assist Pro is a software designed to enhance your YouTube experience. It offers in-depth analytics on your channel's performance, including views, likes, dislikes, comments, and subscribers. With Tube Assist, you can monitor your progress over time and pinpoint areas for improvement. The software provides relevant keywords and tags to ensure your videos appear in related search queries and enables you to track video rankings in search results. Tube Assist Pro comes with a variety of YouTube automation features to help grow your channel:

  • Video Upload and Scheduling: Automatically upload videos to YouTube, optimize them for SEO, and schedule posts to maintain a consistent posting schedule.
  • Playlists: Automatically create playlists, add videos to existing playlists, and manage them.
  • Comment Replies: Automatically respond to comments on your videos using predefined templates.
  • Likes and Subscriptions: Automatically like other videos, subscribe to channels, and unsubscribe from them.

The software employs secure protocols to safeguard user account data and offers the option to enable two-factor authentication for added security.

Tube Assist Pro is a desktop application compatible with Windows and MacOS. Users must create a Google account and link their YouTube channel to it. To enhance the effectiveness of automated actions, circumvent geo-blocking, and bypass network security, you can integrate a proxy into the program. It is recommended to use private proxies with authentication for optimal performance with Tube Assist Pro.

Step-by-step proxy setup in Tube Assist Pro

To create a profile and set up a proxy in Tube Assist Pro, follow these step-by-step instructions:

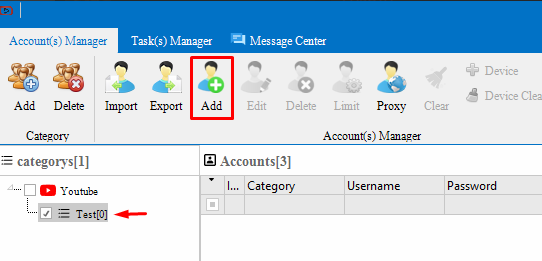
  1. Download and launch Tube Assist Pro on your device. Navigate to the “Account(s) Manager” tab, create a category by clicking the “Add” icon, and set a name for it.

    1.png

  2. Select the created category and click the “Add” button to begin creating a profile.

    2.png

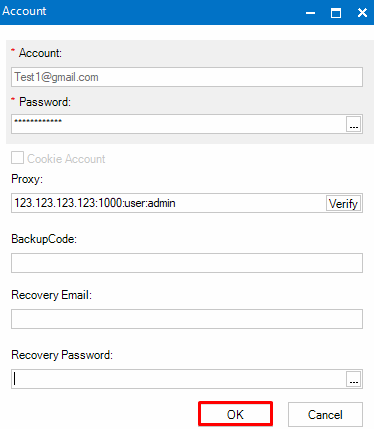
  3. In the opened window, enter the authorization details for your YouTube account. Below, enter the proxy details in the “IP:port:username:password” format. If needed, additional recovery data can be entered in the subsequent lines. Click “OK” to save.

    3.png

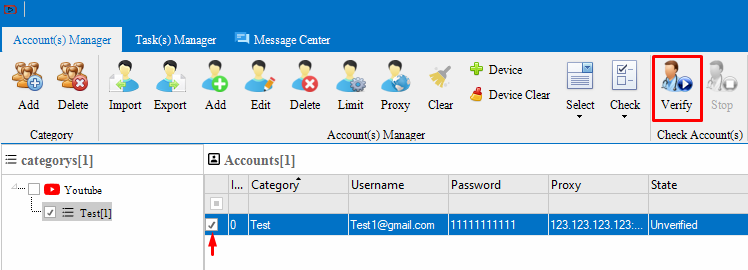
  4. The profile with the entered data will be displayed on the main page. To test its functionality, select the account checkbox and click the “Verify” button.

    4.png

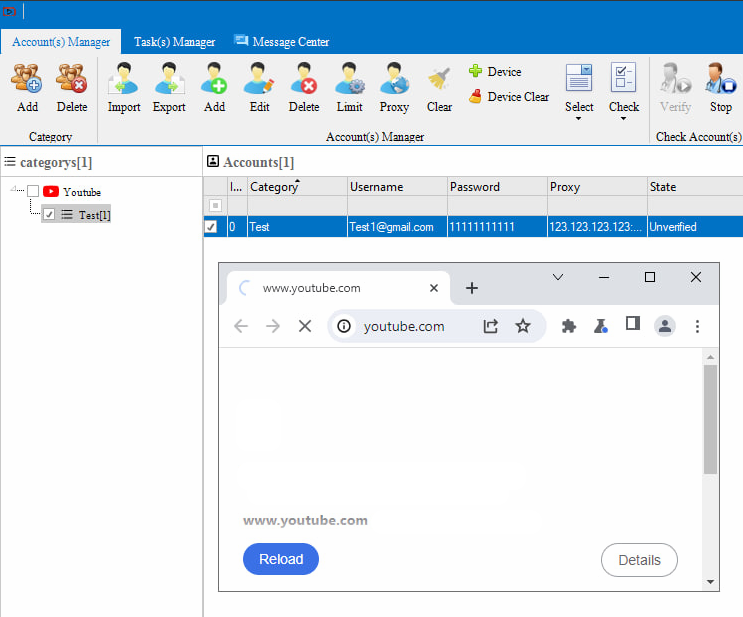
  5. A window will open within a few seconds to verify the functionality of your YouTube profile.

    5.png

How to set up proxy for multi-account in Tube Assist Pro

To efficiently manage multiple profiles, you can import and link proxy servers in Tube Assist Pro. Here's a detailed guide:
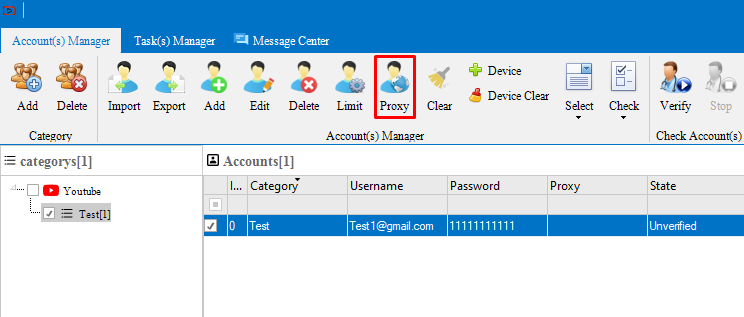
  1. Navigate to the “Proxy” section.

    6.png

  2. In the opened window, choose the desired category and click on the “Import” button to upload your proxy list. Select the appropriate file from your PC.

    7.png

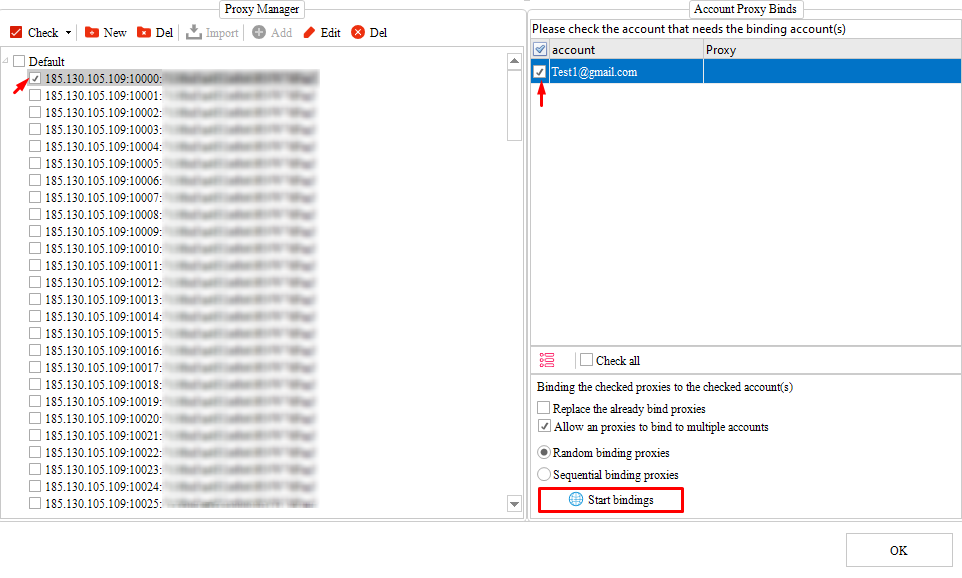
  3. After importing, the proxy list will be displayed on the left side of the window, with previously created YouTube profiles on the right. In the lower right corner, you can choose the proxy binding option:
    • “Sequential binding proxies” - links proxies sequentially to selected accounts.
    • “Random binding proxies” - assigns proxies randomly.

    For safer profile usage, it's recommended to choose “Random binding proxies”. To link the selected proxy and profile, tick their checkboxes and click the “Start bindings” button.
    8.png

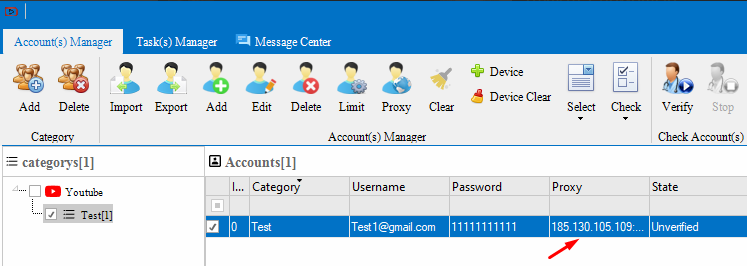
  4. Within a few seconds, the proxy server and account data will be combined. The ready-to-use profiles will appear on the main page.

    9.png

With this setup complete, you can improve your automation capabilities when managing YouTube channels and ensure network security in Tube Assist Pro.

Comments:

1 comment

PellyPell
Which proxy do you recommend ipv4 or ipv6?