Setting up a proxy in the PyCharm development environment

Comments: 0

PyCharm IDE is a versatile tool for developing applications in Python, offering a suite of features to enhance coding efficiency. This cross-platform IDE streamlines writing, debugging, testing, and managing Python projects. It supports versioning, dependency management, and integrates seamlessly with version control systems. The built-in code editor, designed for web developers, includes auto-completion, tooltips, and a user-friendly interface, and accommodates various plugins.

Using PyCharm through a proxy offers several benefits:

  • It acts as an additional security layer, filtering and controlling traffic between the IDE and external resources.
  • In corporate settings, proxies facilitate access control to different resource levels, aiding in efficient management within an organization.
  • Proxies are crucial in web development for meeting specific network security requirements and for testing code under varied network conditions using different IP addresses.

How to set up and change proxies in PyCharm IDE

Here's how to modify proxy settings in PyCharm:
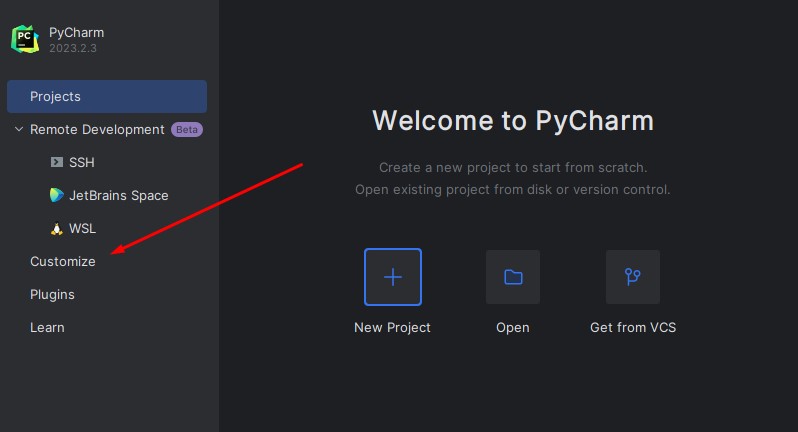
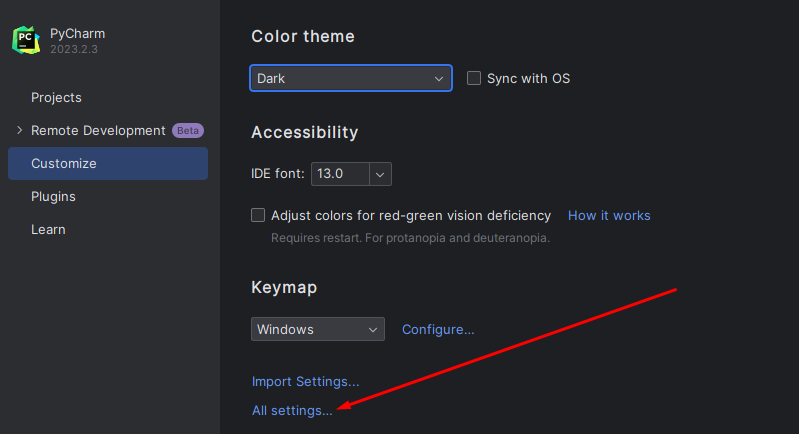
  1. Open PyCharm on your PC. Click “Customize” in the main window's left frame.
  2. Screenshot_2 (1).jpg

  3. Proceed to “All settings”.
  4. image003.png

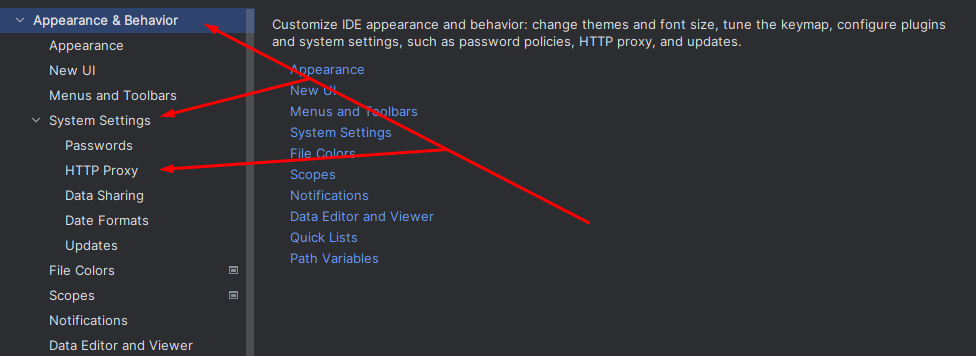
  5. Under “Appearance & Behavior”, expand “System Settings” and select “HTTP Proxy”.
  6. image005.png

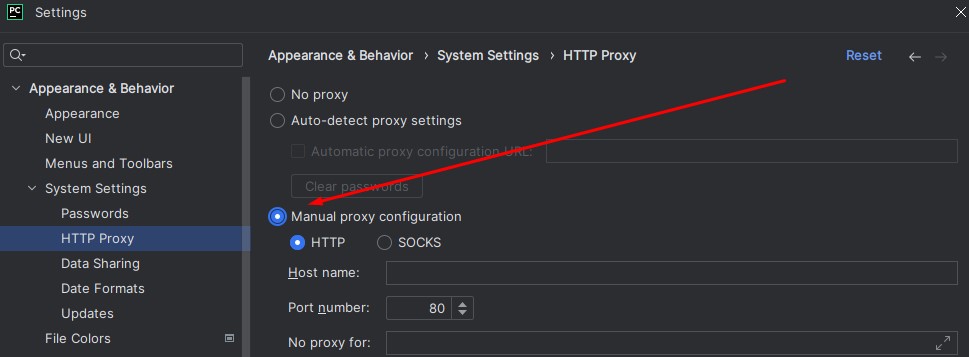
  7. In the settings window, “No proxy” is the default selection. Change this to “Manual proxy configuration” for network configuration.
  8. Screenshot_3.jpg

  9. Choose the protocol type - HTTP or SOCKS, enter the proxy server's hostname or IP address, and the port number. Optionally, list any sites in “No proxy for” that won't use these proxy settings.
  10. image009.png

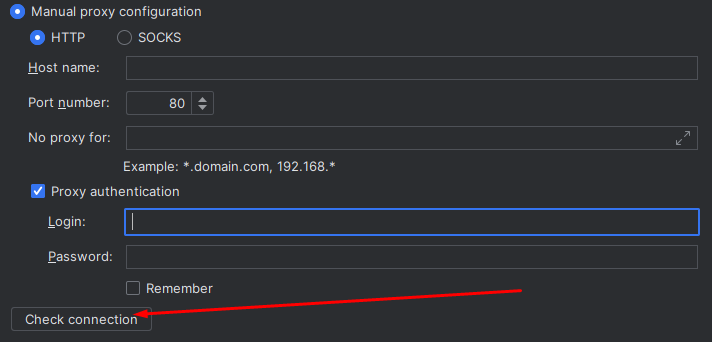
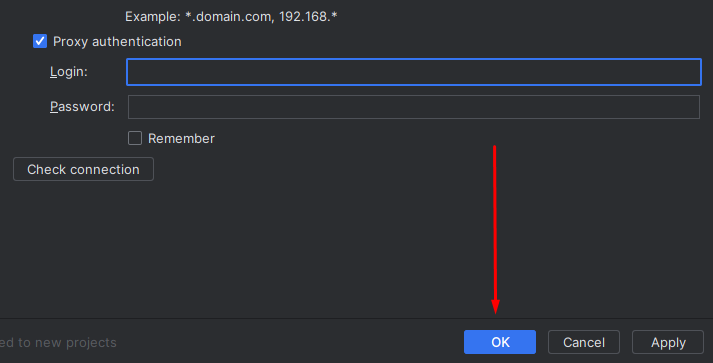
  11. For private proxy use, enable “Proxy authentication” and provide your username and password details. Check “Remember” to save these settings for future sessions.
  12. image010.png

  13. Click “Check connection” to verify the setup.
  14. image011.png

  15. Confirm and save the settings by clicking “OK”.
  16. image012.png

Once set, PyCharm will use the specified IP address. For frequent IP changes during testing, consider using rotating proxies.

Comments:

0 comments