
 en
en  Español
  中國人
中國人  Tiếng Việt
  Deutsch
  Українська
  Português
  Français
  भारतीय
  Türkçe
  한국인
한국인  Italiano
  Indonesia
  Polski
 Proxy Helper is an add-on for the Chrome browser which sets up a proxy server without changing the system's internal configurations.
Following are the key features of Proxy Helper setup:
Using such proxy extensions for Chrome allows users to enhance online privacy, bypass restrictions, and access websites which are blocked in certain areas. Moreover, these users can protect their personal information and limit web resources from tracking them. In this article we are going to show you how to enable proxy in Proxy Helper extension properly step-by-step.
The plugin can be extremely useful for individuals and professionals due to its capability to improve online security and bypass geo-restrictions. Here are some highlights of who is going to get benefits from using this soft:
This all-in-one application serves as a necessity for every individual requiring safe, anonymous, and unlimited internet access for personal or professional use.
Proxy Helper configuration is relatively easy for all users regardless of their level of technical expertise. You may follow these steps to adjust your settings correctly:
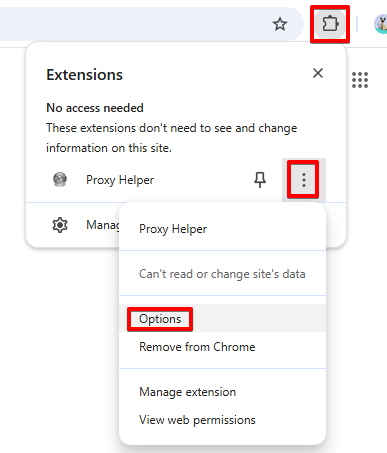
Visit the Google store, type in plugins name, and hit “Add to Chrome”. After installation, the plugin’s icon should appear on your extension tab for easy access.

In order to access the setting menu, click on the icon and locate the “Options” button, which should be visible in the drop-down menu.
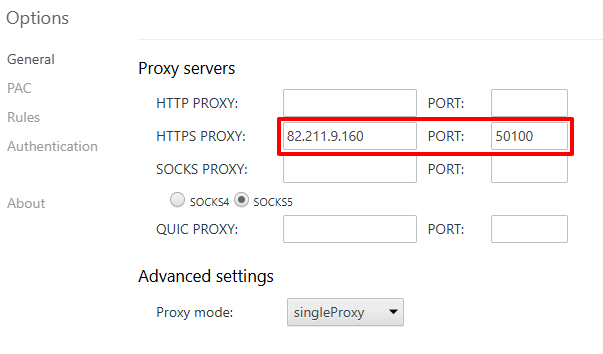
Make sure to select the most applicable protocol (HTTP, HTTPS, or SOCKS). Next, fill in the necessary details such as IP address and port number on the designated area corresponding to the protocol chosen.
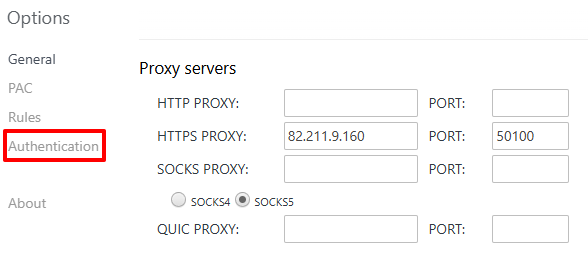
Go to the “Authorization” tab within the settings if your server has authorization details. In our example, Proxy Seller proxies are used with username and password authentication.
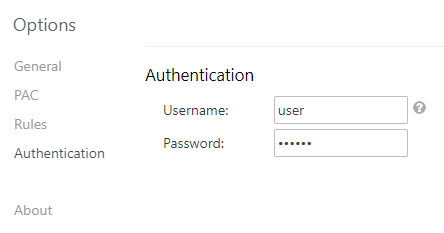
Username and password must be provided. These pieces of information are necessary for setting up a secure and working connection within the add-on.
To activate a new connection simply click on the plugin icon and choose a new option that appears according to your settings.
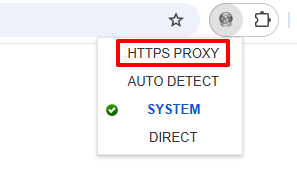
To verify everything is working correctly, it’s best to check the IP address and confirm that the website’s location corresponds to the IP address’s proxy.

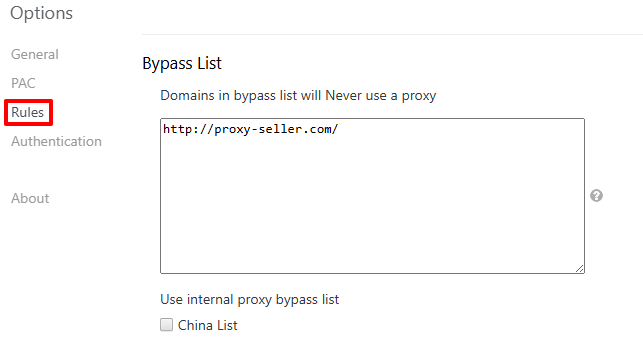
In case you need advanced control over your connection, use “Rules” tab and create a bypass list.
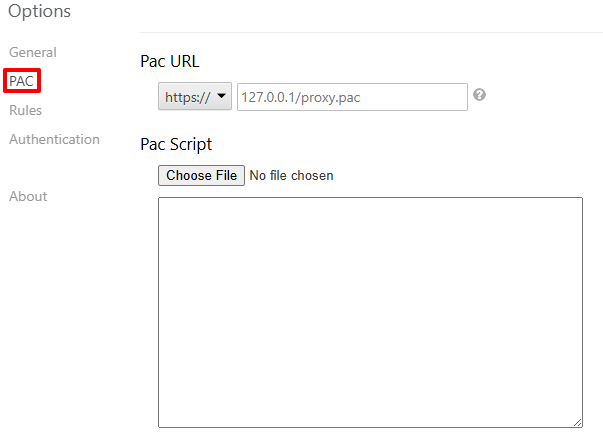
Also, there is a PAC scripts option available. It’s a JavaScript file that allows browsers to automatically decide if web requests should go through a server by referencing the URL being accessed. PAC files provide a more dynamic way to adjust Proxy Helper setup without the need for tedious manual adjustments.
That’s it, Proxy Helper setup is completed.
While using such a plugin, some issues that users experience range from failure to establish connection to authentication problems. To fix these:
Fixing these common issues, users can enhance their experience and maintain a stable connection.
The plugin is designed not only to simplify the setup process of configuring proxies but also to enhance your overall internet experience. Here are some of the key benefits of using this extension:
Whether for personal use or professional purposes, plugin equips with the features to surf the web on your terms.
To sum up, this plugin is an excellent tool for managing proxies efficiently and securely. Its simple setup and strong features lets users take better control of their online privacy, security, and freedom. Plugin takes the trouble out of configuration and is perfect for users at any skill level, optimizing their internet browsing experience.
Comments: 0