
 en
en  Español
  中國人
中國人  Tiếng Việt
  Deutsch
  Українська
  Português
  Français
  भारतीय
  Türkçe
  한국인
한국인  Italiano
  Indonesia
  Polski
 PhantomBuster is a cloud-based automation tool used to extract data and perform actions across various online platforms. It stores the output in formats like CSV and JSON, making it easier to manage and process the collected web data. When using automation on platforms with strict security systems, such as Facebook or Instagram, there is a high chance of being flagged or blocked. To avoid detection, it is recommended to use a PhantomBuster proxy. This allows users to mask their real IP address and create a more stable automation environment.
The software allows you to configure a pool of IP addresses that can be used randomly across tasks. This scraping method helps distribute activity and reduce the risk of being flagged. Below is a step-by-step guide to setting up a PhantomBuster proxy using a pool.
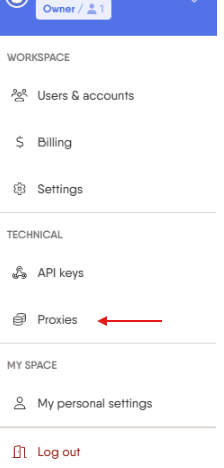
Start from the login details to your account. In the upper-right corner, click your profile name. From the dropdown menu, select “Proxies” to access the settings.
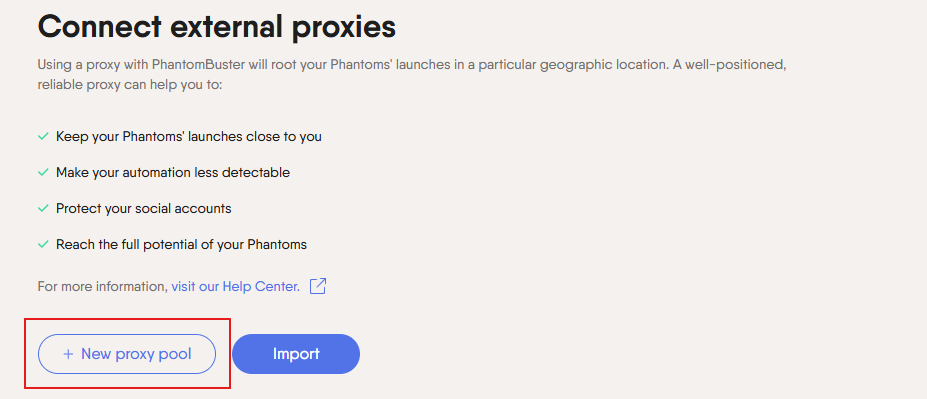
Click on the “New pool” button to begin the setup process. This will allow you to group multiple IPs under one pool.
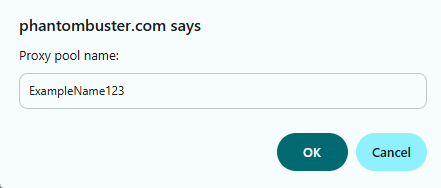
A pop-up window will appear. Enter a name for your new pool. Choose a name that clearly identifies the purpose.
In the next window, enter the IP address and port number of the server in the same field, separated by a colon. This is part of the basic proxy settings PhantomBuster requires.

After entering the IP address and port, continue by filling in your authentication credentials. In the provided fields, enter the username and password associated with the server. Once everything is filled in, click the “Add server” button. This will save the server to your pool and complete the initial part of the PhantomBuster proxy configuration.

If you plan to automate multiple tasks or accounts at the same time, it’s recommended to add several IPs to your pool. To do this, simply repeat the process: enter the IP address, port, username, and password for each new server.
Return to your main dashboard. Click the “Use a new Phantom” button to begin creating a new automation task. This is where you’ll assign the settings and link your automation with the correct platform. Starting a new Phantom is necessary before applying any configuration.

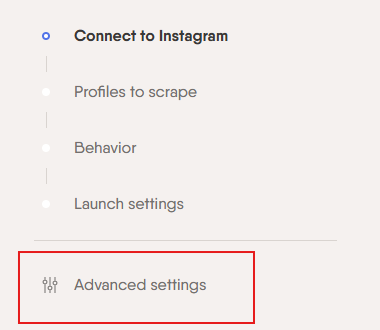
After choosing to create a new Phantom, select the platform you intend to automate, such as Instagram, LinkedIn, or Facebook. Once selected, go to the menu on the left-hand side and click on “Advanced settings.” This section provides access to all configuration options, including server setup, behavior rules, and input fields.
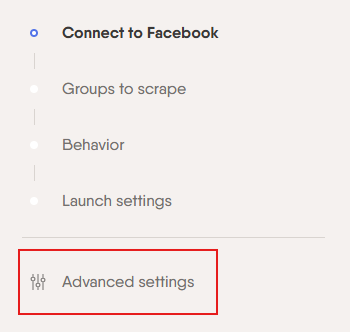
Within the advanced settings area, locate and click on the “Proxies” tab. This tab controls how the Phantom connects to the internet. It’s the section where you will apply either a single one or a full pool, depending on your automation needs.

Inside the “Proxies” tab, select the option that allows the Phantom to use random servers from a pre-configured pool. This helps each session run from a different IP address. Random rotation reduces the chance of detection and supports more reliable multi-session use.
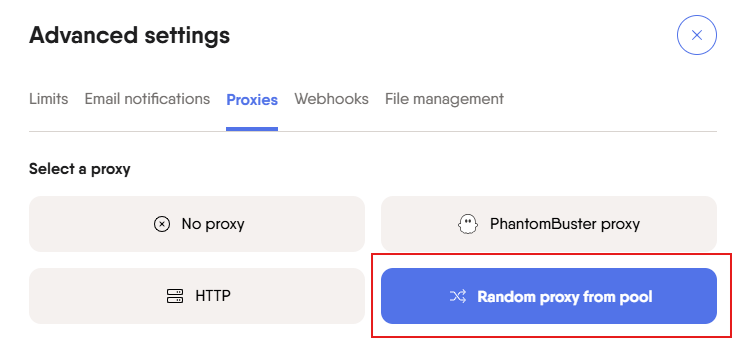
From the drop-down list, select the pool you previously created. Make sure the correct pool is chosen so the Phantom can rotate through the associated IP addresses. After confirming your selection, save the settings to finalize the connection. The Phantom is now configured to use a rotating PhantomBuster proxy setup from your server pool.
This method is recommended for managing multiple tasks across platforms. It also helps increase anonymity through rotating IPs, which is important for successful proxy integration with PhantomBuster.

If you want to assign one specific server to one account for web scraping tasks, PhantomBuster allows you to do this manually. Follow these steps for accurate PhantomBuster proxy configuration.
Navigate to the “Solutions” tab in your dashboard and select the desired automation, such as collecting followers from Instagram. This step begins the process to enable proxy for PhantomBuster features on a per-task basis.

Click on “Advanced settings” for the selected Phantom. This section contains all manual setup options, including server configuration.
Under the “Proxies” tab, choose the “HTTP” protocol from the available options. This is the standard method used during individual PhantomBuster proxy configuration.
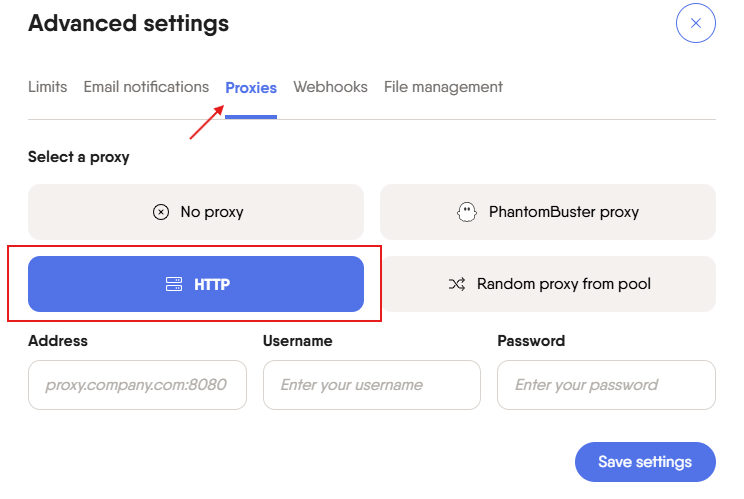
Enter the IP address and port in the provided field. Then, input the username and password to complete authentication. By setting the server here, you fully enable proxy PhantomBuster support for that task.

Save the changes and return to the main dashboard. Launch the Phantom you just configured. If you are unsure “how can I test PhantomBuster proxy functionality” simply run the task. If the setup is successful, the task will proceed without connection errors.

Setting up a PhantomBuster proxy is an important step for reducing the risk of detection and improving the efficiency of automation tasks. Whether you're managing multiple accounts through a server pool or using a dedicated server per task, proper configuration helps maintain stable operation.
Such a setup is an important step for reducing the risk of detection and improving the efficiency of automating tasks. Following the step-by-step instructions in this guide will help you use servers correctly and avoid common setup mistakes. Always verify your credentials before use to prevent connection errors or task interruptions.
Comments: 0