 Proxy for Telegram
 Proxy for LinkedIn
 Proxy for Ebay
 Proxy for Twitter
 Proxy for TikTok
 Proxy for Google
Setting up a proxy in the Omnilogin antidetect browser

Using the Omnilogin antidetect browser, you can create a separate virtual environment for working with social networks and other web resources. The browser provides functionality for setting up a separate fingerprint for each profile. This allows you to configure individual local storage files, caches, and cookies that will only be associated with one specific profile. Omnilogin also allows you to automate any repetitive tasks using a local API, Selenium WebDriver, and Puppeteer.
In addition, it is easy to configure business processes in the Omnilogin anti-detect browser. With features such as browser profile sharing and transfer, users can easily control the visibility and sharing of profiles with team members. Tasks can be easily delegated between users since account creation and development can be handled by different employees in the same work environment. In addition, when using a proxy and setting up a separate fingerprint for each profile, traffic encryption is ensured, as well as bypassing detection systems.
Video guide for setting up a proxy in Omnilogin
Step-by-step proxy setup in Omnilogin
The anti-detect browser has functionality for setting up a proxy, which allows each profile to have a separate IP address. Here's how to do it:
- Open your browser and navigate to the “Profile Management” section to create a new profile.
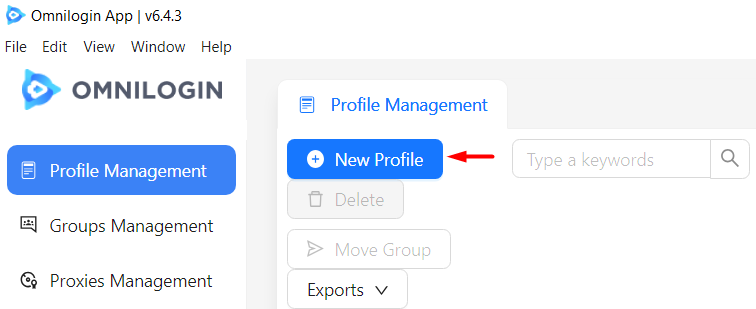
- Set a name for the profile. You can either use the default group or create a new one for better organization.
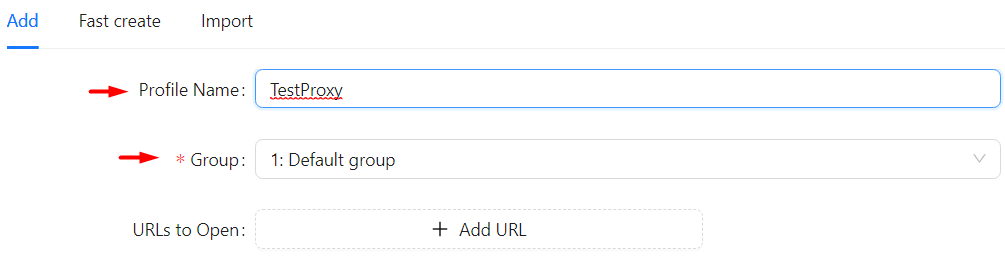
- To set up a proxy, choose “Custom” from the drop-down menu next to “Proxy” to access additional proxy settings. Select the proxy protocol type and then enter the IP address.
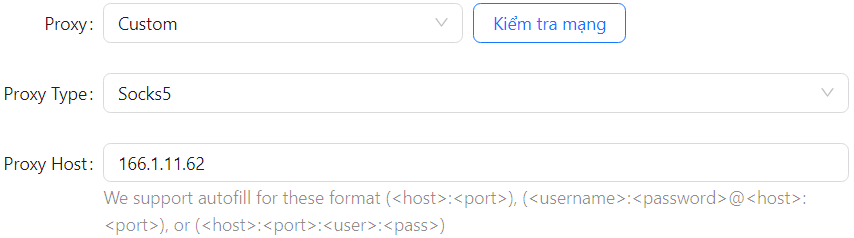
- Specify the port, and if it’s a private proxy, enter your username and password.
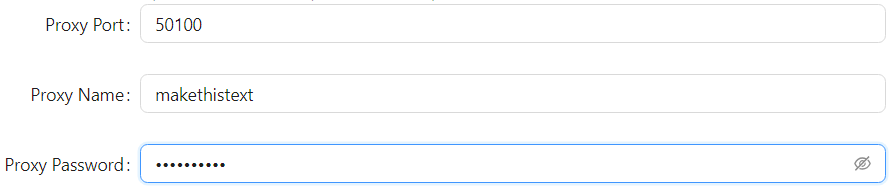
- Test the functionality of the Omnilogin anti-detect browser with the proxy server by clicking the button next to the “Proxy” column.
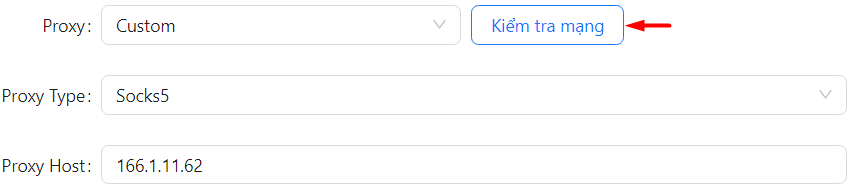
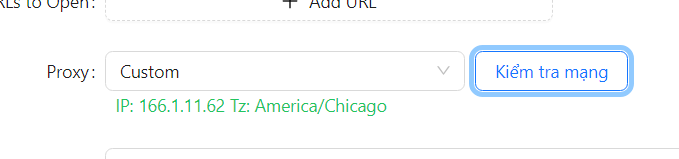
- If the setup is successful, you will see a notification confirming the successful configuration.
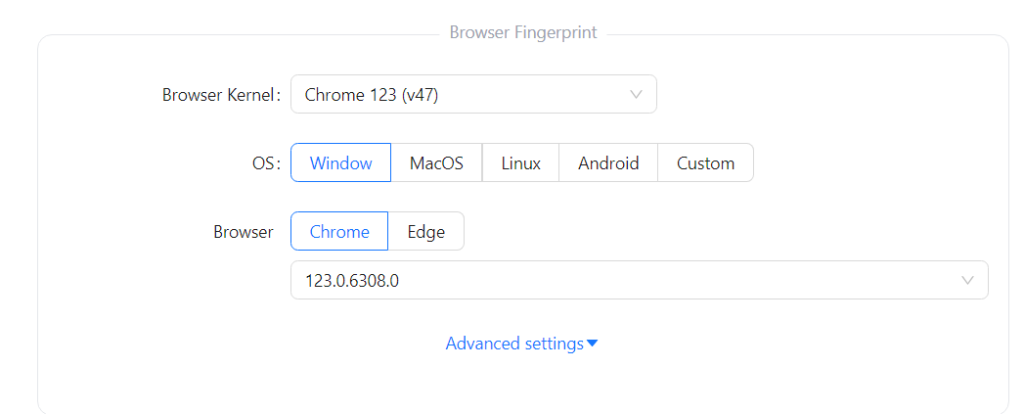
- Complete the browser profile setup by selecting the desired operating system and browser type to create a new profile fingerprint.
- Click on “OK” to finalize the configuration of your new profile with its associated proxy.
This process completes the proxy setup in Omnilogin, allowing you to assign each profile a unique IP address, essential for accessing blocked sites and performing automated actions effectively.
PROXIES FROM $0.02/IP
Ready to put this into practice?
Pick a proxy type and location, and start using it within minutes.
Instant delivery
24/7 support
Refund policy
About the author