 Proxy for Telegram
 Proxy for LinkedIn
 Proxy for Google
 Proxy for Ebay
 Proxy for Twitter
 Proxy for TikTok
Setting up a proxy in the MuLogin browser

MuLogin is popular among businesses and IT professionals for its multi-account browsing capabilities, which make it easy to manage multiple accounts across various web services and social networks.
Another standout feature of MuLogin is its anti-detection functionality, designed to enhance anonymity, security, and bypass tracking systems online. Here are the additional features of the MuLogin browser:
- It allows you to open multiple windows or tabs, each with its profile and accounts.
- The browser isolates cookies and data storage per tab or window, preventing data transfer between accounts.
- You can synchronize bookmarks, passwords, and other data between different profiles or devices.
- It allows you to change the UserAgent, including PC characteristics, operating system version and type, screen resolution, and more.
- The browser provides tools for hiding the real IP address and routing traffic through proxy servers or virtual private networks for anonymity.
- MuLogin can change the fingerprint, including the time zone and browser language.
Anti-detection browsers like this can be used by those seeking privacy online, as well as by professional marketers, website testers, and analysts.
Video guide for setting up a proxy in MuLogin
How to set up a proxy in the MuLogin browser
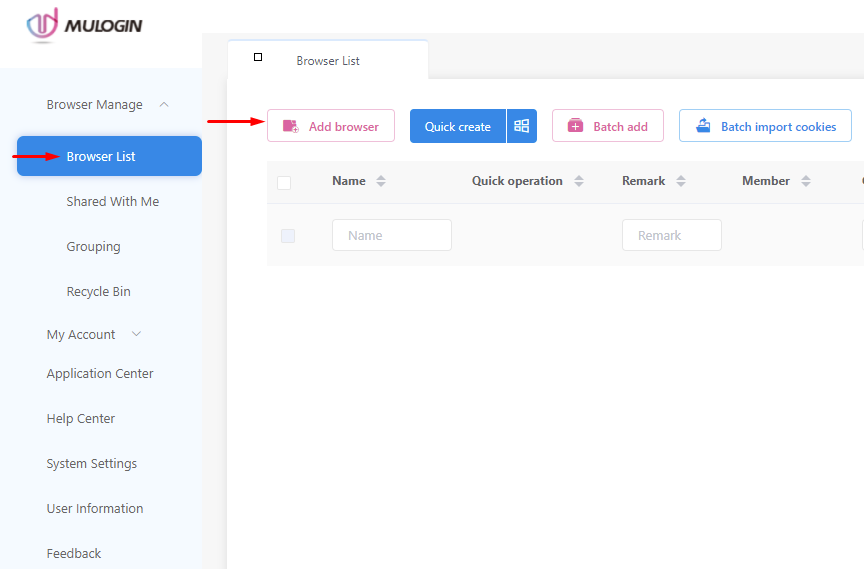
- Download the browser from the official website and launch it. Open the “Browser List” tab and click the “Add browser” button.
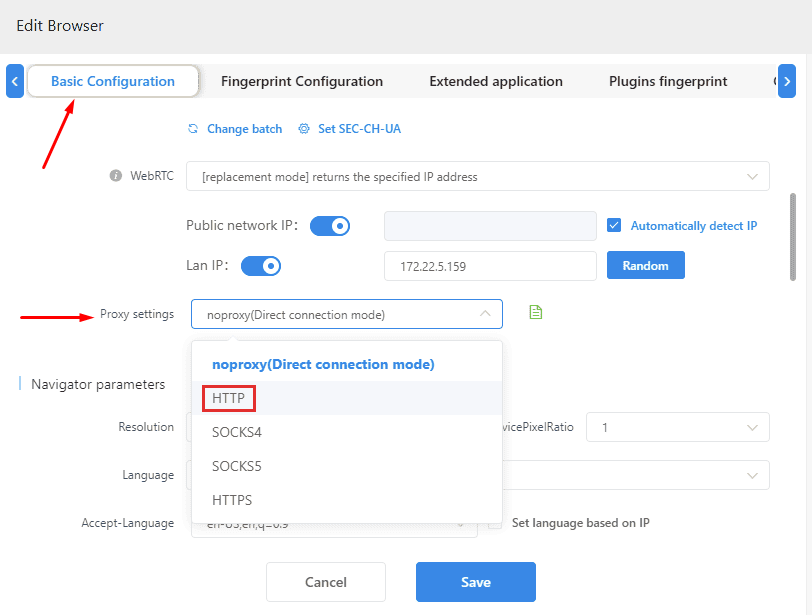
- You will be redirected to the “Basic Configuration” window. Scroll to the “Proxy Settings” tab.
- In the new window, set the name, IP address, and port of the proxy server, as well as the username and password for user authentication.
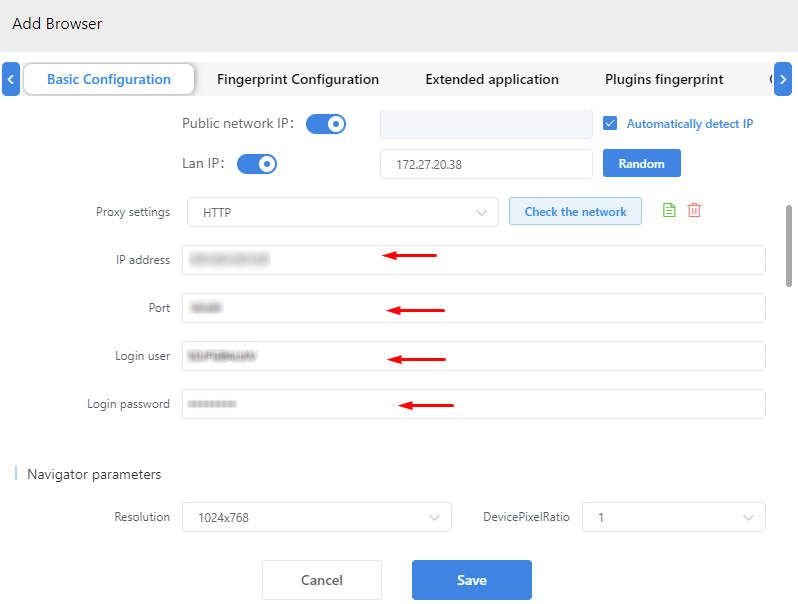
- To check the functionality of the Internet connection with the specified parameters, click the “Check the Network” button.
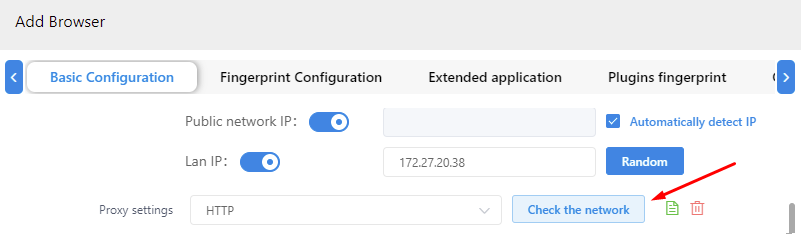
- You can configure your proxy for each individual website. While remaining in the main menu click the “Rocket” icon.
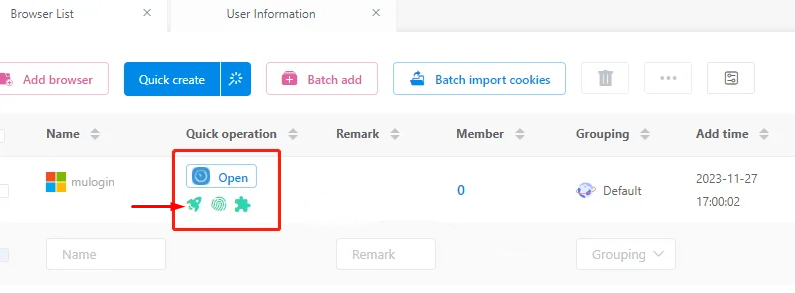
- Click “Paste proxy information”, then change the IP-address and port to the required ones. Once done, click the “Complete” button.
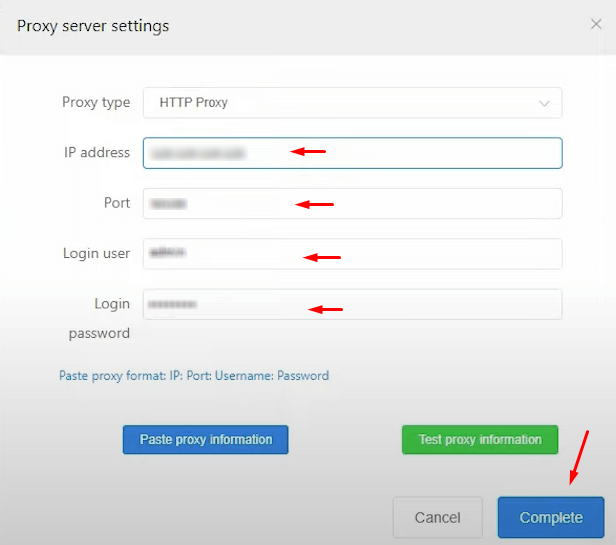
That’s it, your setup is complete. Using a proxy allows you to work with multiple accounts simultaneously under different IPs without the need to constantly log in and out.
PROXIES FROM $0.02/IP
Ready to put this into practice?
Pick a proxy type and location, and start using it within minutes.
Instant delivery
24/7 support
Refund policy
About the author