 en
en  Español
  中國人
中國人  Tiếng Việt
  Deutsch
  Українська
  Português
  Français
  भारतीय
  Türkçe
  한국인
한국인  Italiano
  Indonesia
  Polski
 Bitdefender is an antivirus solution known for its robust protection without compromising system performance. It offers enhanced web protection, surpassing the built-in security features of browsers like Chrome, Firefox, and Edge. Key features include:
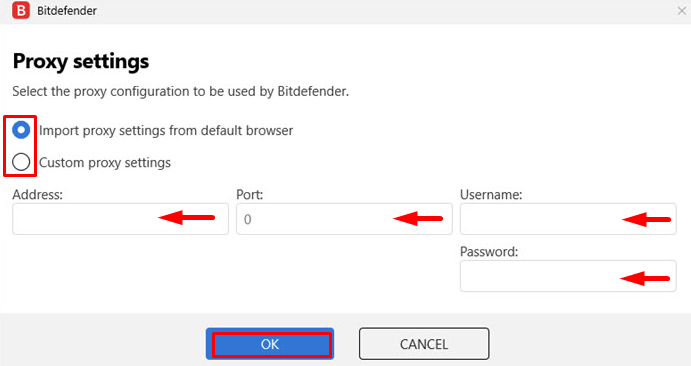
Configuring a proxy in Bitdefender is essential for users who connect to the internet through a proxy. This adjustment enhances the antivirus's ability to accurately detect threats on websites visited.
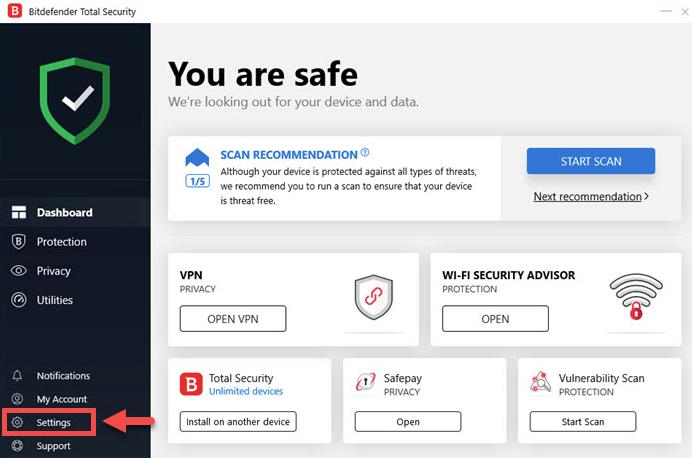
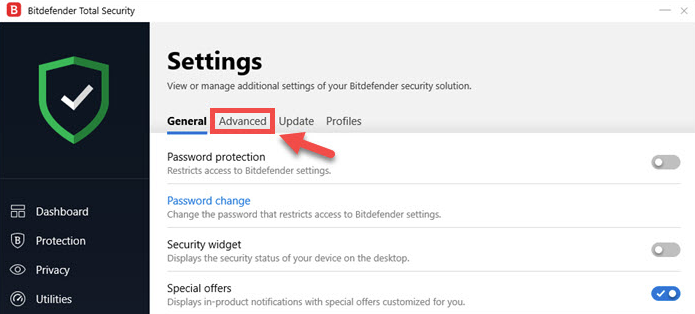
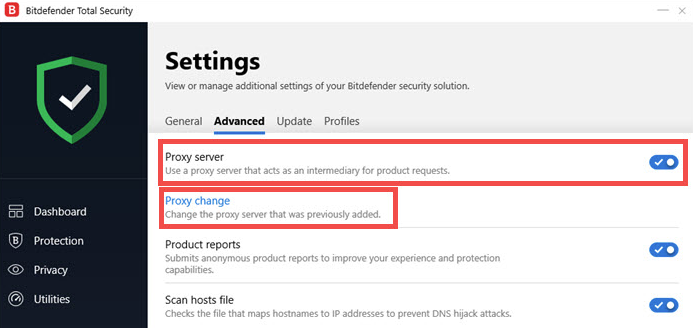
To set up a proxy in Bitdefender, follow these steps:


With these settings in place, Bitdefender will be able to effectively protect your device while you access previously blocked sites or download programs that were not available in your region before.
Comments: 0