
 en
en  Español
  中國人
中國人  Tiếng Việt
  Deutsch
  Українська
  Português
  Français
  भारतीय
  Türkçe
  한국인
한국인  Italiano
  Gaeilge
  اردو
اردو  Indonesia
  Polski
 Maxthon Cloud Browser is a browser that differs from all others in its built-in cloud storage. It is possible to save a tab anywhere, and then return to work at the same moment. The cloud saves files, photos, videos, links, bookmarks, and more - your data will never be lost and will always be securely protected. But for maximum security, you should use a proxy along with the browser.
Proxy servers will protect your cloud storage and data from hacks, leaks, and blocking. They will help you bypass restrictions and provide you with anonymity on the network. You can change your IP address to any other and safely promote your business online.
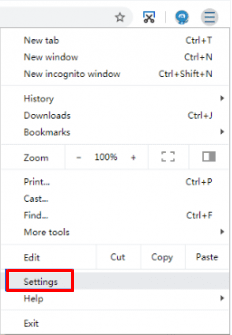
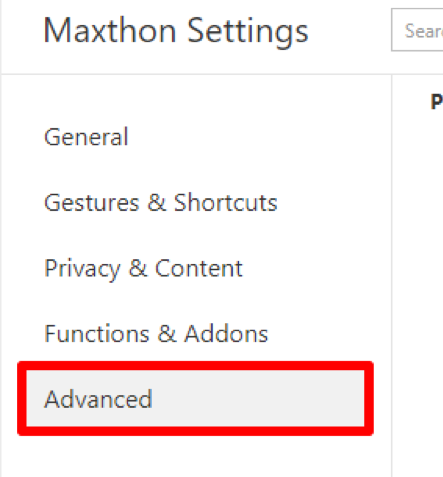
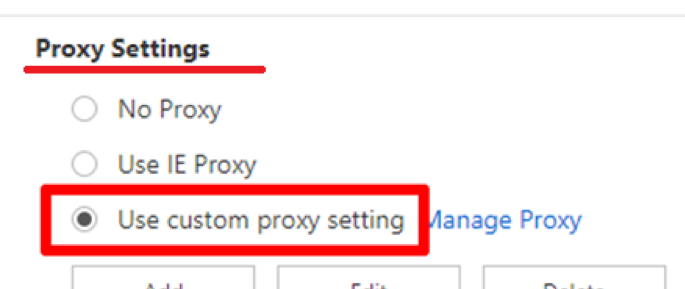
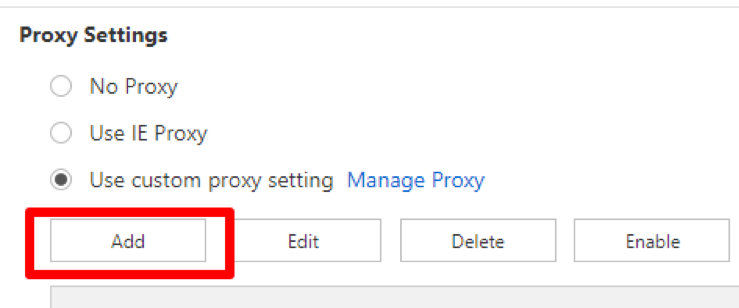
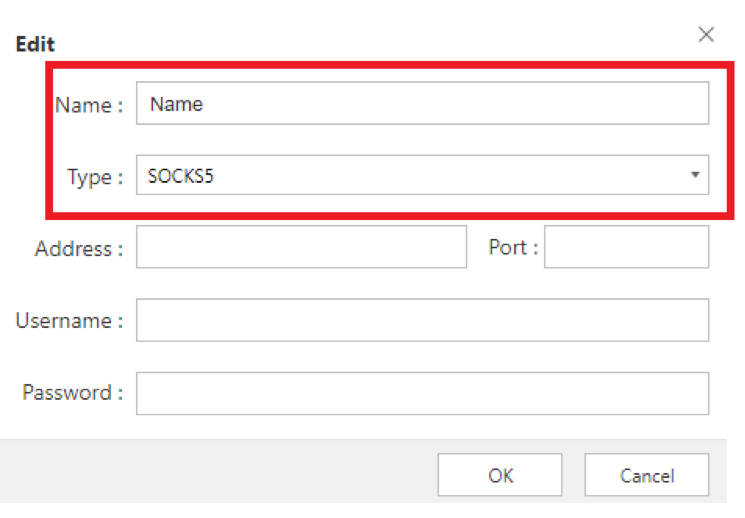
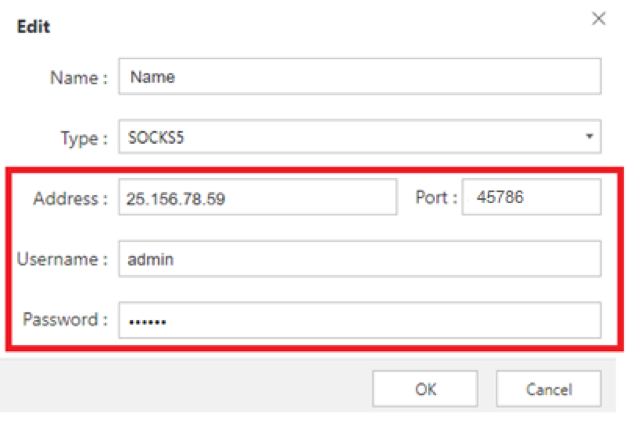
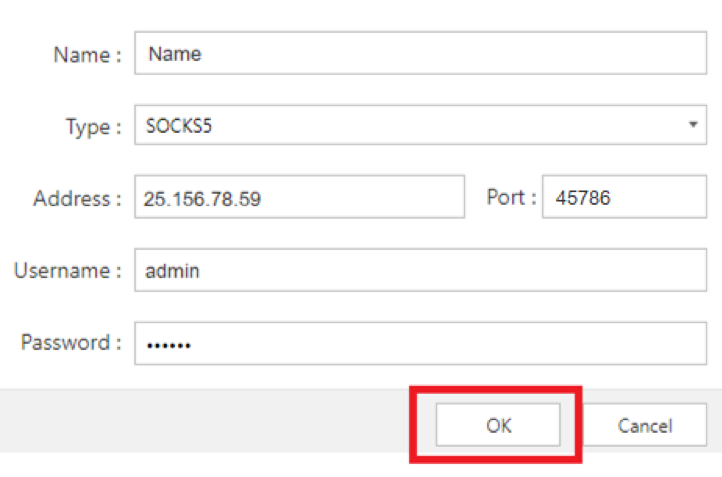
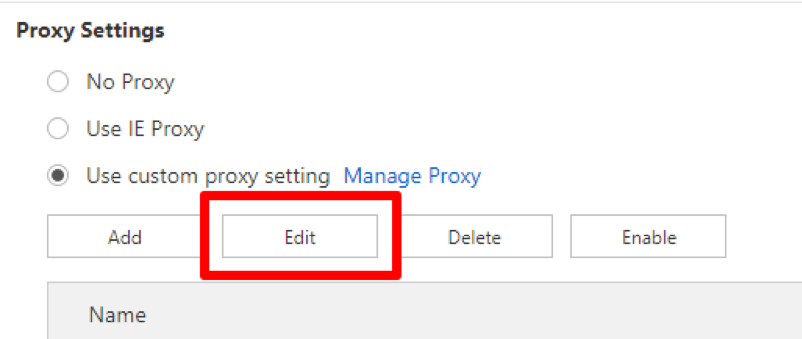
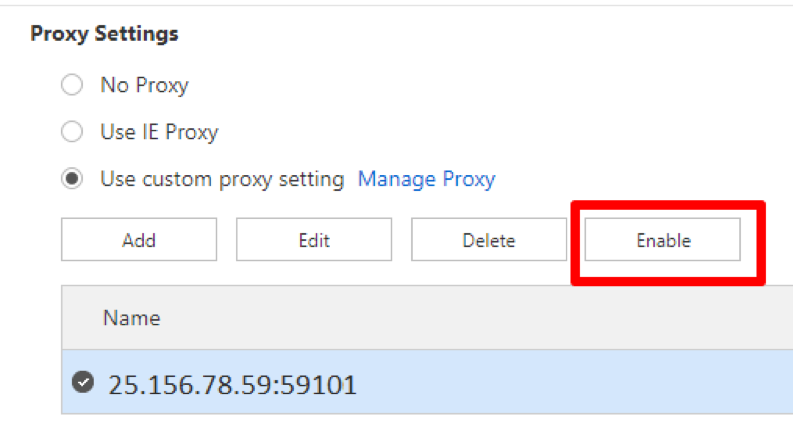
You have configured a proxy for Maxthon Cloud Browser. If you use it for work, promotion on social networks, or storing important confidential information, choose high-quality private proxies. Then you will not be hacked, and all your data will be securely protected.
Comments: 0