
 en
en  Español
  中國人
中國人  Tiếng Việt
  Deutsch
  Українська
  Português
  Français
  भारतीय
  Türkçe
  한국인
한국인  Italiano
  Gaeilge
  اردو
اردو  Indonesia
  Polski
 Proxy SwitchyOmega is a browser extension designed for setting up, managing, and switching between proxy servers. The extension allows you to assign different proxy servers to each browser profile and switch between them as needed. Proxy SwitchyOmega also includes an “Auto Switch” option for automatically connecting to the necessary proxy server on user-selected sites. This functionality allows you to work with different IP addresses on multiple tabs in one browser window without the need to manually switch between proxies.
You’ll learn how to install Proxy SwitchyOmega on your browser. This extension works with Chrome, Firefox, and Edge. Start by opening the extension store for your browser.
You can search for “SwitchyOmega” directly on these pages.
Follow these easy steps:
Here are the direct URLs to speed things up:
Setting up the Proxy SwitchyOmega extension is identical across all browsers. For example, let's consider the setup in Google Chrome:
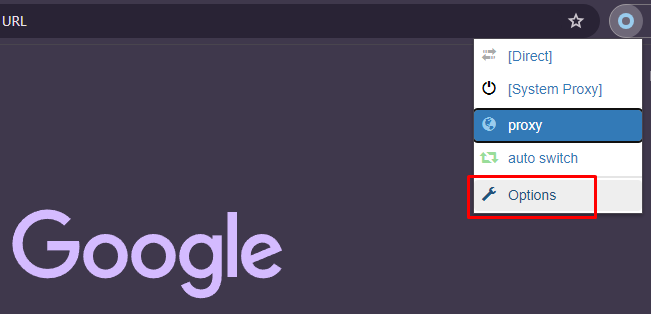
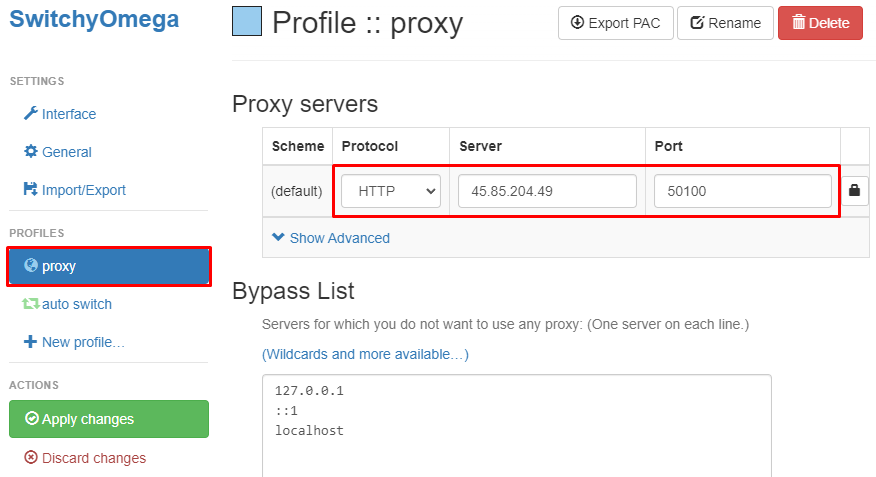
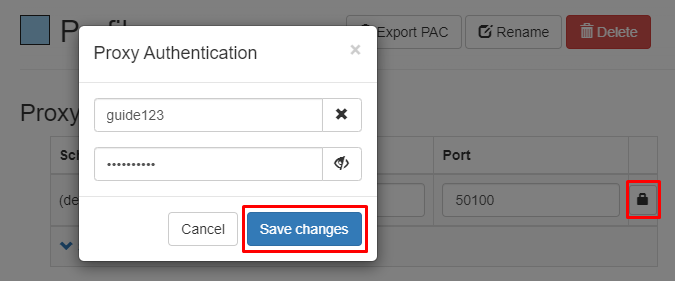
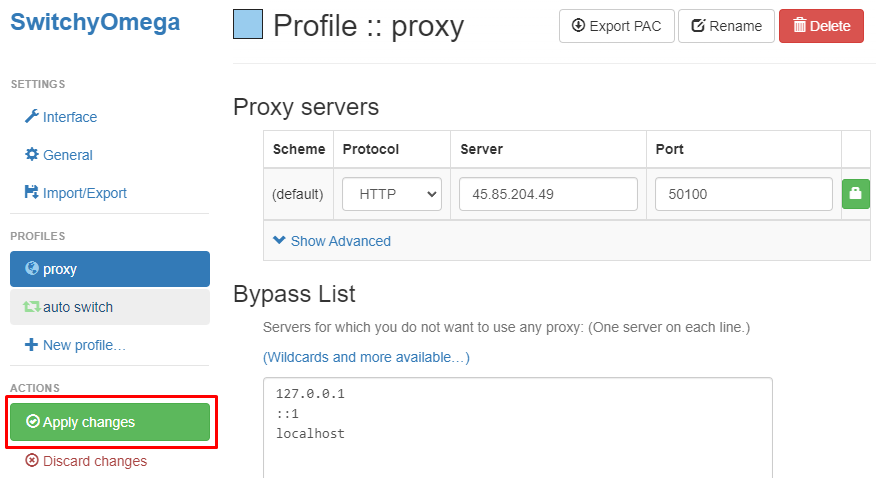
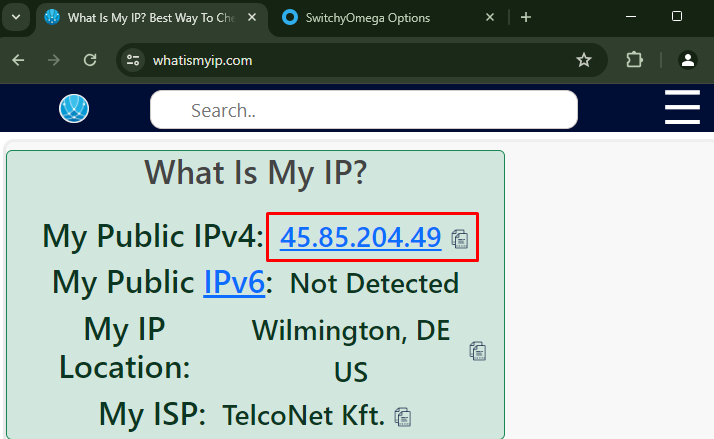
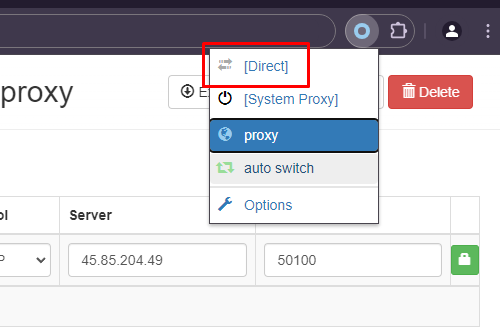
The setup of the proxy server in the SwitchyOmega extension is complete. This extension allows for the configuration of various proxy servers and the ability to switch between them manually or automatically as needed. The advanced functionality of the extension enables users to configure proxies for bypassing regional restrictions and blocks and to manage them conveniently during browser use.
Next, you’ll optimize your proxy setup in Proxy SwitchyOmega.
Start by enabling the Auto-Switch mode to switch proxies based on website rules automatically.
To set rules:
This approach saves time and ensures you use the right proxy automatically.
To configure proxies inside Proxy SwitchyOmega, create new proxy profiles using each proxy’s details, then assign them to auto-switch rules or use them directly.
Here is a key list comparing datacenter and residential proxies:
Protect your proxy profiles and rules by regularly backing them up. You’ll learn how to export and import your Proxy SwitchyOmega settings quickly.
Before any browser or extension update, export your settings to avoid losing your profiles.
Consider using cloud storage like Google Drive or Dropbox to keep backups accessible anywhere. For advanced users, Git can track changes to your profile configurations over time.
This routine ensures you never lose your optimized proxy setup in Proxy SwitchyOmega or any alternative browser.
We recommend Proxy-Seller as a reliable proxy provider for Proxy SwitchyOmega users. They offer private SOCKS5 and HTTPS proxies fully compatible with the extension.
Proxy SwitchyOmega is essential for automated proxy control in your browser. Its Auto-Switch mode ensures you use the correct proxy for every site, eliminating manual switching.
To maintain security, remember two things:
By doing this, you keep your proxy management efficient and your anonymity constant.
Comments: 0