
 en
en  Español
  中國人
中國人  Tiếng Việt
  Deutsch
  Українська
  Português
  Français
  भारतीय
  Türkçe
  한국인
한국인  Italiano
  Indonesia
  Polski
 Eclipse is a popular open-source platform for software development, available for free. It offers a range of benefits, including compatibility across different operating systems like Windows, Linux, Solaris, and Mac OS X. Eclipse supports various programming languages such as Java, C, C++, Python, and more. It's not just limited to software development; Eclipse is also suitable for creating other types of applications and provides numerous APIs for building modules.
To ensure the safe testing of projects in Eclipse and gain access to tools that may be restricted in certain regions, you'll need to configure a proxy. Below, we'll guide you through the step-by-step process of adding a proxy in Eclipse.
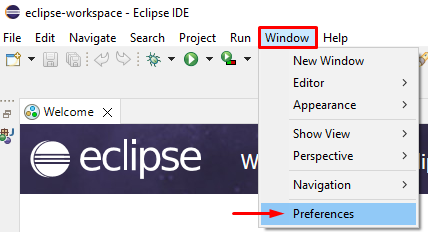
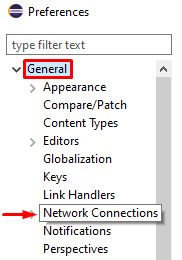
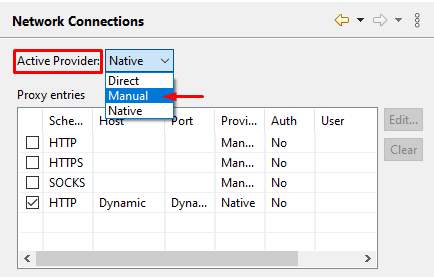
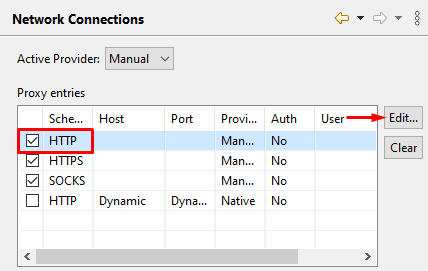
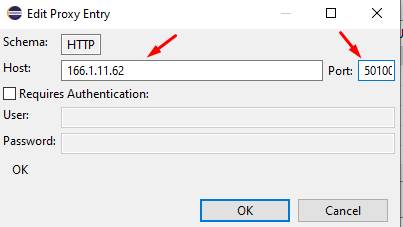
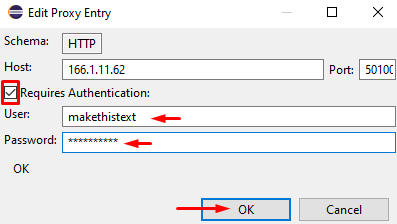
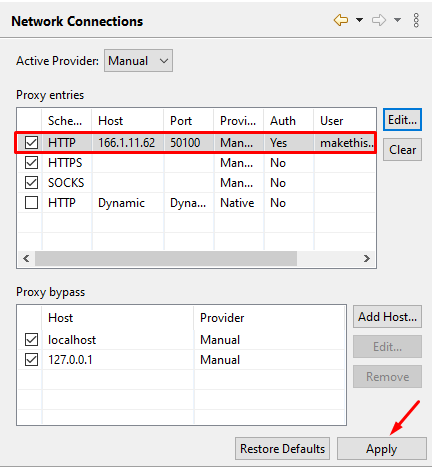
That's it! You've successfully set up a proxy in Eclipse. You can use these instructions to change proxies whenever needed, allowing you to work on the platform securely and without restrictions.
Comments: 0