How to set up and run BlueStacks through a proxy

Comments: 0

BlueStacks is a PC-based Android gaming emulator that enables you to enjoy mobile games on your computer, including popular titles like Pubg and Free Fire. To access games at more affordable prices, maintain anonymity, and overcome regional access restrictions, you can utilize a proxy. In the following section, we provide step-by-step instructions to guide you through the setup and use of a proxy in BlueStacks.

Video guide for setting up a proxy in BlueStacks

Step-by-step proxy setup using Proxifier

Since there is no functionality inside the emulator itself for setting up private proxies, we will install a proxy on the BlueStacks application via Proxifier so as not to proxy the entire operating system.
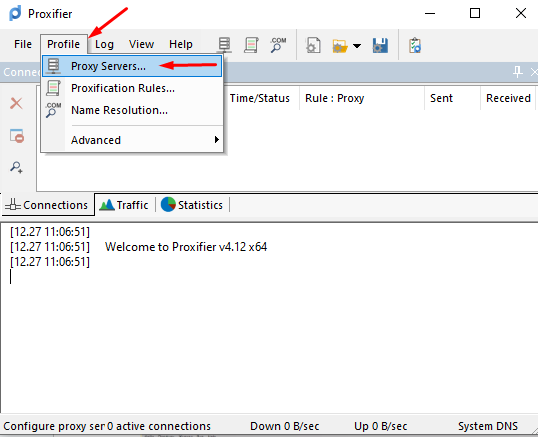
  1. Launch the Proxifier program. In the main menu, locate the “Profile” section at the top panel and click on it. Select "Proxy Servers" from the dropdown menu.

    1.png

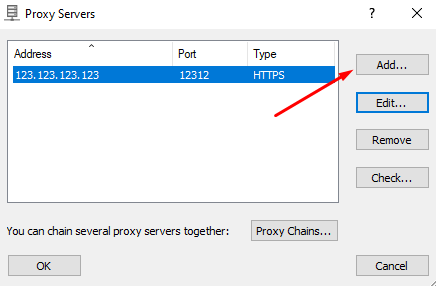
  2. In the pop-up window, click “Add” to create a new proxy configuration.

    2.png

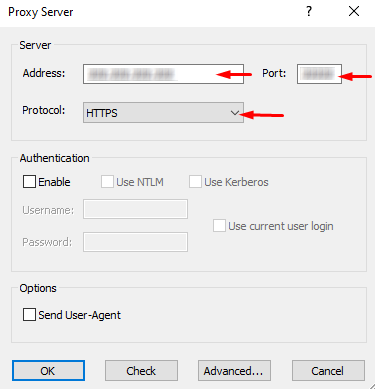
  3. Fill in the proxy settings, including the IP address of the new proxy server, port, and select the proxy protocol type from the dropdown list below.

    3.png

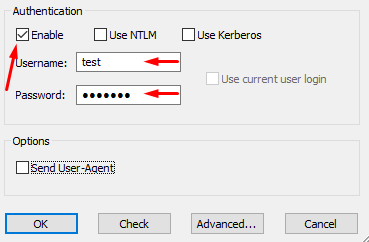
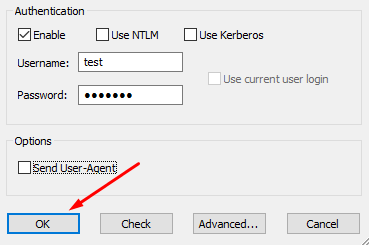
  4. For proxies with authorization, activate the corresponding fields in the same window and provide your username and password.

    4.png

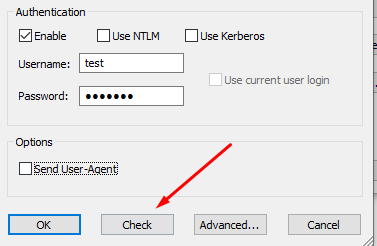
  5. Verify the connection to the proxy by clicking the “Check” button.

    5.png

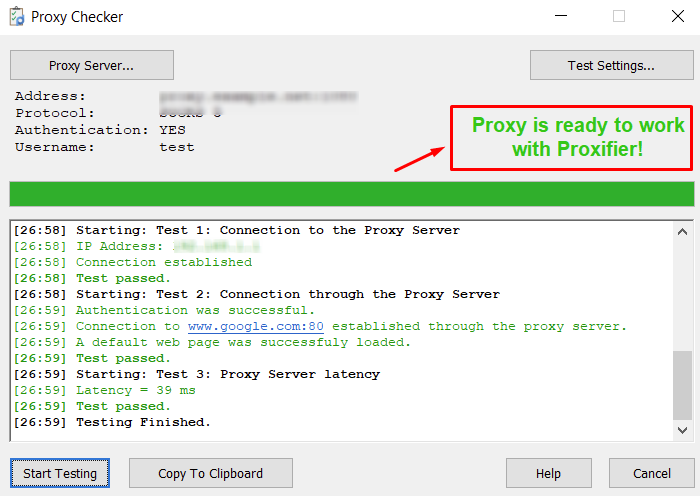
    Upon successful testing:

    6.png

  6. Once all the data has been entered and testing is successful, click “OK”. Return to the program's main menu.

    7.png

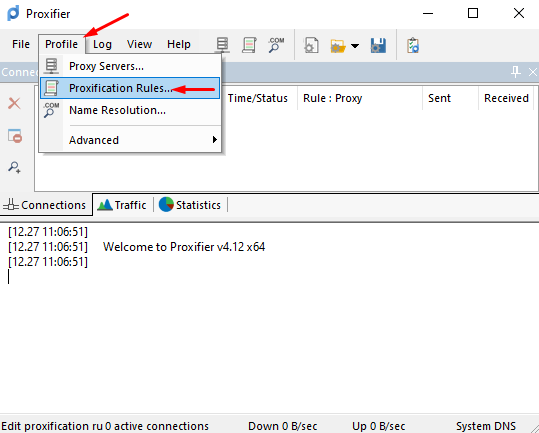
  7. To ensure that the configured proxy is used exclusively with BlueStacks, navigate to the “Profile” section and select “Proxification Rules”.

    8.png

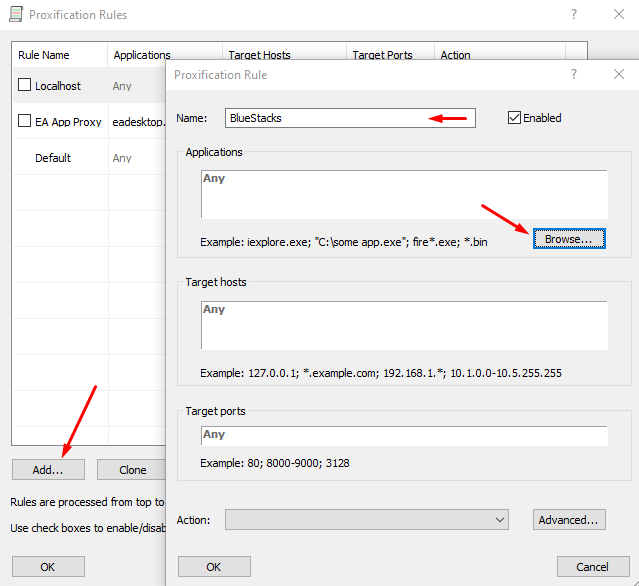
  8. Create a new rule for the proxy by clicking the “Add” button. Give it a name for easier identification and click on the “Browse” button.

    9.png

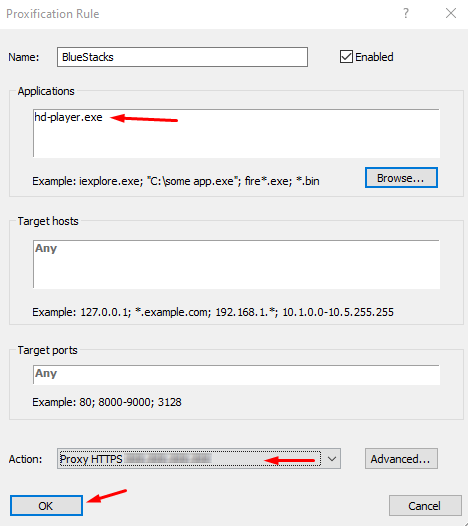
  9. In the opened window, locate the BlueStacks program file (in .exe format) on your PC. Then, select the newly configured proxy from the “Action” dropdown menu and save the settings by clicking “OK”.

    10.png

The setup is now complete, and BlueStacks' network traffic will automatically pass through the proxy server, following the settings specified in Proxifier.

Comments:

0 comments