How to set up a proxy in GSA Search Engine Ranker

Comments: 0

GSA SER (Search Engine Ranker) is a sophisticated link-building tool utilized in internet marketing to enhance the visibility of websites in search engine results, such as Google. Its primary function is to automate content publication for generating feedback, testing search queries, and spreading information about products or services. Here’s a closer look at GSA SER and its advantages:

  • Fully automated backlink creation process: GSA SER enables the creation of thematic backlinks, enhancing their overall effectiveness.
  • Detailed reporting: It provides comprehensive reports on tasks completed, assisting in the analysis of work effectiveness and overall SEO optimization of the website.
  • Support for various proxy types: GSA SER is compatible with multiple proxy formats, including HTTP, HTTPS, SOCKS4, and SOCKS5.

Configuring a proxy in GSA SER allows for the use of private IP addresses, ensuring a stable and secure network connection. This is especially beneficial in maintaining the efficiency and reliability of the link-building process.

Setting up a proxy in GSA for web scraping

Using a proxy in GSA SER is crucial for bypassing restrictions and maintaining anonymity on the Internet, particularly useful for avoiding identification or blocking by search engines or websites hosting backlinks. Here's how to set up a proxy for SEO in GSA Search Engine Ranker:
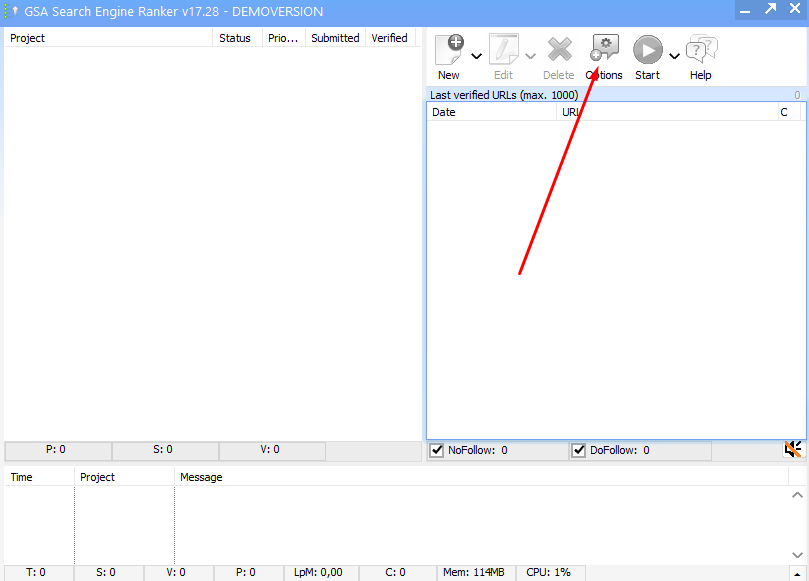
  1. Open GSA Search Engine Ranker and click the “Options” button at the top of the main window.

    image001.png

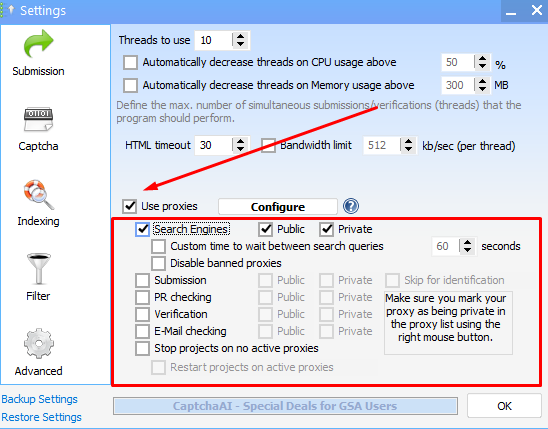
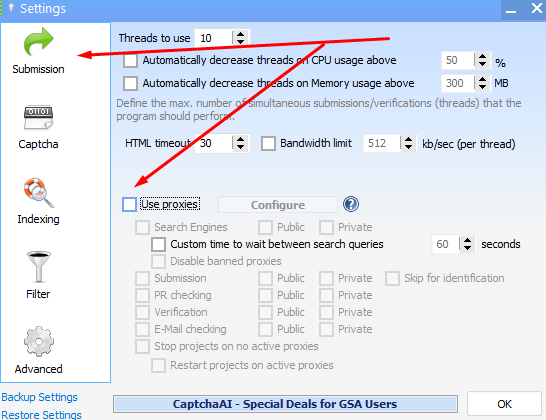
  2. Go to the “Submission” tab and check the “Use proxies” box.

    image003.png

  3. Once activated, additional configuration parameters become available. Here, you can select the purposes for which the proxy will be used, such as website optimization, account registration, and network marketing, among others.

    image004.png

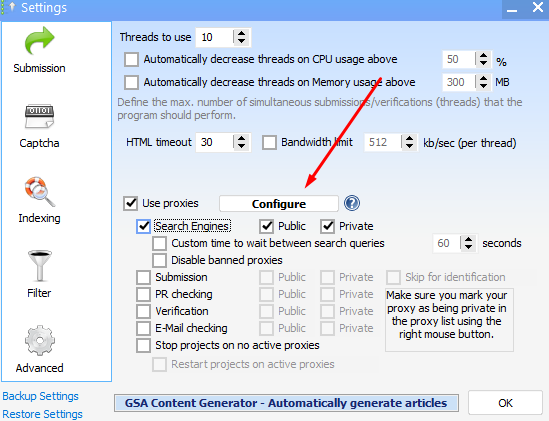
  4. After setting the parameters, click the “Configure” button.

    image005.png

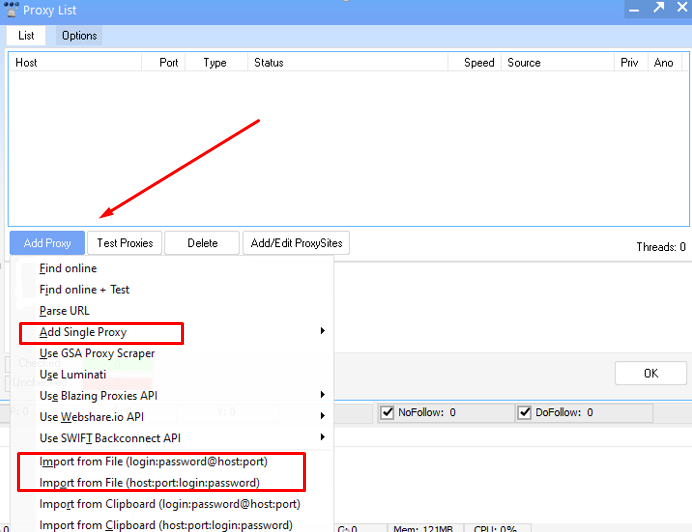
  5. In the new window, click on the “Add Proxy” button. You'll see multiple options in the drop-down menu:
    • “Add Single Proxy” allows for manually or automatically entering one specific private proxy server IP address.
    • "Import from File" lets you upload a pool of IPs from a text file on your PC. Choose the option that best fits your needs.

    image006.png

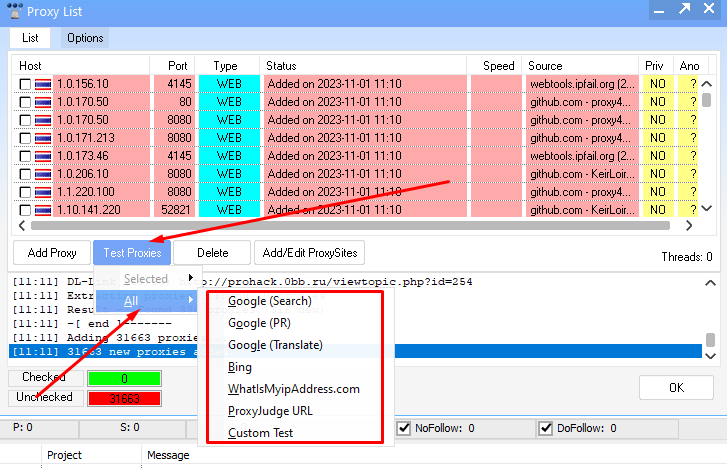
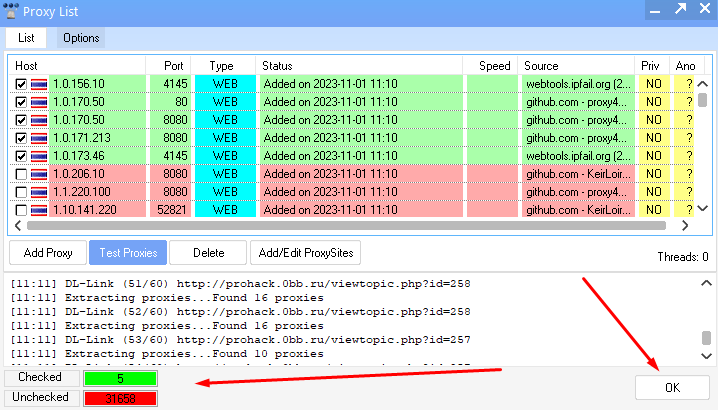
  6. After adding IP addresses, it’s advisable to test them. Click the "Test Proxies" button, then choose either “Selected” to test only chosen IPs or “All” to test all added IPs. In the subsequent context menu, specify the search engine for the connection test.

    image007.png

  7. The program will then display the results of the tested connections. Click the “OK” button to proceed.

    image008.png

Now, you can use all working proxies for various webmaster activities, replace them, check their status, and perform necessary tasks effectively.

Comments:

0 comments