How to set up a proxy in AntBrowser

Comments: 0

AntBrowser is a new anti detect browser that is used to replace browser fingerprints, which makes the work on the Internet unique, allowing you to go online simultaneously with many different types of accounts. This product guarantees confidentiality, convenience and perfect speed connection in any mode of operation.

Proxy value for the AntBrowser

In the fact, each profile in Antbrowser is a separate PC, linking it to a permanent IP through a proxy will make it possible to fully protect yourself from attention, in particular, to secure profiles on Facebook, Instagram, other social networks. For an absolute guarantee of confidentiality and protection of personal data, it is recommended to set one proxy address for each individual profile.

Video guide for setting up a proxy in AntBrowser

Step-by-step proxy configuration for AntBrowser

AntBrowser - is a powerful anti detect browser. Allows you to use multiple account or profiles. If so, then you need a proxy server, isn’t it? Let’s configure this application with proxies.

  1. Open your application, in the personal control panel you will see the menu list. Press the “MY PROXY” button.

    Press the «MY PROXY» button

  2. Now, in this section, press the “+ADD” button.

    Press the «+ADD» button

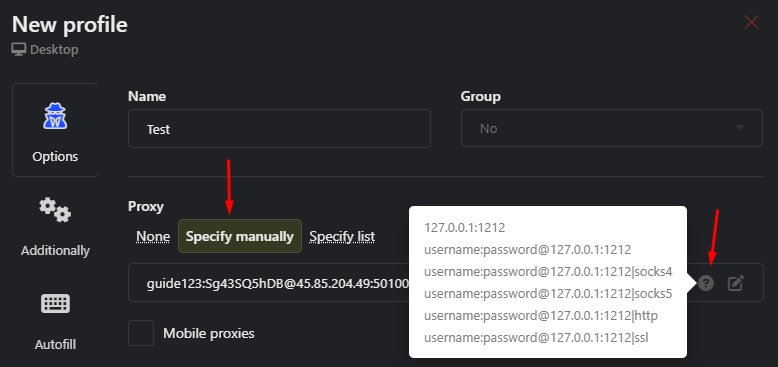
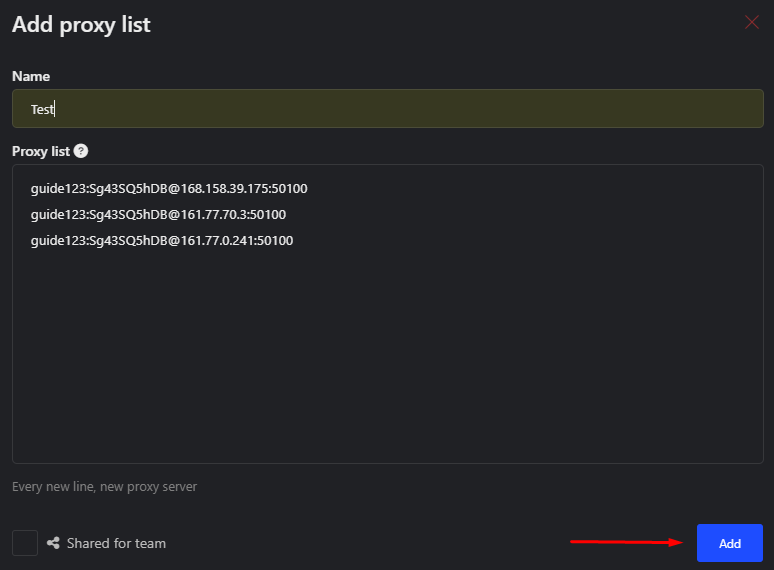
  3. In the newly opened window, you can see the “Name” field, it can be filled with any suitable name. Then you can see the format of proxies as should be put. We will take one of our proxy servers with login and password authentication. We recommend using the Socks5 protocol. Enter your proxy in the required format login:password@ip:port|protocolofproxy and press the “Add” button. Such data of the proxy server can be found in the order submission mail, or in the personal control panel if you have purchased the proxy from Proxy-Seller.

    Enter your proxy and press the «Add» button

    For anonymous AntBrowser usage, Italian proxy will work perfectly.
  4. After this, you can see the successfully added proxy to the list.

    After this, you can see the successfully added proxy to the list

  5. To use this proxy with a profile you need to open the “MY PROFILES” menu.

    Open the «MY PROFILES» menu

  6. Press the “+New profile” button.

    Press the «+New profile» button

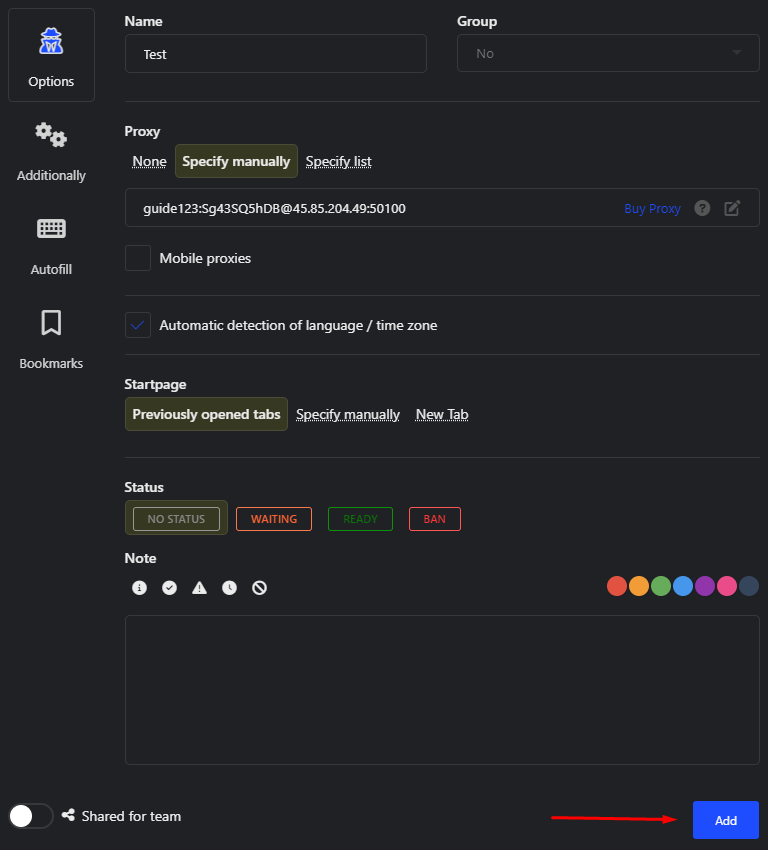
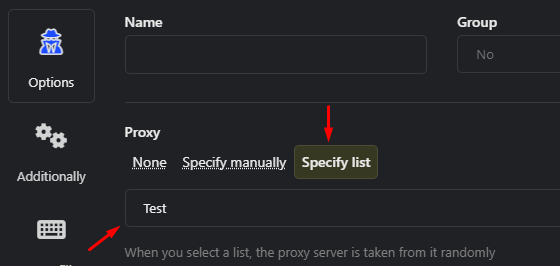
  7. In the newly opened window, choose the “Specify list” and choose your added proxy profile name from the drop-down box. Then, configure all the settings you will need in the future and press “Add”.

    Choose the «Specify list» and choose your added proxy profile name from the drop-down box. Configure all the settings you will need in the future and press «Add»

Proxy settings for AntBrowser are done and proxies are ready to use.

Comments:

0 comments