
 en
en  Español
  中國人
中國人  Tiếng Việt
  Deutsch
  Українська
  Português
  Français
  भारतीय
  Türkçe
  한국인
한국인  Italiano
  Indonesia
  Polski
 Fraud detection systems of social media, advertising campaigns, and online marketplaces do analyze device parameters, geolocation and browser digital data. Their aim is to detect suspicious activities which pose enormous problems for multiple account users such as arbitrageurs, SMM specialists, and online businesses. In order to circumvent these issues, antidetect browsers are required.
Dicloak is an antidetect browser, a type of software that allows its user to create separate profiles with unique digital fingerprints as if they were operating from different devices. It is perfect for arbitrageurs, marketers, SMM experts, and anyone else who manages several accounts where anonymity is a must.
This article provides information about Dicloak’s features, its most notable benefits, and the ways in which it can be maximally utilized. The review also contains information on how to create a new profile and configure proxies.

Among all available antidetect browsers, professionals seem to prefer Dicloak more than the others because of the unique features it possesses relative to other options. Let’s take a closer look at the pros and cons of Dicloak.
Benefits of antidetect browser Include:
Another benefit of the Dicloak browser that stands out is its diverse payment models that cater to both the most basic functions and more complex tasks, allowing for increased usability across the board.
Between the two extremes of convenience and security that comes as a technical trade-off, users may have to remember some possible challenges before fully using the software. One of the trade-offs of security measures is reduced speed, which largely comes down to the quality of the proxy chosen. Unstable servers may slow down the user experience by causing delays in page load times. To combat this, paid proxies will always trump free ones, as they will help ensure that the proxy is fast and reliable. On the other side of things, there is always the risk of instability in conjunction with heightened security modes that some browsers like Safari have come with. Some versions of Firefox, for instance, will block scripts from outside sources, making things quite difficult. Highly protected sites like Google, most banking sites, or Cloudflare also add complexity to simple tasks like making accounts on them.
Features offered by the Dicloak antidetect browser will help users tackle target areas for safe browsing and management of many accounts with impressive levels of precision.
Dicloak’s open API allows users to automate tasks via scripts or integration with corporate systems. This is helpful for arbitrageurs who have to set up a lot of accounts at once.
For instance, Dicloak API can be leveraged by arbitration teams to set up advertising accounts in bulk which saves a lot of time and reduces the risk of errors during the setup process.
The additional features of Dicloak include the profile management, which adds to the security level:
Now, we will take a close look at the primary functions of this antidetect software.
Managing various accounts can take a lot of time. However, with the automated login feature on Dicloak, this process can be greatly simplified.
When a profile is loaded, the browser saves the logins, passwords, and cookies, and uses them when the profile is relaunched. This feature minimizes the time used for authorization when managing dozens or even hundreds of accounts, and reduces the chances of people misremembering passwords.
Dicloak ensures the management of multiple accounts at a time without having to worry about their security.
Main capabilities:
Indeed, these functions greatly enhance the safety and ease of managing several accounts at once.
With one of Dicloak’s special features, users can set a profile for accounts with different digital fingerprints.
What is included in the setting?
More importantly, when interfacing with anti-fraud algorithms that are often imposed by significant security measures, profile identity is undetectable due to each parameter being specific to each profile.
RPA (Robotic Process Automation) is an additional feature incorporated into Dicloak's antidetect browser that allows users to automate some repetitive processes of managing accounts. The browser includes an extensive library of templates and allows users to build their own scenarios designed for efficient execution of mundane tasks.
Fully robotic processes of automation that can be performed seamlessly include:
Through DIcloak, RPA users are able to greatly increase output and productivity by automating monotonous work tasks while also being able to devote more attention to crucial aspects of the business.
Dicloak has a choice from a list of distinct pricing plans that give users access to almost all features of the platform with limitations varying in the number of additional profiles and their features.
This starter plan is best suited for a single user as it only supports 5 profiles with no extra payment needed. Users can run profiles 15 times per day at maximum and can link up to 3 extensions. Users have access to the setting of all the basic features such as digital browser fingerprinting and proxies, profile creation, cloud accounts, etc. This plan is great for technology novices wanting to take advantage of the perks of Dicloak.
An affordable plan for $8 per month. This plan allows for up to 50 profiles and a maximum of 1000 profile launches daily. The number of connectable extensions is increased to five. It also includes batch import, export, cloning of profiles, and restoration of deleted data. The plan allows working in a team of up to three people, and additional members can be added at $1 each.
An advanced plan on $138 per month. It enables unlimited users, provides up to 200 profiles, and does not limit the number of profile launches daily. Alongside “Share+”, team management features are incorporated such as shared and assignable profiles and internal multitasking. This is the best solution for professional working groups.
A moderately priced plan on $15.84 a month that allows for 100 profiles, 50,000 launches a day, and 100 connectable extensions. Along with bulk profile management, cloning, importing and restoring profiles. This offer is suitable for users who are in need for some performance of the program and flexibility in its use.
This plan is affordable at $5.50 a month and is best for small-scale businesses. Starter plan offers up to 30 profiles, which means 30 users can make unlimited launches each day. Using this plan, up to 50 extensions can be added. Fingerprint settings and profile editing features are also included in the plan, proving its effectiveness for freelancers and small businesses.
This plan costs $9.90 per month and offers up to 60 profiles. Unlimited profile launches per day are also included. This balance plan allows users to add up to 50 extensions, making it a suitable choice for smaller businesses. Profile restoration and cloning is also available with this plan along with access to cloud data.
The advanced plan caters to professional users and teams, costing $13.75 per month. This plan supports 100 profiles, unlimited daily launches and automation features like RPA and API. It is effective for seasoned professionals working on large volumes of data.
Custom plans are tailored for large businesses and can be priced based on the user's requirements. These plans support a maximum number of profile launches, users and other participants too. Features available with the previous plans are still included, but with the aid of a dedicated manager who handles setup and support.
| Plan | Free | Share | Share+ | Plus | Starter | Premium | Advanced | Custom |
|---|---|---|---|---|---|---|---|---|
| Monthly cost | $0 | $8 | $138 | $24.48 | $8.50 | $15.30 | $21.25 | Individually calculated |
| Number of profiles | 5 | 50+ | 200+ | 100+ | 30 | 60 | 100 | Customizable |
| Number of participants | 1 | 3+ | ∞ | 1+ | 1 | 2 | 3 | Customizable |
| Profile launches per day | 15 | 1000 | ∞ | 50 000 | ∞ | ∞ | ∞ | Customizable |
| Connected extensions | 3 | 5 | 100 | 100 | 50 | 50 | 50 | Customizable |
| Team management | — | + | + | + | — | + | + | + |
| RPA automation | — | — | + | + | + | + | + | + |
| Open API | — | — | + | + | — | — | — | + |
| Window synchronization | — | — | + | + | + | + | + | + |
Discount percentages of 45% are provided for those subscribing to Plus, Starter, Premium, and Advanced plans on an annual basis.
The dicloak browser interface has been set up in such a way that all users are capable of working with multiple features at once seamlessly. Its arrangement and layout makes finding tools and customizing the browser for particular activities very easy.
The main sections of the browser are logically divided: profiles, proxies, anonymity settings, and extensions management are organized in separate sections of the interface.
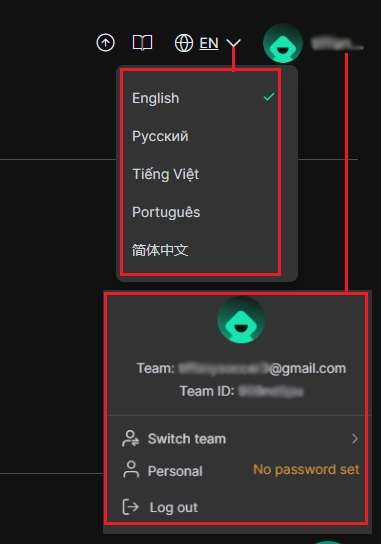
The upper right corner contains a panel for notifications and a link to the Dicloak help center page on the website. Users can change the language of the help section to English, Chinese, or Portuguese. Next to the user’s name is a drop down menu with the team ID and settings, allowing the user to change authorization information and log out.
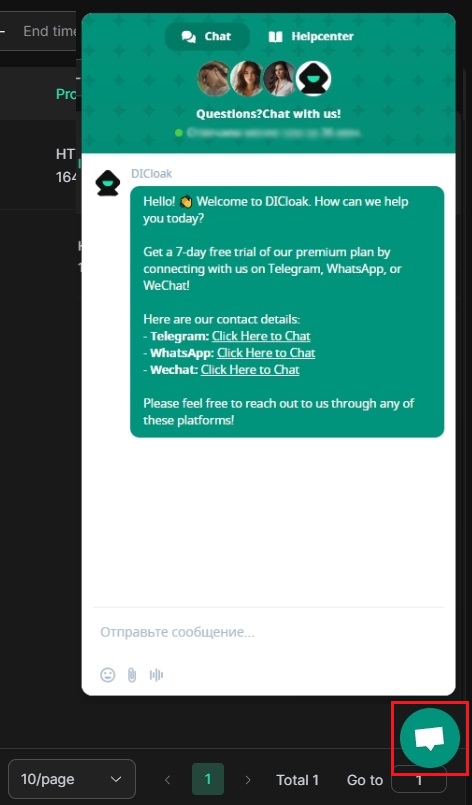
In the lower right corner, there is a support icon, from which the user may choose to have his question answered by a support representative or to search for more frequently asked questions in the “Help Center”.
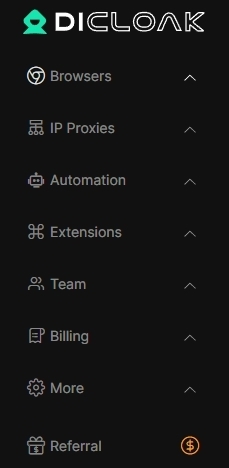
Now let us examine the interface of the browser in more detail.
This section is composed of three subsections: “Profiles”, “Groups”, and “Trash”.
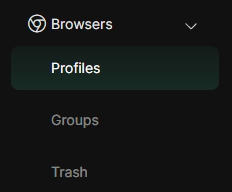
When logging in to the browser, a profiles page is displayed, which contains a creation button at the top and displays the total number of created profiles and accounts that have been launched.
In addition to the standard opening of a new profile, the “Create Profile” option allows the user to select “Batch import”, “Batch create”, or “Batch update”. There's also “Share management” and “Transfer log” which allow for teamwork.

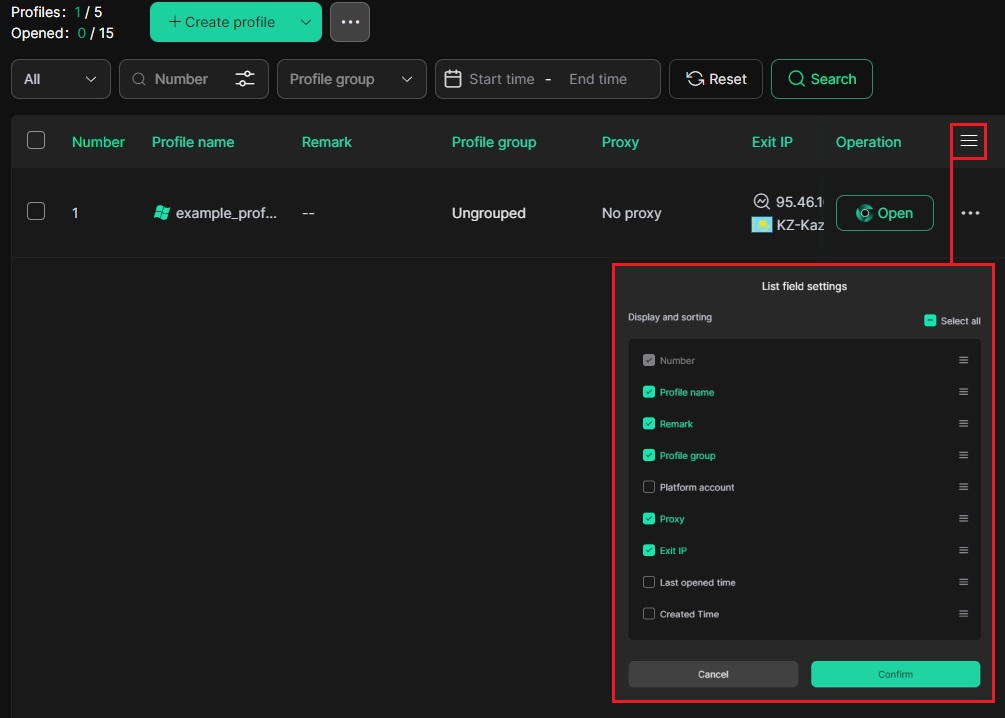
Each of the profiles is represented as a card containing basic information: name and number, connection status, proxy server and others. Above it, there is an option to filter profiles using specified criteria. Columns can be altered according to your requirements by clicking on the three horizontal stripes in the upper right corner.
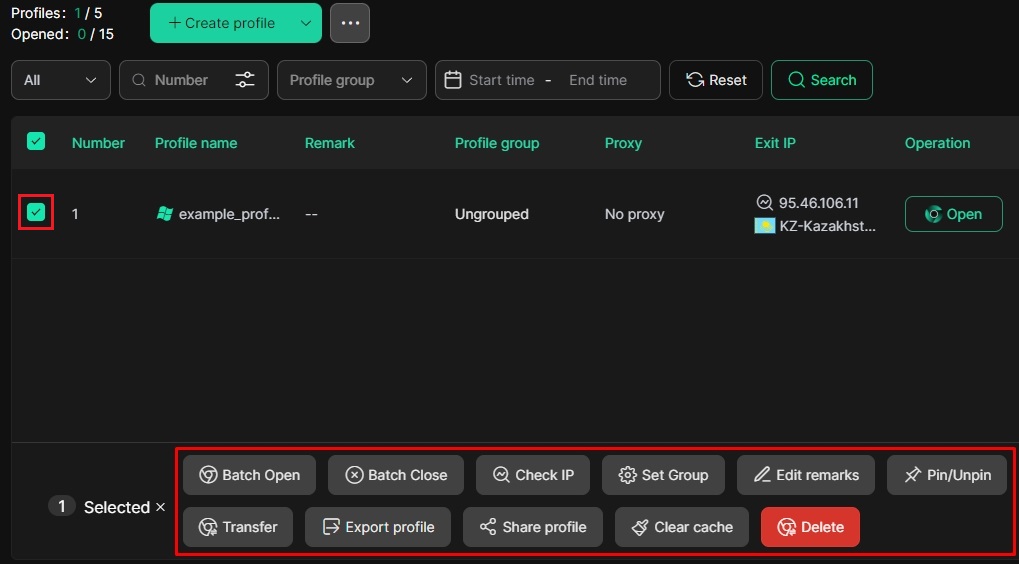
On selecting profiles, tools for bulk opening and closing, deletion, transferring, grouping, issuing an IP address, and other admin functions will appear at the bottom of the window.
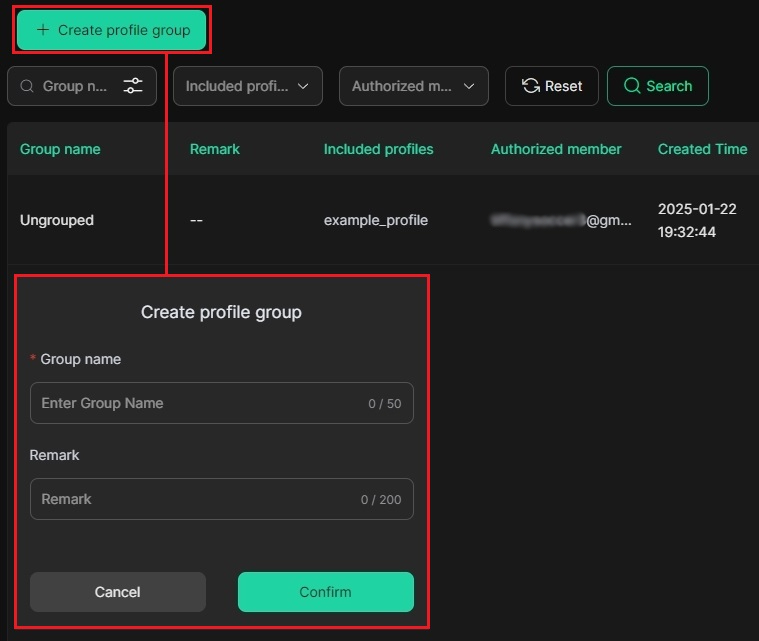
On the “Groups” tab, to facilitate the allocation of profiles, there is a button “Create profile group”. There is also group information (group name, date of creation, owner, etc.), as well as filters for fast information retrieval.
Deleted profiles can be viewed on the “Trash” tab. These can be restored within a month, after which they will be lost permanently.
To restore or delete profiles, press the corresponding buttons at the bottom of the window. This feature can be accessed through all payment plans apart from the “Free” plan.

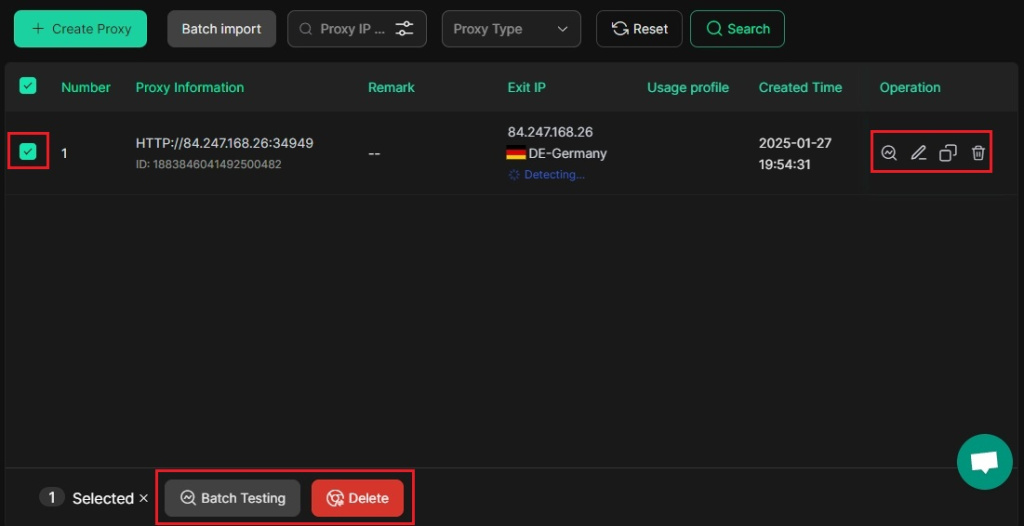
Users are able to create and import proxies in bulk, along with filters for quick searches under the “IP Proxies” tab. Additionally, you will find a separate section within this area.
The information about a specific proxy will be available. Furthermore, information with functionality checks, copy, edit, and delete options will be enabled. When a specific proxy is selected, batch testing and deletion buttons can be found at the bottom most part of the screen.
In this section, functionality is further categorized into three tabs, namely “Synchronization”, “Task”, and “Process”. Users that have the “Share+” plan or higher will be able to benefit from this feature.
On the other hand, users can simultaneously manage multiple browser windows from the “Synchronization” tab which is a very handy feature for users that work in automation, mass accounts, or other multitasking processes. It allows the work stream to be sped up because of the reduced need to repeat the same task in every window.
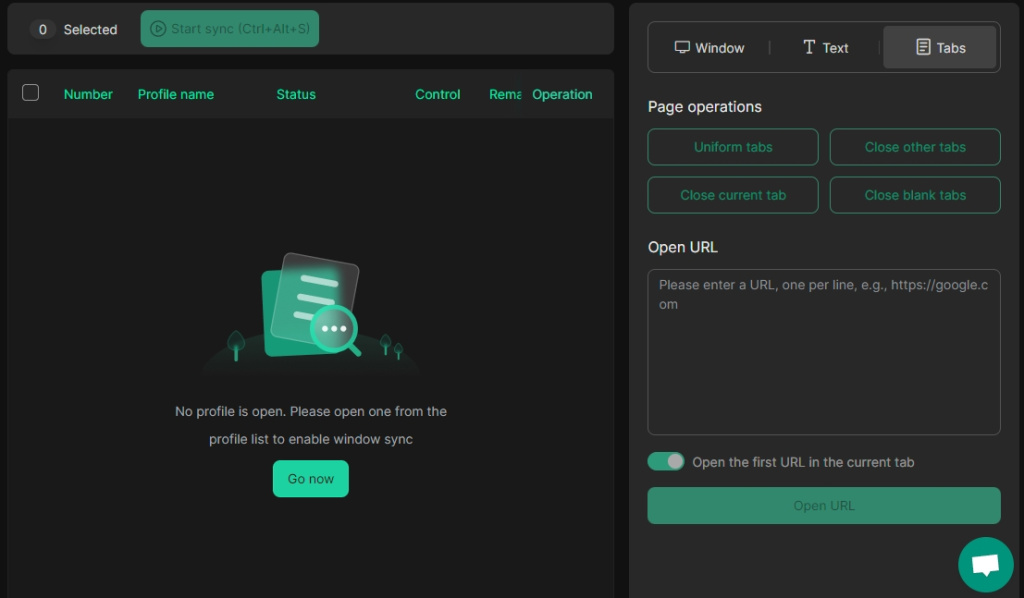
The “Tasks” tab is associated with automation. It is meant for the development, implementation, and supervision of automated operations. Its features include executing RPA scenarios and action synchronizations, or carrying out tasks set up by the user.

The “Process” tab contains the Automa tool, which the users can use for specifying and supervising automated processes (RPA). It enables the creation of scenario-based automation for tasks such as data gathering, automatically completing forms, and multi-accounting.
For effective work, users are provided with the tools for quick access to Automa, documentation, video training materials, and support chat. This enables quick familiarization with the functions of the program. Due to its flexible configuration possibilities, Automa can be used for a wide variety of tasks ranging from routine operations to complex workflows with external systems.
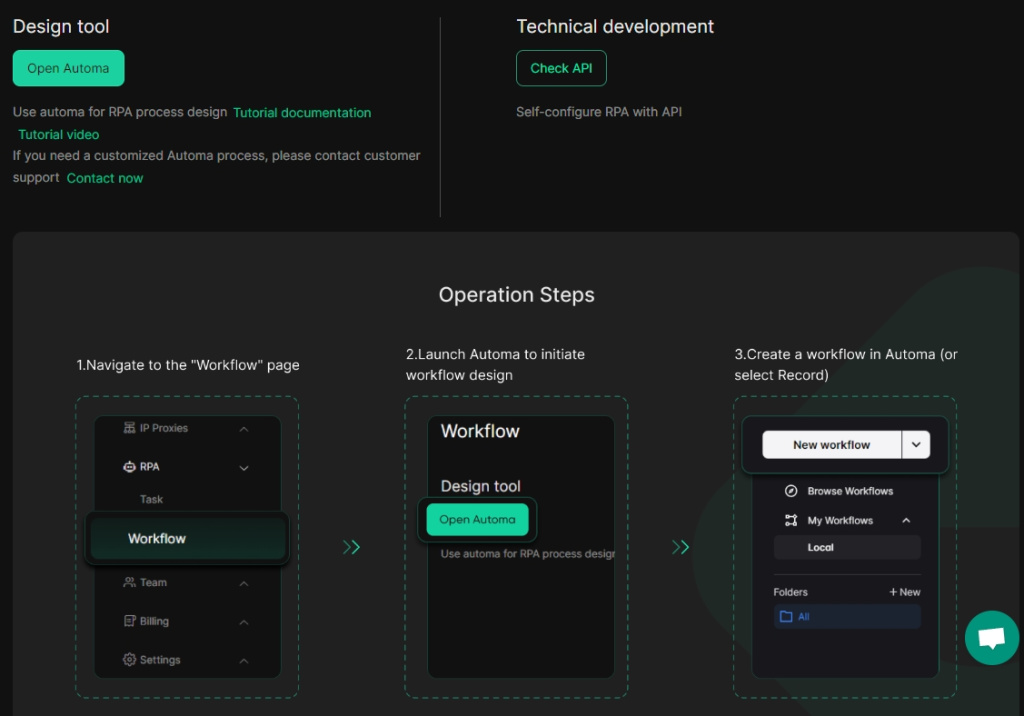
With Automa, users can now create processes free from programming complexities and focus instead on what matters most designing the process itself.
Users can start creating a new workflow or editing an existing one, and then combine automation with other systems through API. To get the needed information, press the Check API button. A page containing relevant instructions and links to further documentation will open. Users can also create an API key by pressing the “Generate Now” button.

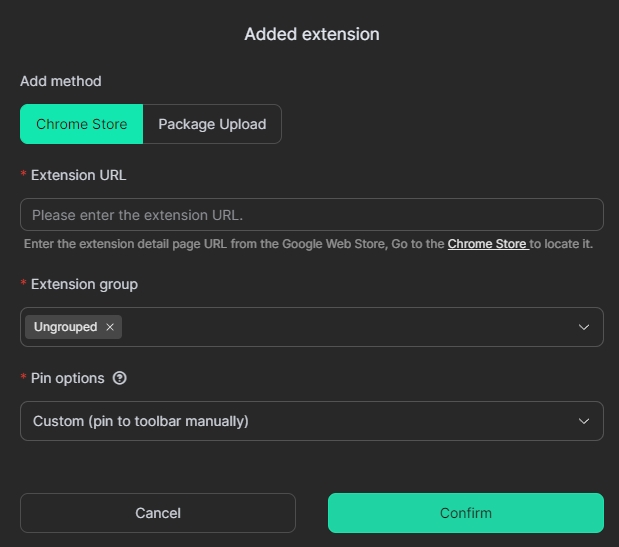
This tab allows users to add and manage extensions that can be utilized within specific profiles or workflows. It enables the uploading of extensions from the Chrome Store using a designated URL or from the user’s computer directly. There is also support for categorization of extensions which aids in managing them under specific projects or activities.

In the window for adding extensions, you can select the method of downloading via URL, group classification, and pinning of the extension to the browser toolbar for easier access.
In the collaboration of team work, there is a set of sub pages called “Members”, “Groups”, and “Operation log”.
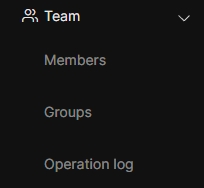
These pages enable the arrangement of team work, setting of access privileges, and monitoring of user actions.
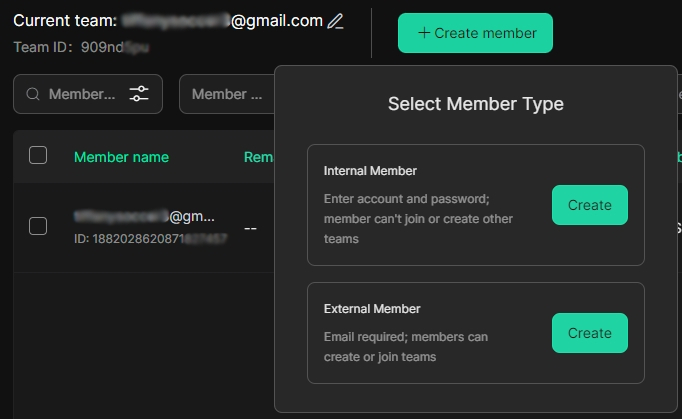
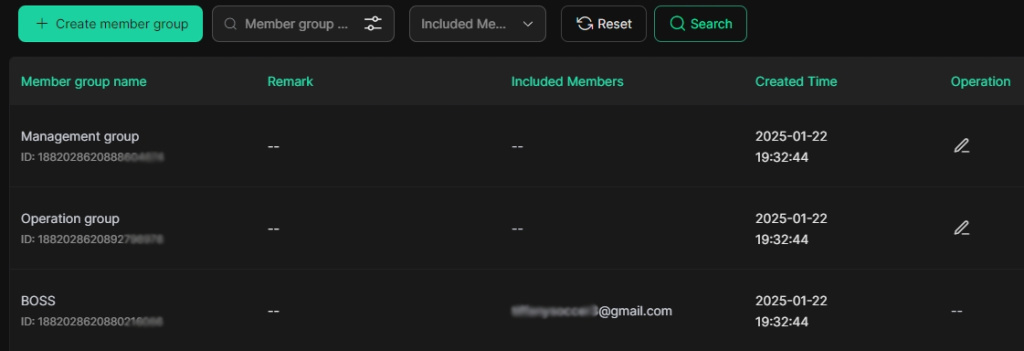

Utilize filters to streamline the search process for specific records. Manage work with your group through convenient management tools.
The “Billing” tab is for changing active tariffs, checking resource consumption, and selecting the most advantageous package of services.
The top section shows the current tariff, the fee charged for it, the period of validity, and some usage information like the number of profiles, users, and active sessions. If, however, you want to increase these limits, you can do so via the “Change” button.
Beneath are shown the various tariff plans available, along with the description of their respective features and costs.
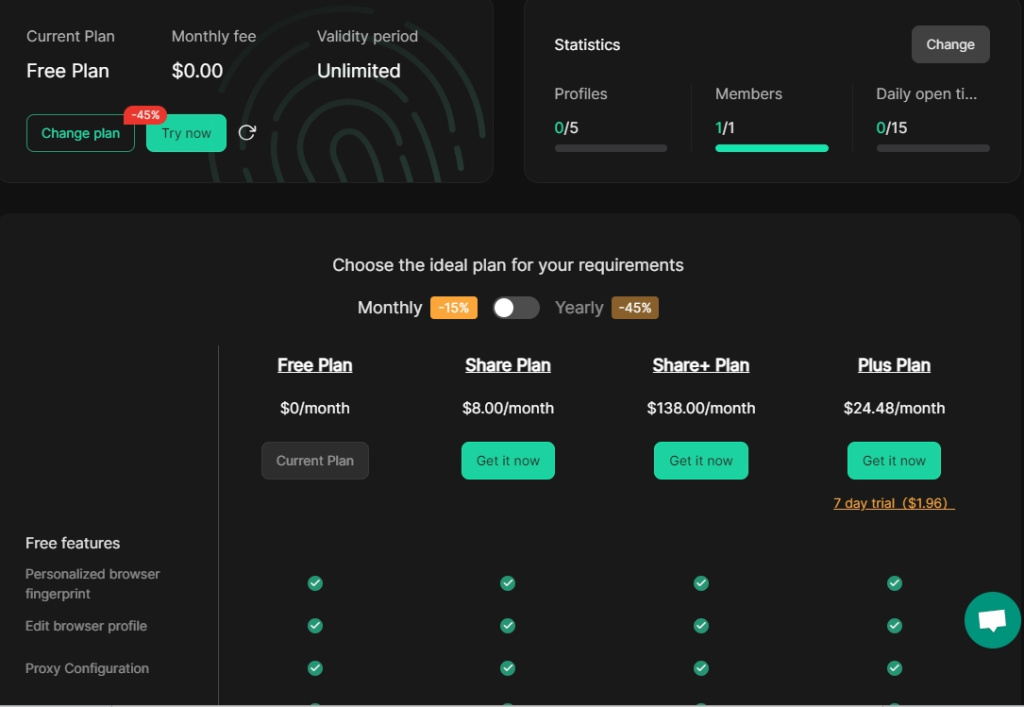
Here there are two tabs: “Configuration” and “Open API”.
On the “Configuration” page you will find settings for both global and personal parameters that govern how the browser works.
Setting the basic parameters for how the browser works is done in “Global settings”:
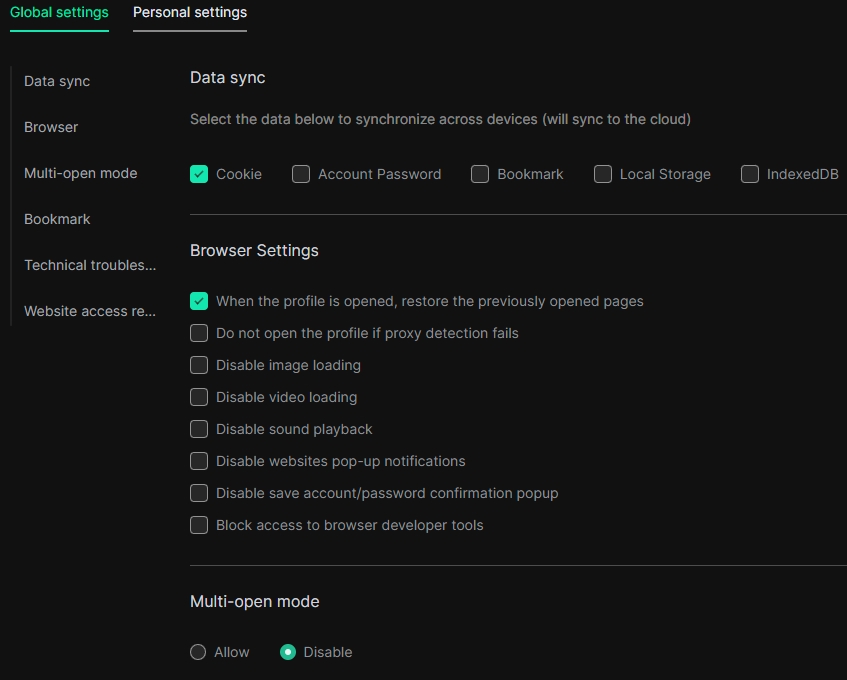
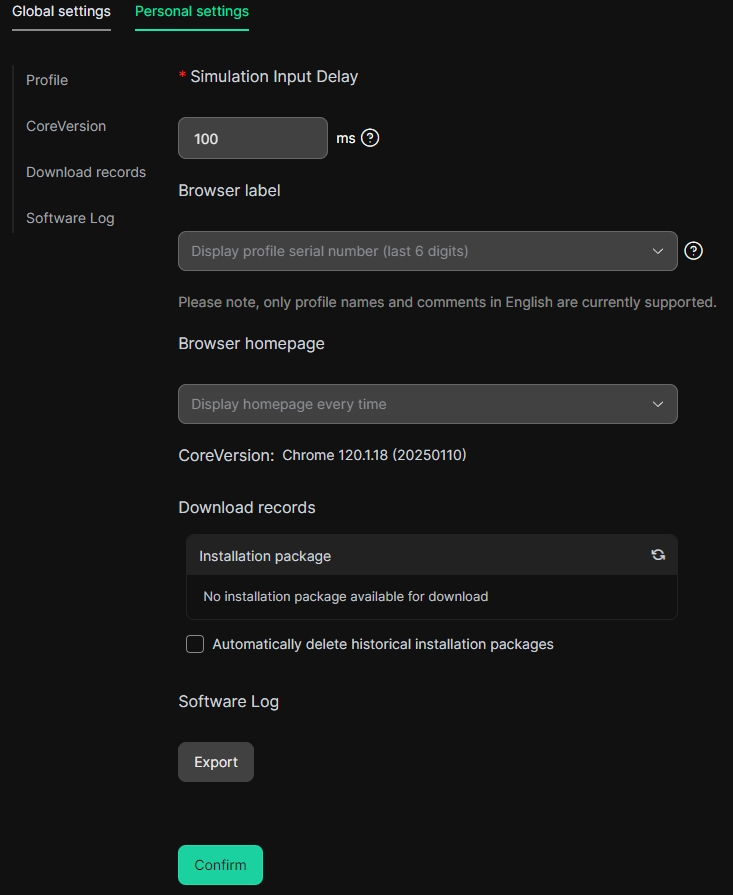
In the “Configuration” tab under “Personal settings”, there are dedicated controls for handling profiles and their use of the browser.
Installation packages of the program can be administered from the “Download records” section. To improve space, it also provides for automatic removal of older packages. Here, you can also export a software log that corresponds to the user’s needs, containing the logs intended for program performance analysis or troubleshooting.
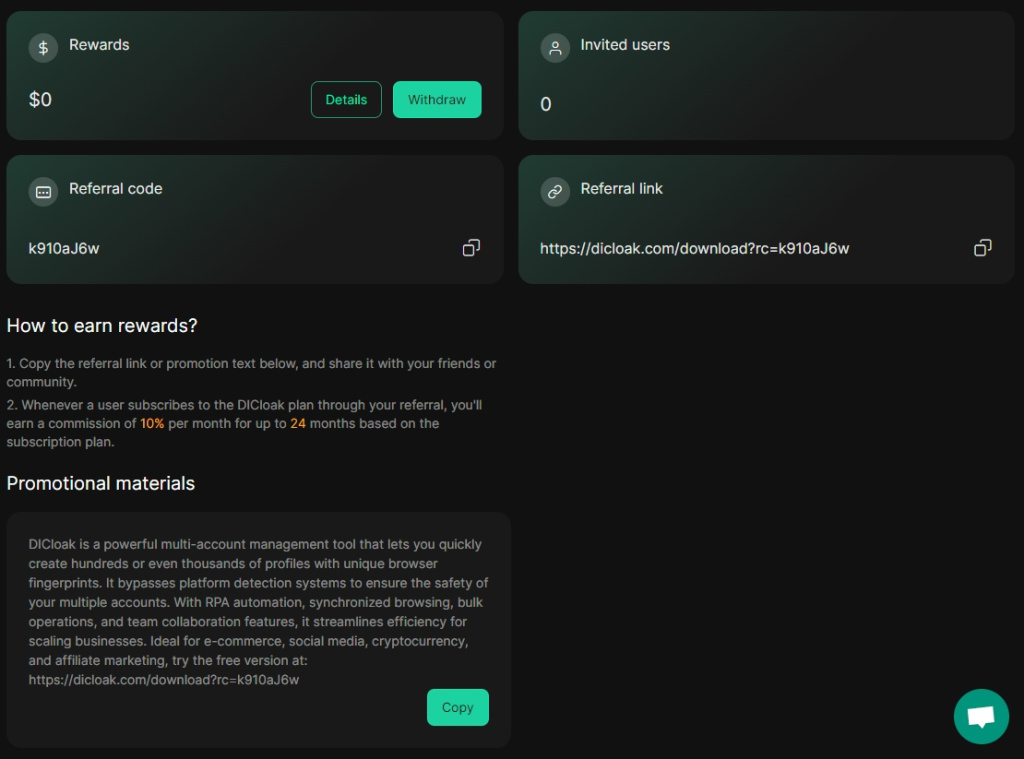
This section is centered on managing the referral system of the browser, which allows users to earn rewards when they bring new clients to the company.
The interface consists of several sections, with the most pertinent ones at the top, including:
Participants will receive a 10% commission for every payment done by the client referred by them. This period can last up to two years based on the subscription.
Social media, messengers, and all other outlets can utilize the text templates and a link provided in the “Promotional Materials” section.
How to set up a proxy and create a new profile using the Dicloak browser.
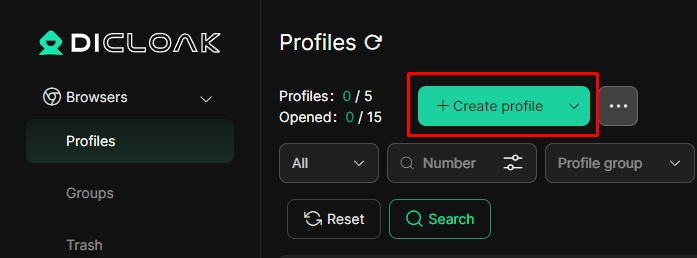
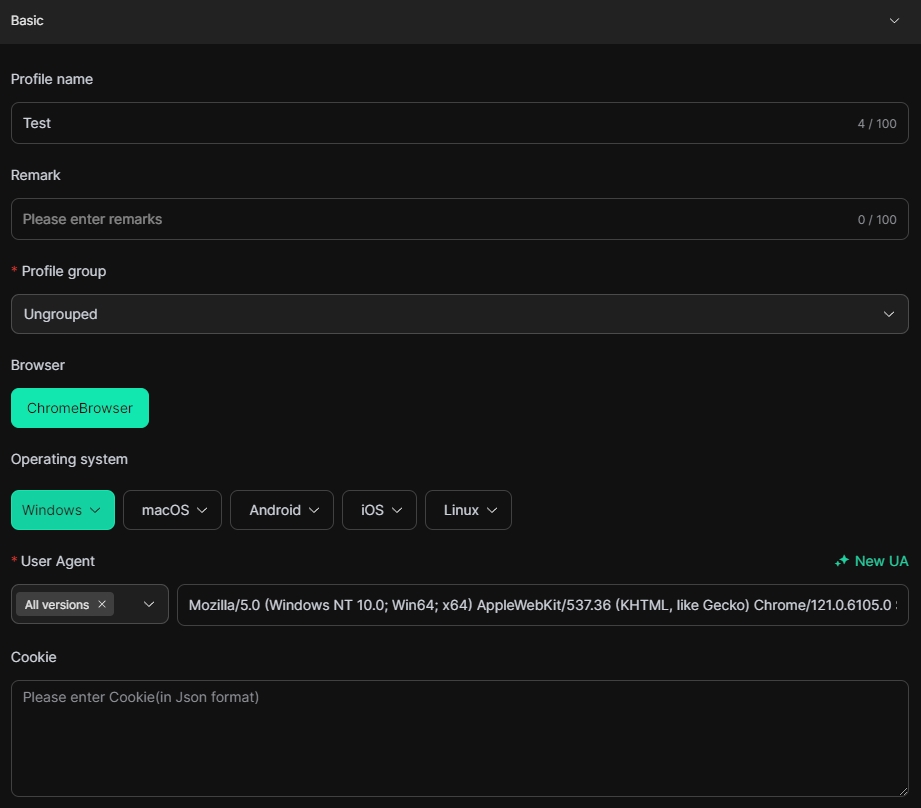
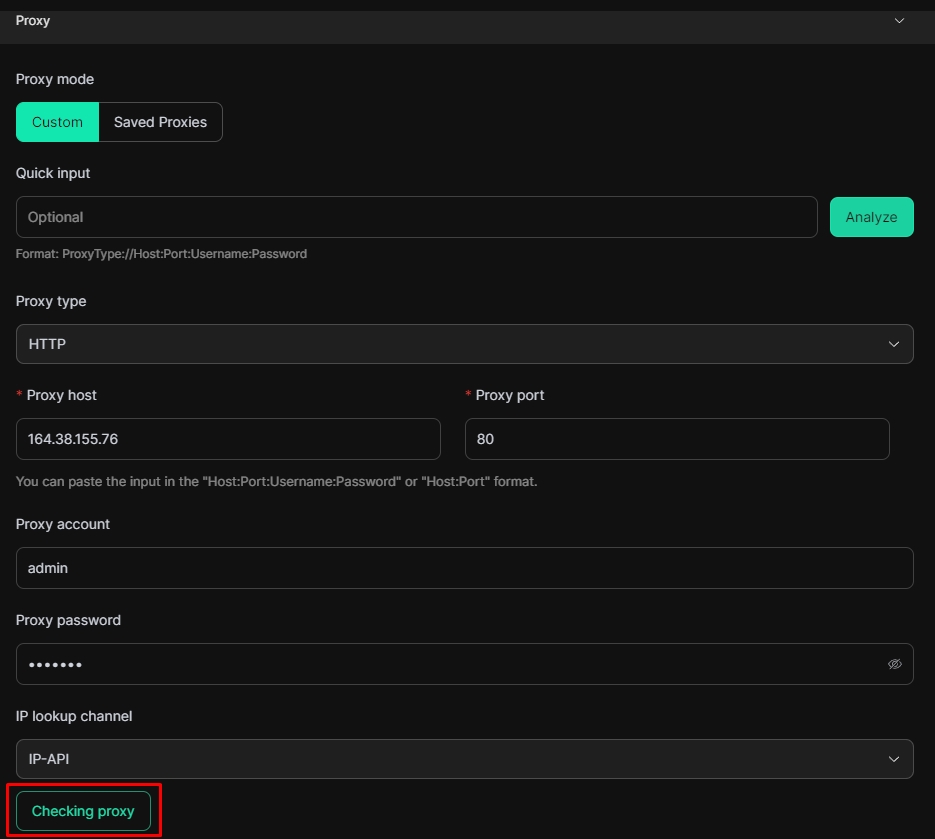
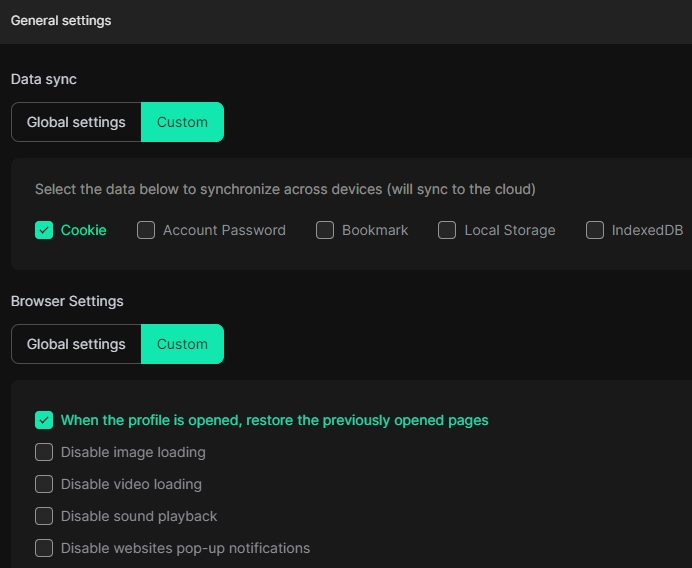

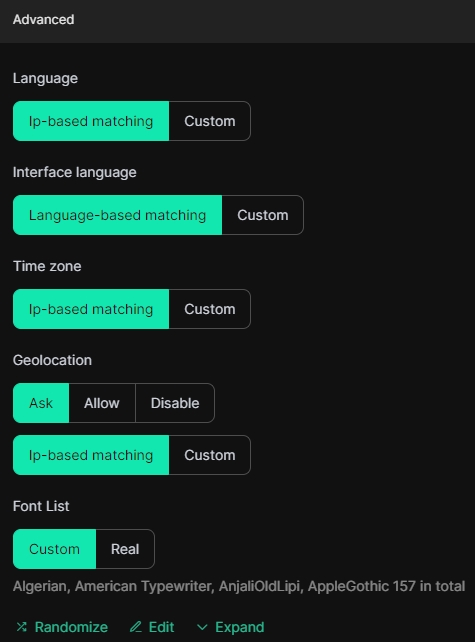
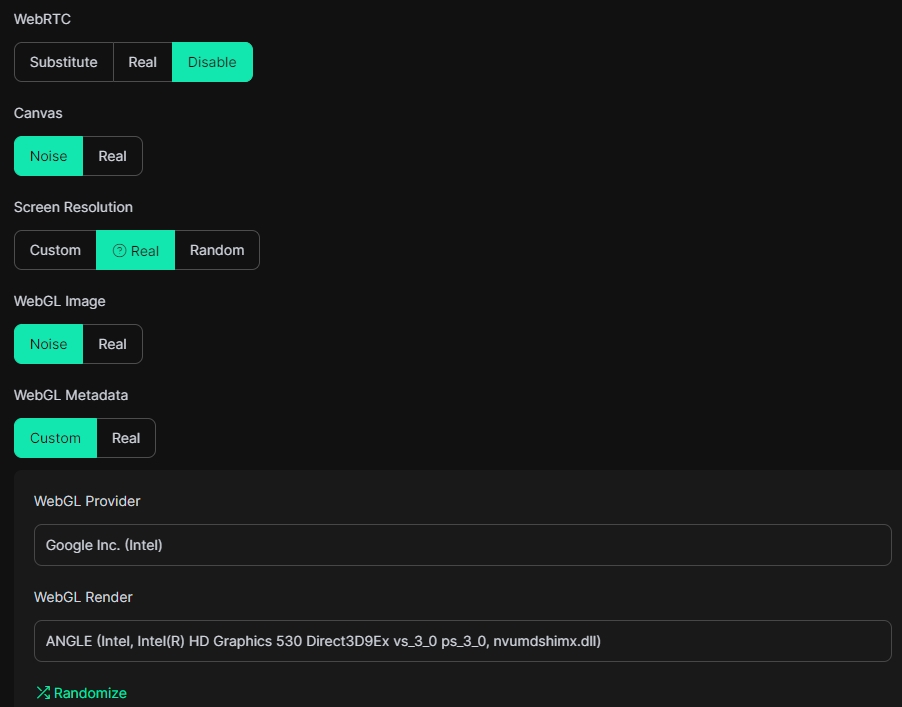
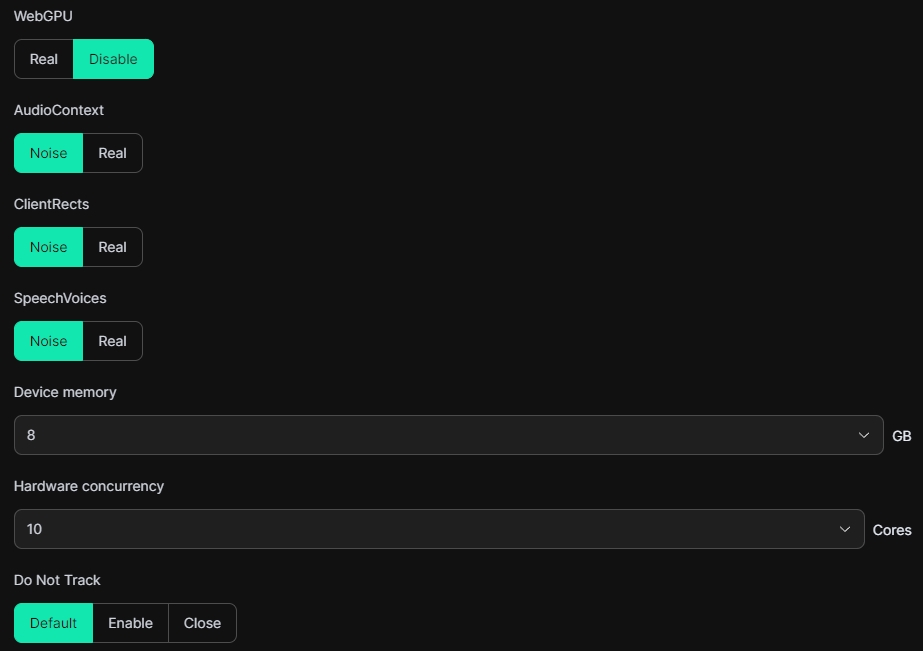
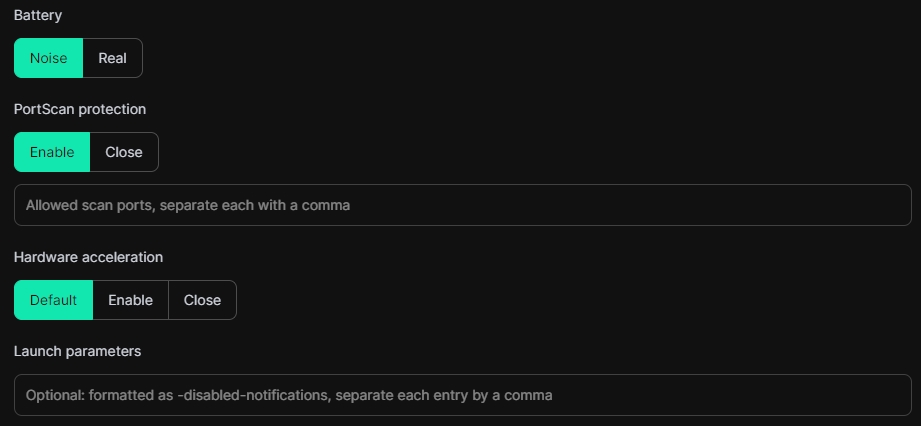
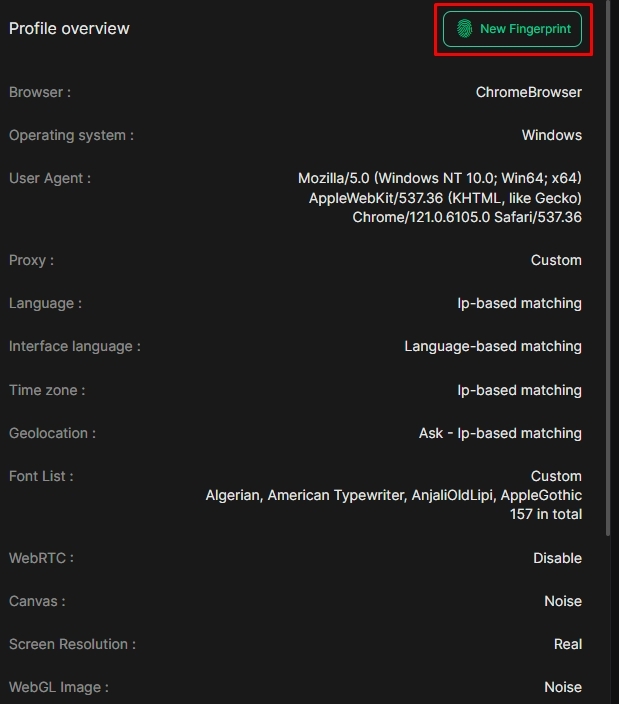


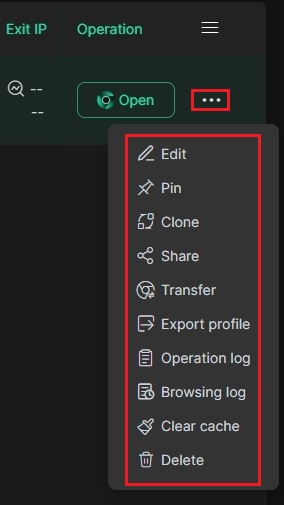
By clicking the three dots to the right, the profile management menu opens. It is possible to edit the profile, clone, delete it, share it, transfer it, clear the cache, and so on.
The proxy configuration within Dicloak facilitates a unique approach to managing connections for different purposes. Apart from the traditional methods of adding and configuring proxies, the tool also allows for the “Batch import” method. This one works with a template as well, which can be downloaded. It contains IP address, port, username and password. Once the file is fulfilled, the system will allow the template to be uploaded, and all the proxies will be added to the configuration automatically.
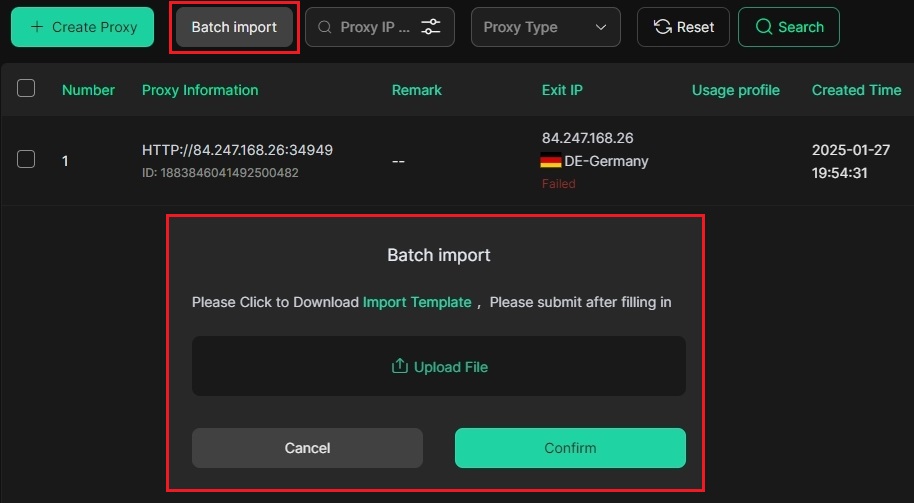
Indeed, this is quite a useful feature when dealing with a large set of proxies since it increases the speed of the process while minimizing mistakes when it comes to setting the proxies manually.
Dicloak browser is a tool for safe anonymous surfing on the internet and allows easy management of multiple online accounts. It is able to create fully separated user profiles with unique digital fingerprints, has proxy server integration, and offers automation via RPA tools which makes it much harder for anti-fraud systems to block or identify accounts.
Well-thought-out systems of settings are one of the main advantages as they provide a range of configurations that can be tailored to each profile. Simple external service integration is available due to flexible fingerprint management, automatic account login, and API support.
It’s useful for both individual and collective work because of advanced automation features and flexible pricing plans.
Comments: 0