 en
en  Español
  中國人
中國人  Tiếng Việt
  Deutsch
  Українська
  Português
  Français
  भारतीय
  Türkçe
  한국인
한국인  Italiano
  Indonesia
  Polski
 Waterfox is an anti-detect browser designed for secure web surfing, based on the open-source Mozilla platform. It supports operating systems such as Windows, Linux, and MacOS and comes with built-in tracking protection by default. Waterfox allows for proxy server configuration to ensure the highest level of user data protection and anonymous web browsing.
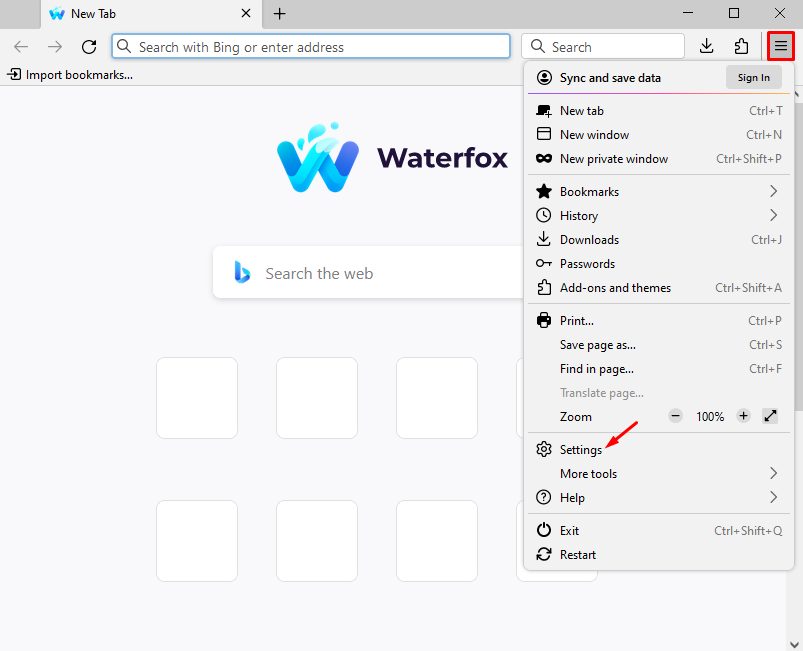
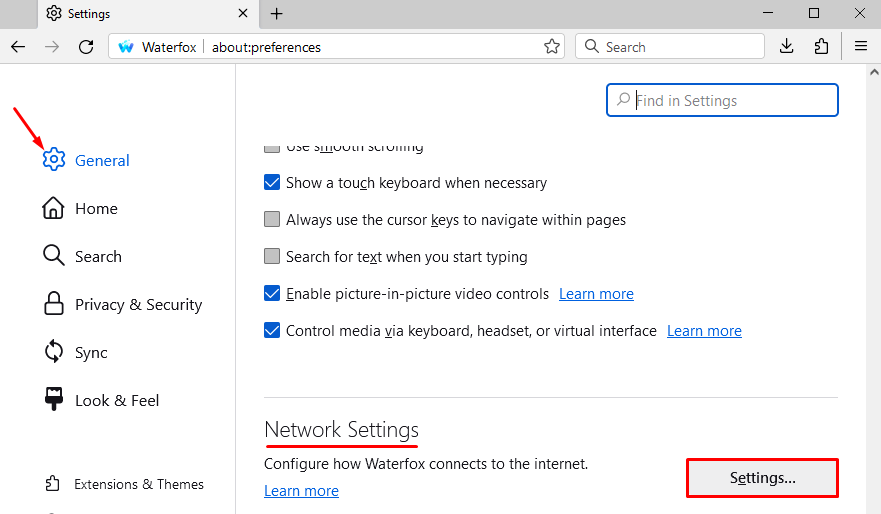
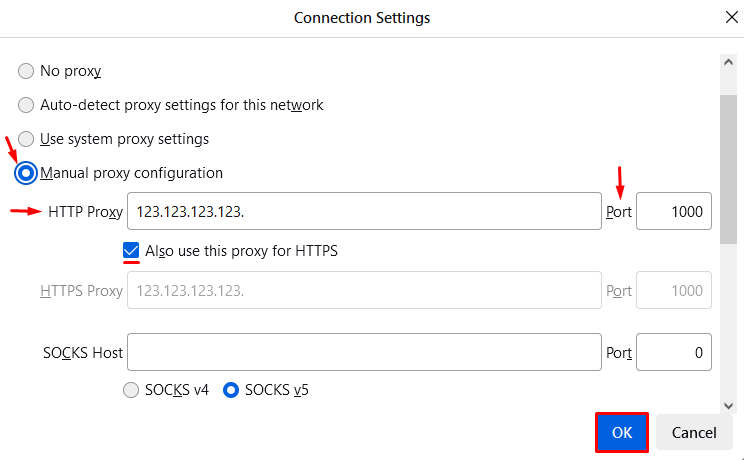
The process of configuring a proxy in Waterfox is very similar to that in Mozilla Firefox.


If public proxies are used, or if the user's device IP address authentication is in place, this prompt will not appear, as the connection is established automatically.
The proxy configuration in the Waterfox anti-detect browser is now complete, with traffic being routed through the set IP address. Web surfing is confidential and secure.
Comments: 0