Configuring a proxy in the SmartProxy extension

Comments: 0

SmartProxy is an extension that simplifies proxy usage, compatible with popular browsers like Chrome and Firefox. It offers a user-friendly interface for managing proxy servers. Setting up an IP address in SmartProxy can greatly enhance online security and anonymity. This intuitive extension makes using proxies easier, enhancing privacy and information protection. By setting up a proxy in SmartProxy, your real IP address is hidden, enabling you to bypass geographic restrictions and content blocks. SmartProxy automatically determines rules for proxying and network operation. Simply add the desired resource to the rule list, and all traffic will be routed through the set IP.
Video guide for setting up a proxy in SmartProxy

Step-by-step proxy configuration in SmartProxy

  1. Install SmartProxy from your browser's official store.
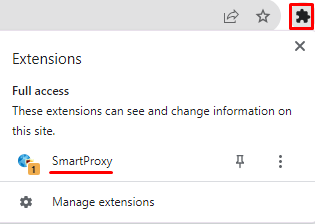
  2. Click on the extension icon in the top right corner of the browser and select "SmartProxy".

    1en.png

  3. In the pop-up window, choose "Settings".

    2en.png

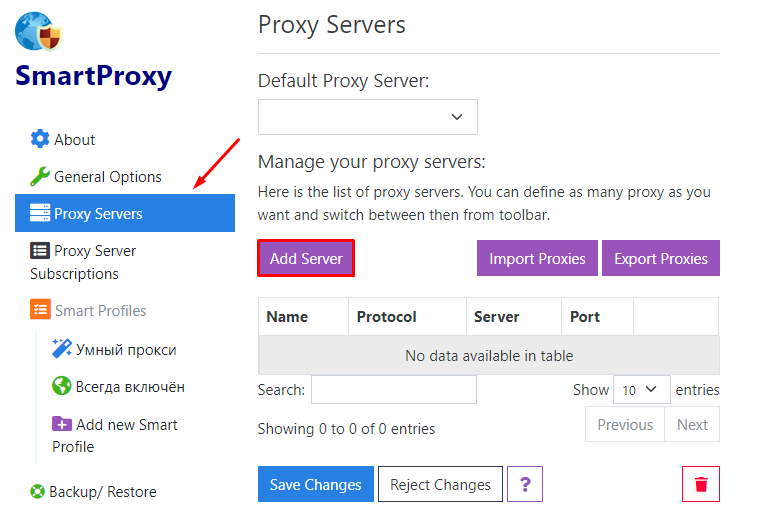
  4. In the extension menu, go to "Proxy Servers" and click "Add Server".

    3en.png

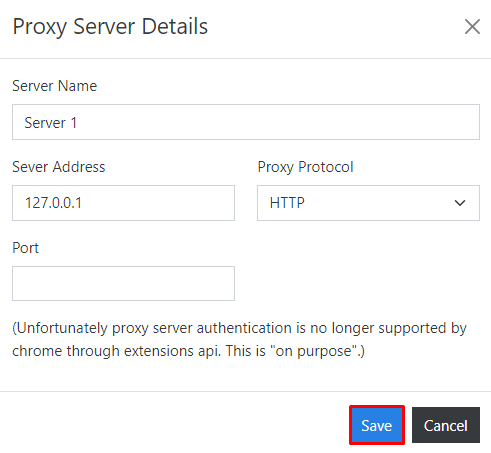
  5. In the settings window, assign a server name and fill in the proxy details: IP address, port, and choose the connection protocol. Click "Save" to store the information.

    4en.png

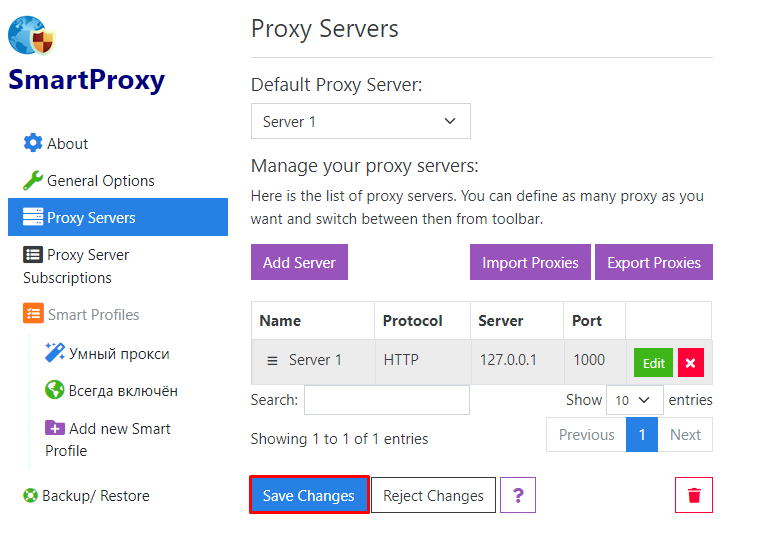
  6. After saving, the added proxy server will appear in the list, where you can add more IP addresses in the same manner. Click "Save Changes" to finalize the setup. It implies the use of public proxy servers without authentication requests.

    5en.png

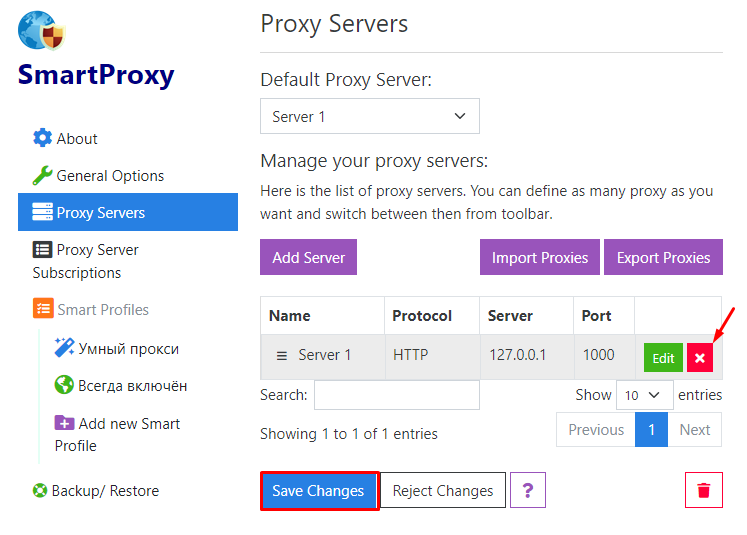
  7. To disable a proxy, you can remove it from the list by clicking the red button next to the selected proxy and confirming the action by clicking "Save Changes".

    6en.png

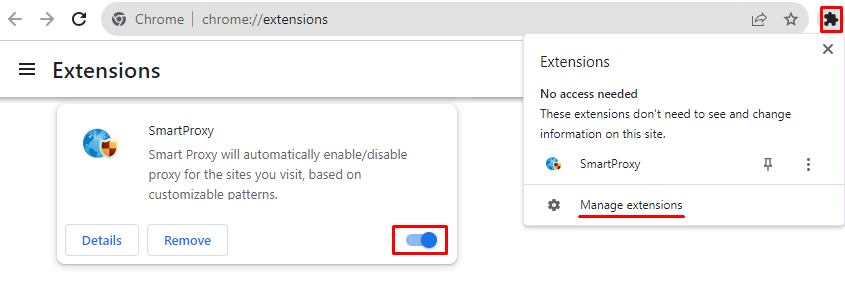
  8. To disable the extension's functionality entirely in the browser, click on the extension icon in the top right corner, proceed to "Manage extensions", and deactivate the SmartProxy toggle.

    7en.png

Comments:

0 comments