 en
en  Español
  中國人
中國人  Tiếng Việt
  Deutsch
  Українська
  Português
  Français
  भारतीय
  Türkçe
  한국인
한국인  Italiano
  Indonesia
  Polski
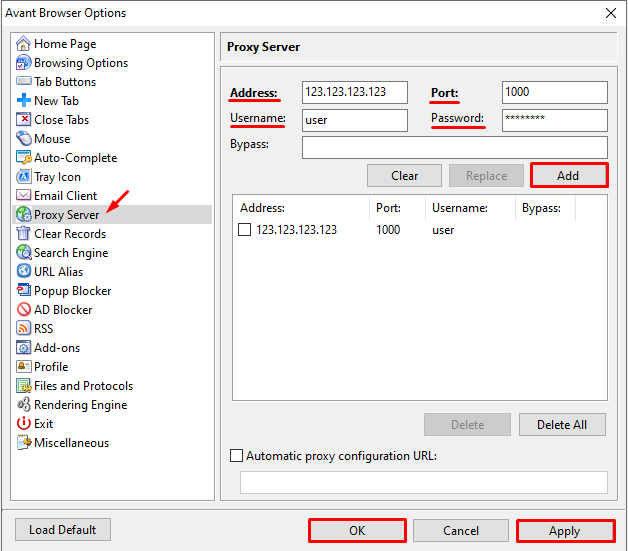
 The Avant Browser is a specialized anti-detect browser designed for secure and efficient management of multiple accounts. Utilizing the Avant web browser ensures secure internet connections, data encryption, and online anonymity. It offers the functionality to configure a proxy server, allowing users to change their IP address for enhanced privacy and traffic tunneling during web surfing.
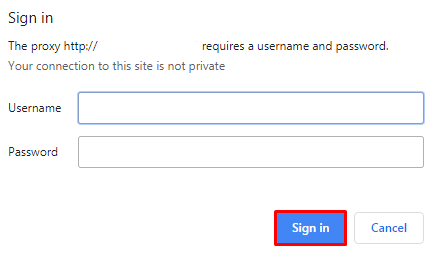
The Avant Browser is optimized for safety and effectiveness when handling numerous accounts, with proxy server settings to further reduce the risk of account blocks. To set up a desired IP address, follow the steps outlined below:


The proxy configuration in the Avant anti-detect Browser is now successfully completed, making account management on online platforms more secure and confidential.
Comments: 0