
 en
en  Español
  中國人
中國人  Tiếng Việt
  Deutsch
  Українська
  Português
  Français
  भारतीय
  Türkçe
  한국인
한국인  Italiano
  Indonesia
  Polski
 For users who want to collect data from dynamic websites, ParseHub is a great tool. It is a desktop-based web scraping software that allows you to collect information using a point-and-click interface. It supports JavaScript rendering, AJAX calls, dropdowns, and pagination. This makes it useful for scraping complex websites. The best part is that all of this can be done without writing a single line of code. Any user could build their own custom workflow and run it on their local machines or cloud for scaling tasks. But if you scrape websites at scale, it can lead to rate limits, IP bans, or CAPTCHAs. This is especially true for commercial or protected sites. You can avoid these problems by adding a ParseHub proxy setup to route the requests through different IPs.
This prevents traffic from appearing suspicious. You can use it to bypass geo-restrictions as well. A proxy integration with ParseHub can also help with anonymity and increase the success rate of your tasks. You can also benefit from session isolation when you use a server in the tool. If you manage multiple projects that have the same targets or credentials, you are able to route each session through different servers. It also prevents cross-account detection and keeps each run focused, improves your project’s success rate and keeps the accounts and keys from being flagged. This is useful if you are performing basic eCommerce price monitoring or advanced content aggregation. A good setup will ensure a smoother and scalable operation.
If you prefer a more visual tutorial, then check out the video below for ParseHub proxy setup. It shows everything you need to know about accessing the settings, entering details, and formatting them.
It is easy to set up a proxy for scraping in ParseHub. The process is the same for all major operating systems, including Windows, macOS, and Linux. This makes it easy to configure and repeat the settings on any device or system.
There are two ways to do such a setup, for the whole application, or for a single project. We are going to break down each of these methods.
This setup is for whole app traffic that is routed through proxy.
Launch ParseHub on your computer, and either open an existing project or create a new one by navigating to the "Projects" section and selecting "New Project".
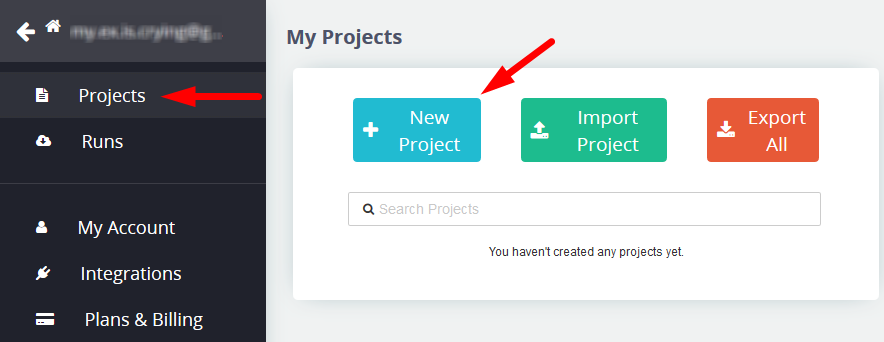
Find the gear icon or Settings menu from the dashboard. It is usually found in the top-right corner of the tool. Click to open the configuration panel. You can find settings related to project preferences, account sync, and configuration in this section.
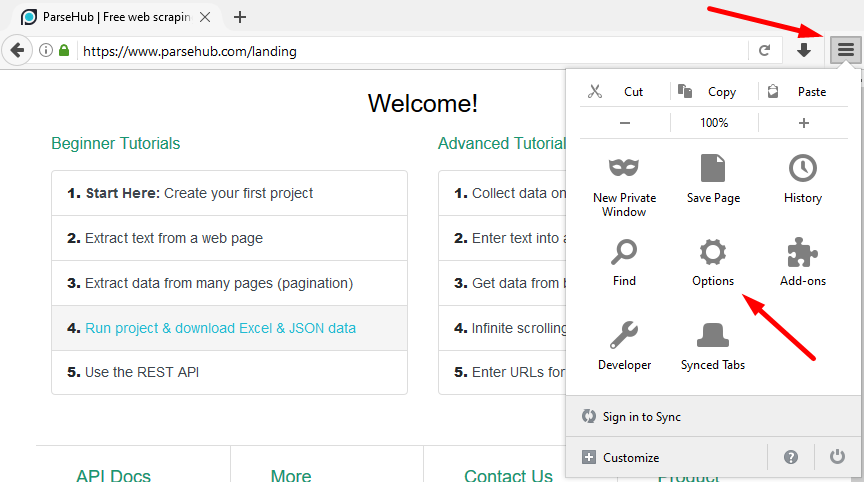
Go to the Advanced Settings section inside the Settings panel. All the ParseHub proxy server configuration is done here.
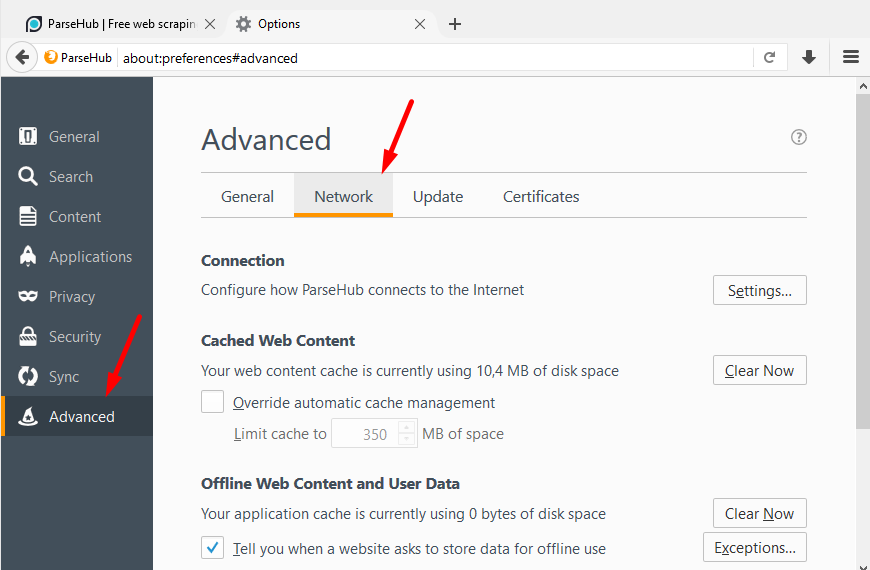
This is where you will enter the server details in the proper format.

This is where you will enter the server details in the proper format.
Scroll down until you find the Manual input field. This is where you should enter the server information for all project requests. This is available on all paid plans and supports both individual IPs and lists.
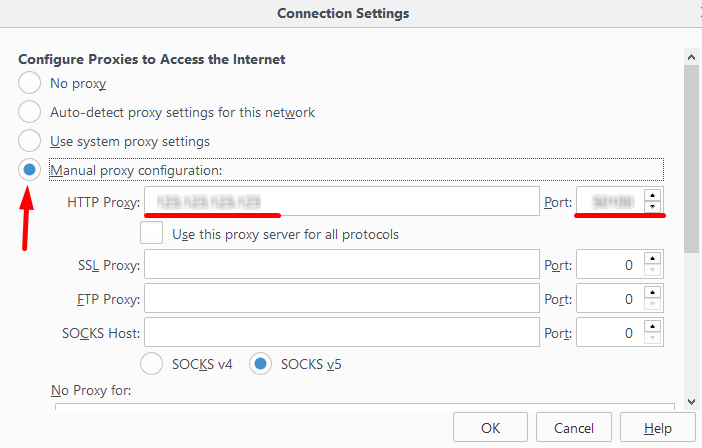
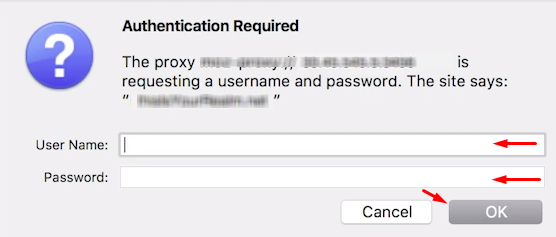
Click “OK”. If you are using private proxies, a notification will prompt you to enter your username and password. Fill in your details and click “OK” then.
ParsHub supports both HTTP and SOCKS5 protocol types. HTTP proxies are commonly used for standard web traffic and are easier to configure. SOCKS5 proxies have better performance and support more protocols. This is useful if you are dealing with dynamic or secure sites. Make sure you choose the correct type based on the website you are trying to scrape.
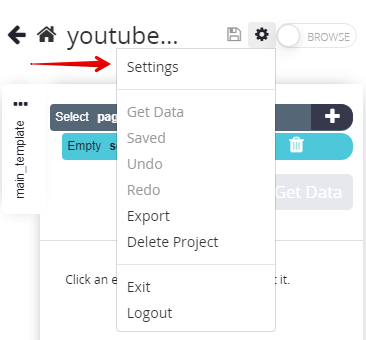
Create a new project, or open the current one you have. Click on the “gear” icon located next to your workspace name and proceed to the Settings area.
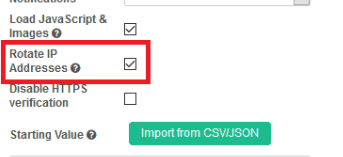
Then, activate the checkbox for the Rotate IP Address section.
Enter the information from your ParseHub proxy server into the designated field below. If you have a private one that needs authentication, the format should be “username:password@ip:port”. If you don’t need authentication, the format can be “ip:port”.
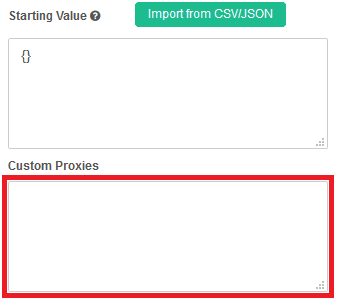
In case you have multiple proxies for rotation or load balancing, enter each of them on a new line. This will create a server list. Platform will randomly select one from this list for each session. To avoid request failures during scraping runs, make sure to include only working and responsive proxies.
When you are done with entering the IP or the list, click Save Settings to apply the changes. Then, run a test project using online tools like “My IP” to verify if your new address matches your proxy IP. If it does, then the configuration is successful. Such setup means that traffic is proxied only for this specific project.
It is important to run ParseHub with a proxy for those who want to scrape websites with efficiency. Since most of them can limit request volume or restrict your access based on location, you need a proper setup. This will help you to bypass rate limits, reduce the risk of blocks, and improve the overall scraping experience.
When you are configuring, make sure to select the correct type. For those wondering how to set a proxy in ParseHub, you must format your entries correctly and test everything before a large-scale project. A proper server will keep your workflows running efficiently and anonymously across all operating systems.
Comments: 0