 en
en  Español
  中國人
中國人  Tiếng Việt
  Deutsch
  Українська
  Português
  Français
  भारतीय
  Türkçe
  한국인
한국인  Italiano
  Gaeilge
  اردو
اردو  Indonesia
  Polski
 What is SEnuke? SEnuke is a program created to automate search engine optimization (SEO) tasks. Its primary objective is to assist in the promotion of websites by generating and distributing content to various online platforms in order to acquire backlinks. SEnuke SEO includes a number of tools and features, including:
SEnuke offers several different subscription plans with varying features. You can get started for just $97 a month, and there's even a $1 demo version you can try out for a week.
Using SEO automation can lead to issues with search engines if rules and restrictions are not followed. Google and other search engines penalize websites for using unwanted promotion methods, which can result in lower rankings or even site blocking. If you decide to start using the software, it can only be downloaded on a Windows OS, and there is no support for the Russian language.
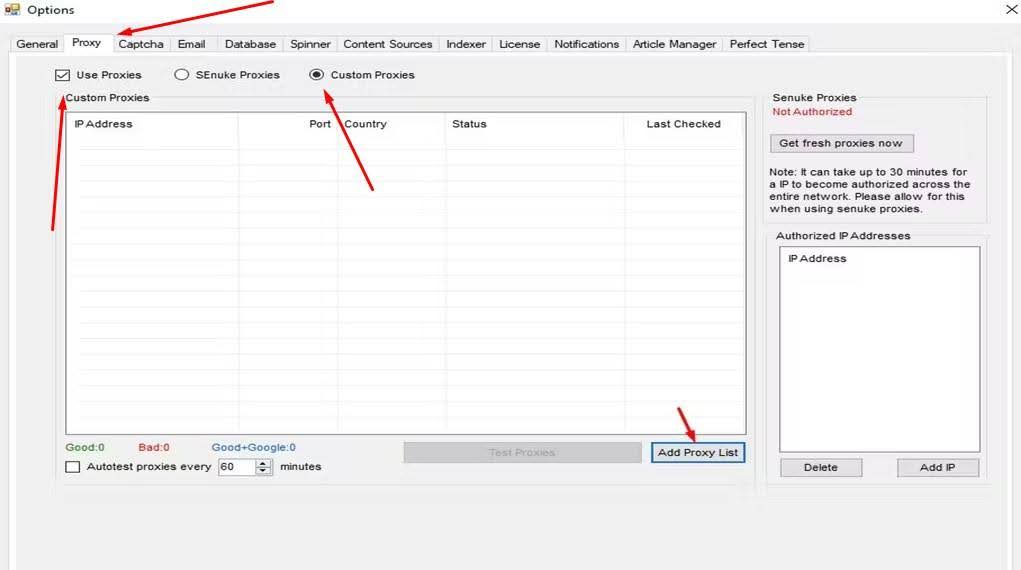
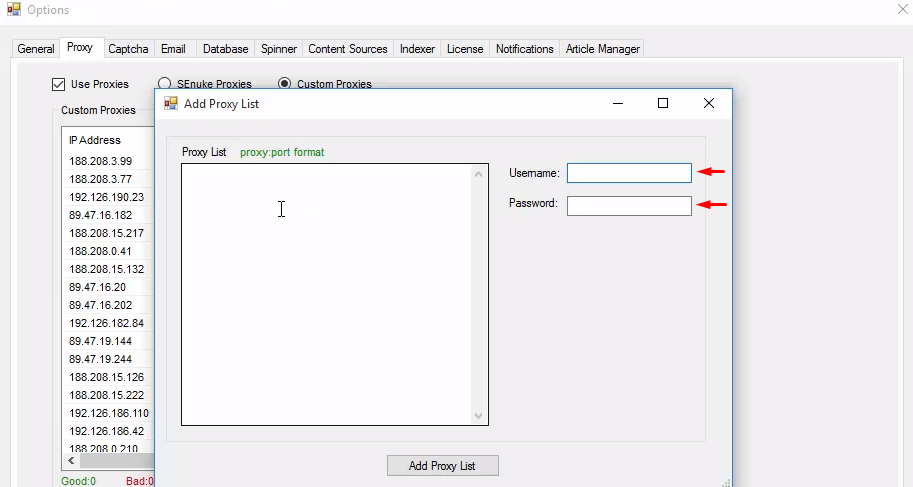
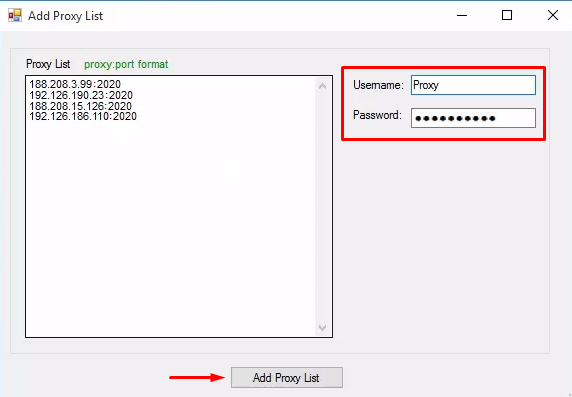
Proxies for SEnuke are needed to anonymize internet traffic and bypass restrictions that may be imposed by internet service providers or specific web resources.


The proxy configuration for the SEO automation program has been completed. When creating or editing tasks in SEnuke, you can now select a proxy from the list. This allows you to test advertising campaigns across different regions and levels, improving your analytical base and accelerating website promotion.
Comments: 0