
 en
en  Español
  中國人
中國人  Tiếng Việt
  Deutsch
  Українська
  Português
  Français
  भारतीय
  Türkçe
  한국인
한국인  Italiano
  Gaeilge
  اردو
اردو  Indonesia
  Polski
 Setting up a WinGate proxy server can transform the way you manage your network. When you use it, there are significant advantages to notice. It offers you a boost in security, maintains anonymity, and optimizes the bandwidth. This multi-protocol proxy server offers you a boost in security, maintains anonymity, and optimizes the bandwidth. This platform is an effective solution that gives you the desired control and flexibility you need. It acts as a gateway between the users and the internet connection, helping you filter web traffic, manage access, and improve overall network performance.
Moreover, the configuration is exceptionally useful for businesses, schools, and advanced users. Network administrators and IT teams often rely on a WinGate server to enable secure, monitored, and efficient web browsing for all users on the network. So, let’s walk through the process to set it up for excellent benefits.
Now, you get ready to check the effective steps that will help you set up your WinGate proxy server. Check each one in detail:
The process starts with downloading and installing this intermediary server on your device. You need to enter your email server address during installation for administrative alerts.
Once you install the app, you need to reboot your PC. Once your device is ON again, the software will be running in your notification area. Right-click the icon and select WinGate Management.
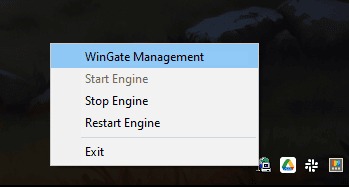
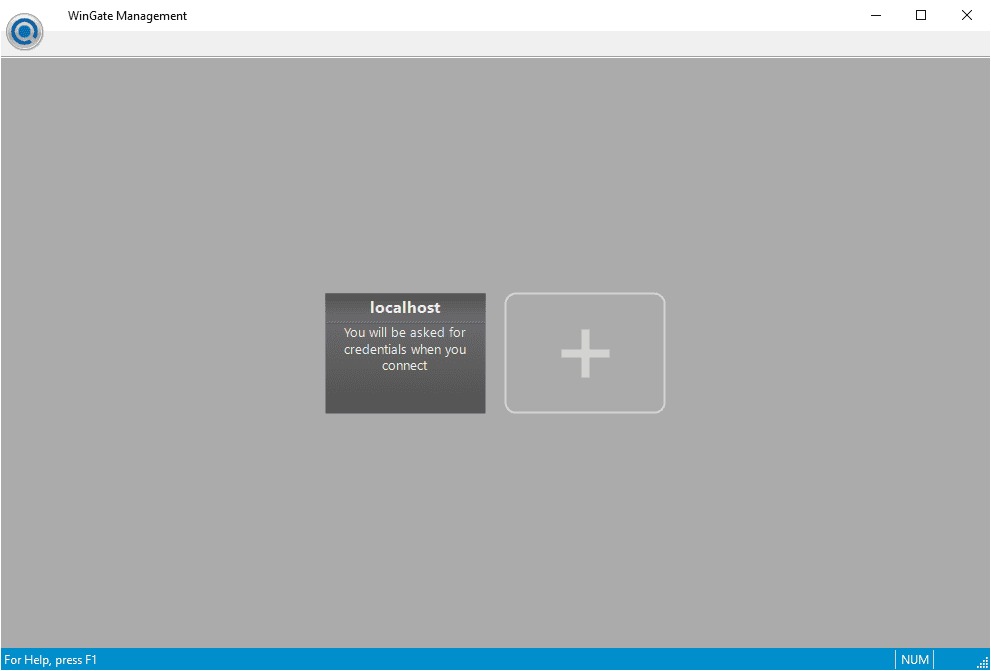
The next step is to click localhost. Now, the software starts to load the modules and check for the license information.
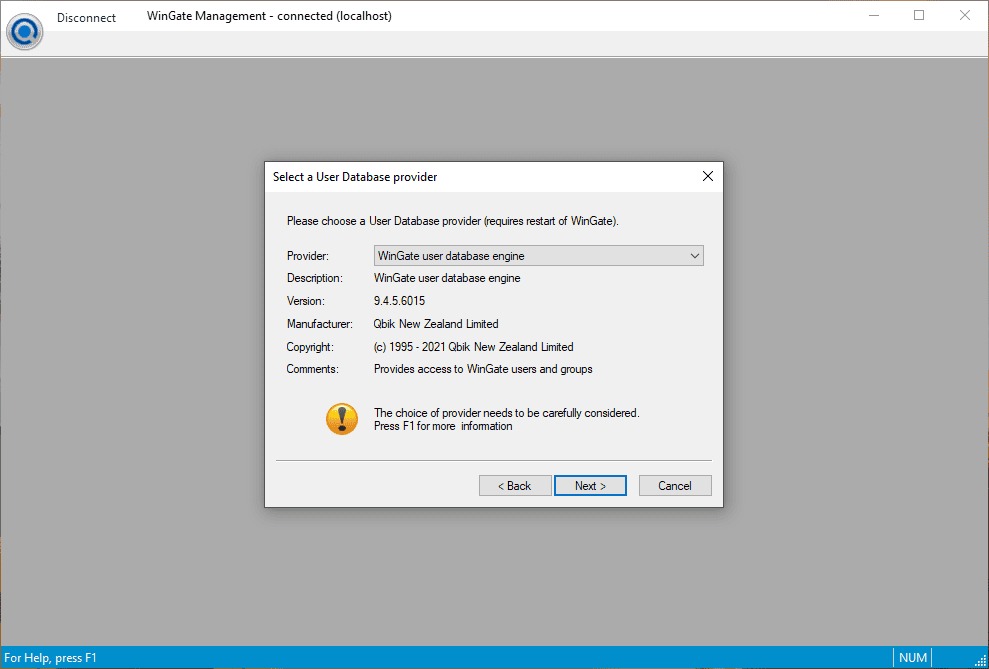
After this check, the software starts and requests that you provide a user database. It is necessary for user authentication and management. See this part as crucial for the software to work correctly. So, choose the appropriate option and click Next.
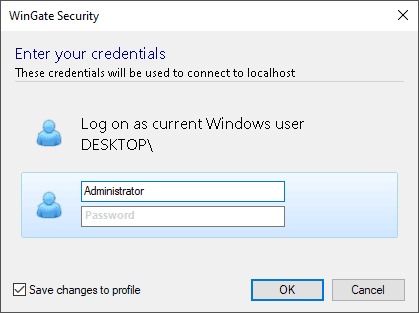
Now, you will be asked for an account. This account belongs to the Administrators group. After you choose the right option, click OK.
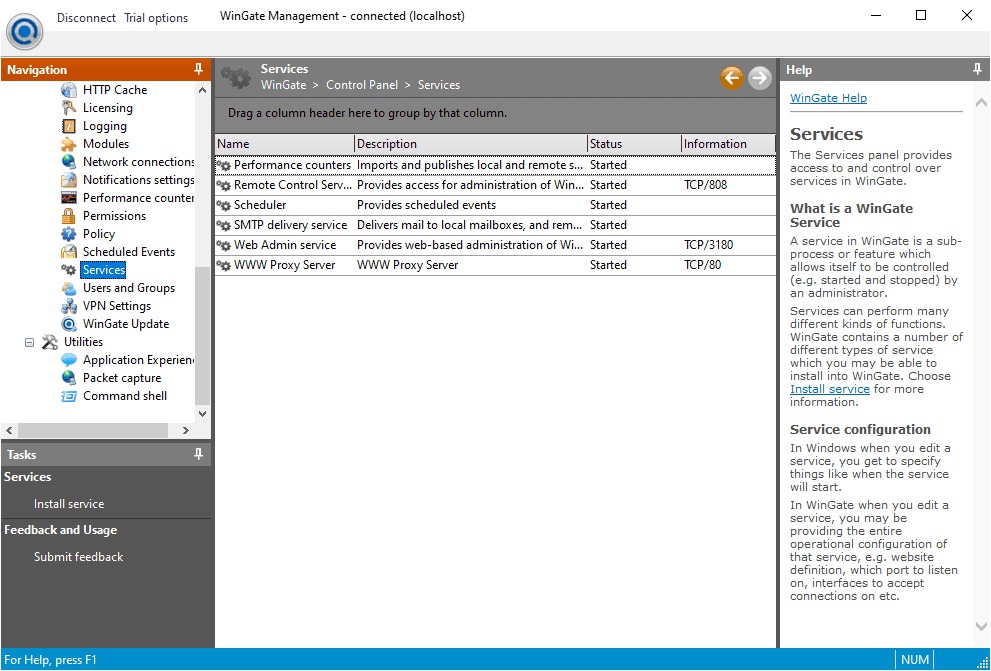
Continue and select Services from the navigation on your screen.
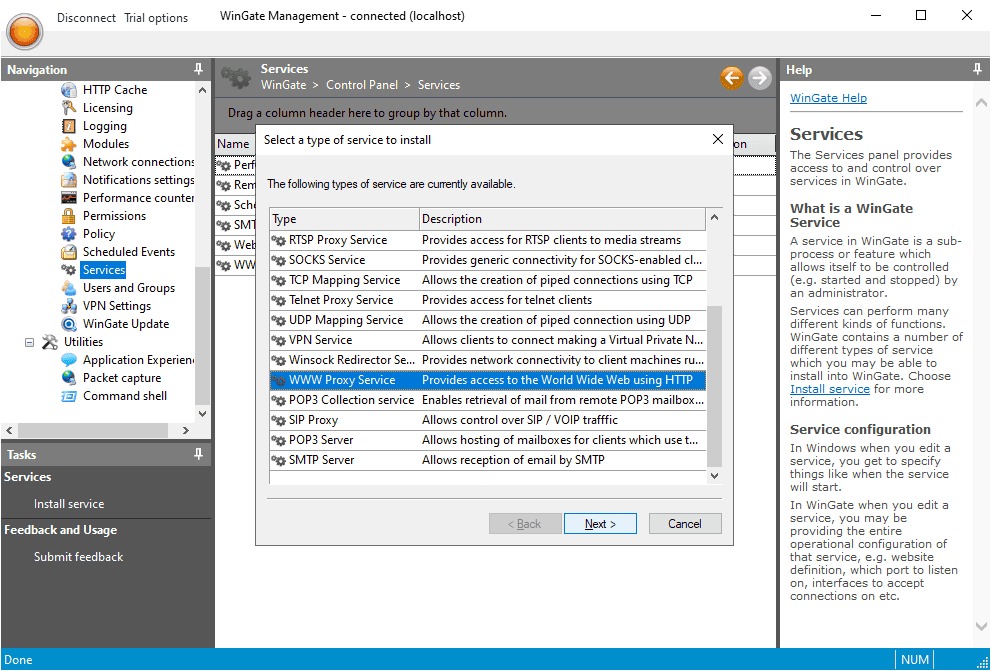
You can see a list now. Move along by choosing WWW Proxy Service from the list in front of you. After the selection, click Next.
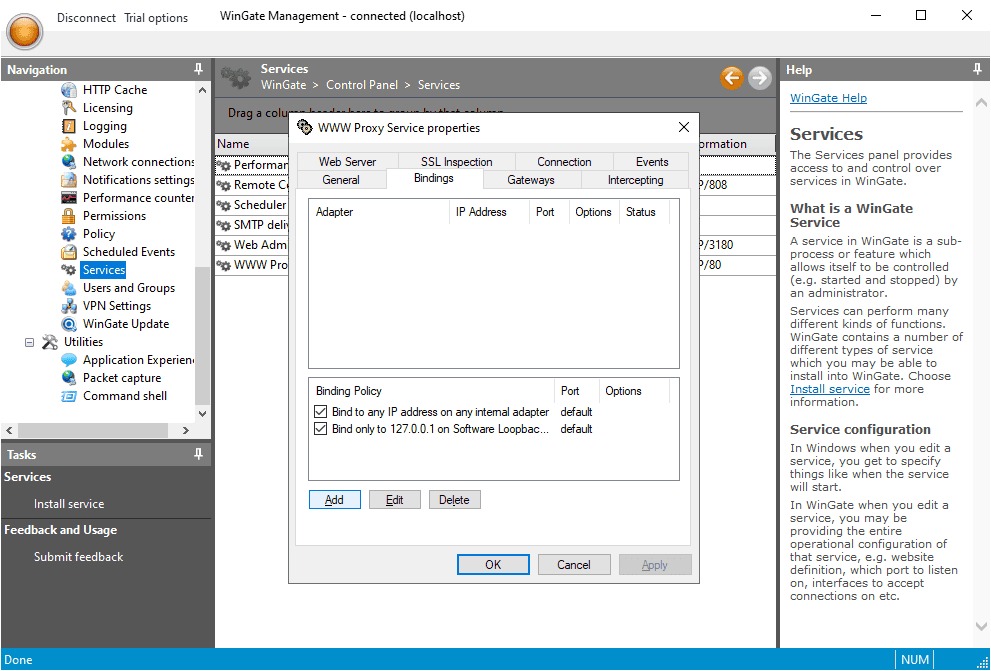
After you add the name, hit the Finish button. Afterward, you can see that the service properties window is open. Go to the Bindings tab. Simply continue to remove any active bindings you see. Finally, click the Add button.
The next step is to choose Any External Adapter and click OK. It will save your configuration.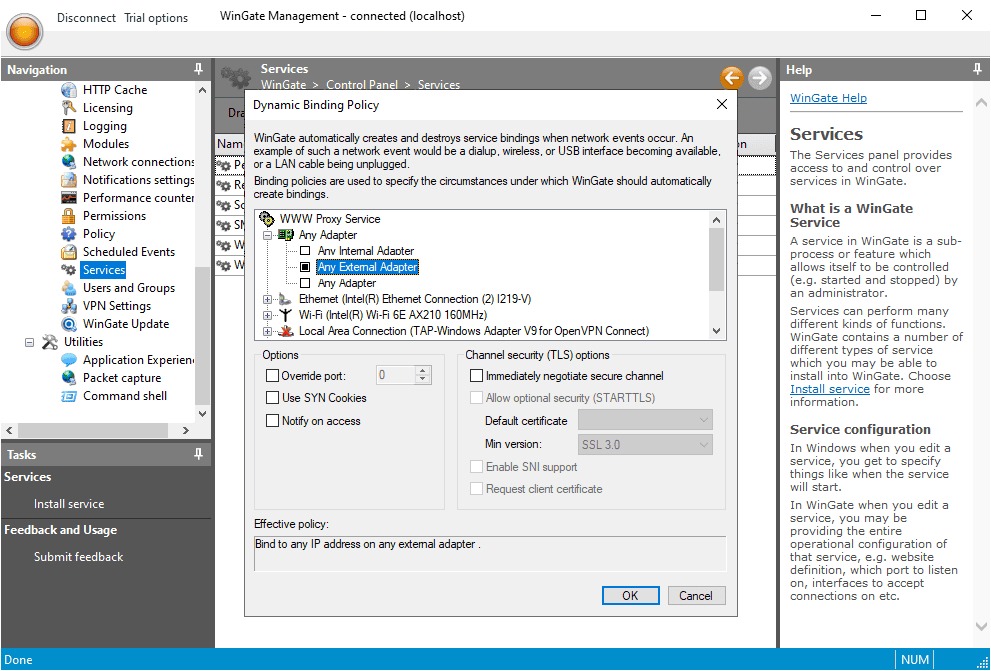
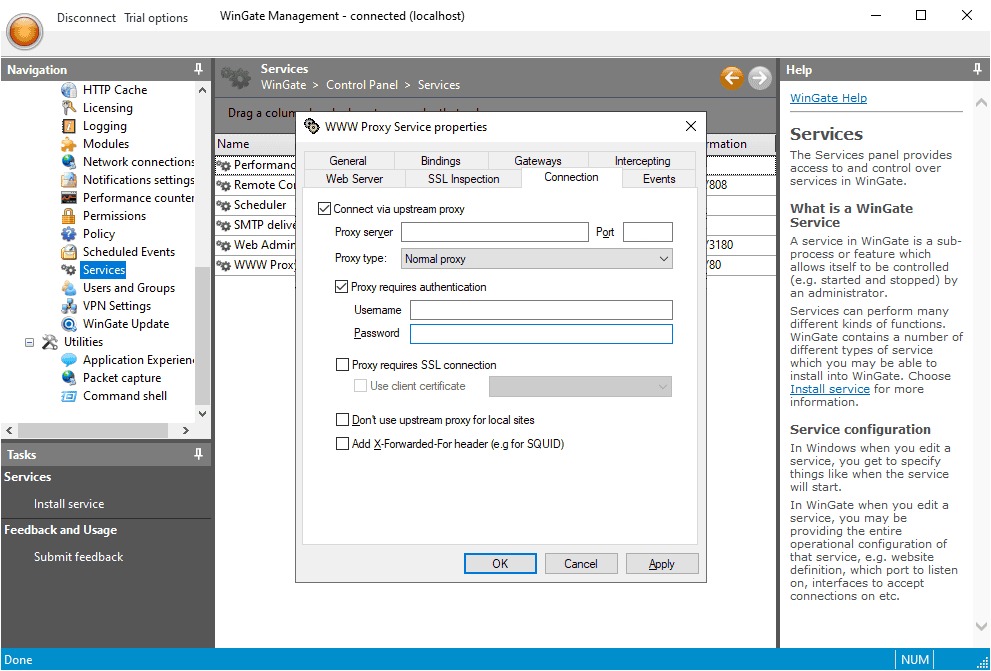
Move forward by going to the Connection tab. Click to tick the box you see next to Connect via upstream proxy. Now, you need to enter the essential details, including HTTP Proxy Host, Port, Username, and Password.
It is essential to define the access rules for different users and devices. You can do this by configuring Web Access Control rules within the Management console. The rules will enable you to specify who the users and devices are to access particular websites, content types, or services and when they can do so.
Here is a quick breakdown of how to do this:
The users can easily verify the WinGate proxy server settings. Here is a simple approach to do this:
After you learn how to set a proxy, you must also learn about some issues. When you use the WinGate proxy server, little mistakes can cause big problems. The following are some common ones with a tip to fix them:
The topmost problem is when users fail to assign accurate ports for HTTP, HTTPS, or SOCKS traffic. When the ports are misconfigured or blocked by a firewall, you notice that the server won’t work properly.
Another common issue is improper user permissions or access policies. It can immediately block legitimate users. You can also see cases of unauthorized access.
One more challenge many users see is when the DNS is not correctly set up. The signs include encountering website loading errors.
When the logging is not there, it becomes highly difficult to identify the issues. Some users are facing this problem in the software.
In the end, you have gained an understanding of how to set proxy in Wingate. It helps you secure your network and control your internet access. When you use it, you can see an overall improvement in the performance of your online activities. This server offers you benefits ranging from internet traffic filtration to user identity protection. But if the setup is not right, you may not get the expected benefits.
Misconfiguration is a problem that can lead users to vulnerabilities and performance issues. So, you must check the authentic sources of information. For instance, you can get deeper insights from various official documentation, community forums, or advanced network security guides.
Users want to ask various questions while using the WinGate proxy server configuration. The following are some common ones:
There are different proxy protocols that are supported by the app. Some popular ones it supports are HTTP, HTTPS, SOCKS4, and SOCKS5. As a result, this software feasibly works with different types and services.
There is no problem in using a FREE server with an app. But you need to be aware of some serious concerns. For instance, unreliability, slow speed, or insecure systems.
Yes. It offers advanced logging and reporting features. You can view per-user activity, including accessed URLs, data volume, and timestamps, from the Activity tab or enable detailed logging in the service settings.
The app does not natively support proxy rotation. However, you can simulate rotation by scripting service restarts or using external tools in combination with WinGate’s upstream server settings.
Comments: 0