
 en
en  Español
  中國人
中國人  Tiếng Việt
  Deutsch
  Українська
  Português
  Français
  भारतीय
  Türkçe
  한국인
한국인  Italiano
  Indonesia
  Polski
 Setting up proxies correctly is essential if you want to manage multiple browser profiles safely in VMLogin. This guide explains how to complete a full VMLogin proxy configuration, why proxies are necessary for secure and stable operations, and which type works best depending on your use case.
It’s required in VMLogin to isolate browser profiles and ensure each one operates with a unique IP address. This is especially important when managing multiple accounts across social platforms, marketplaces, or online tools. Without an intermediary server, profiles may share the same IP address, increasing the risk of detection, verification requests, or bans. If you’re planning to use VMLogin for tasks like automation, ad verification, affiliate marketing, or any activity involving multiple logins, then assigning a separate one to each profile is critical. A standard rule is to use one per browser profile, helping avoid fingerprint overlap and boosting account safety. A properly configured proxy for VMLogin browser usage ensures better anonymity and operational stability, which are essential for any type of sensitive or multi-account task.
Follow these 10 steps to complete the configuration and assign a working one to your browser profile.
You must be signed in to access the proxy settings VMLogin interface and manage profiles.
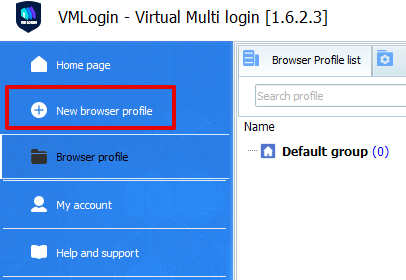
Once logged in, locate the “New Browser Profile” button on the main dashboard. This is where you can create a new browser profile with custom fingerprint and configurations.
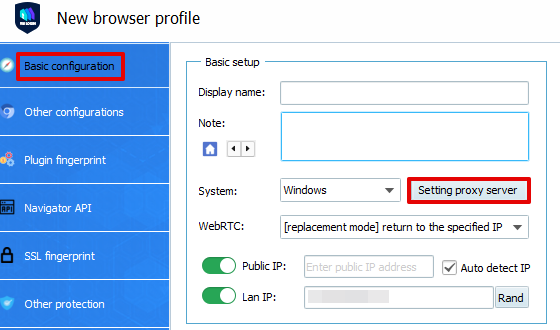
In the “Basic Setup” tab of the profile creation window, click the Setting Proxy Server button.
This opens the menu where you can input your details and continue with the VMLogin setup.
A new configuration window will appear. Toggle the Enable Proxy Server switch to the “On” position.

The browser supports HTTP, HTTPS, SOCKS4, and SOCKS5. The type you select depends on the service you’re using and the task you plan to perform.
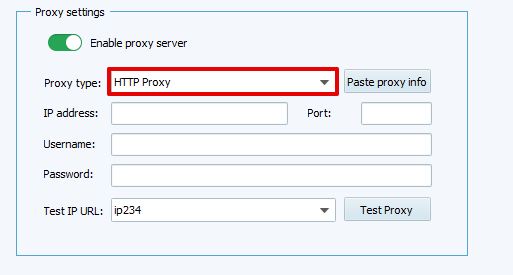
Selecting the correct type is essential to avoid errors in your proxy server VMLogin browser configuration.
Input the details in the respective fields:
Ensure the information is accurate. Incorrect login credentials will prevent the proxy connection VMLogin browser process from completing successfully.
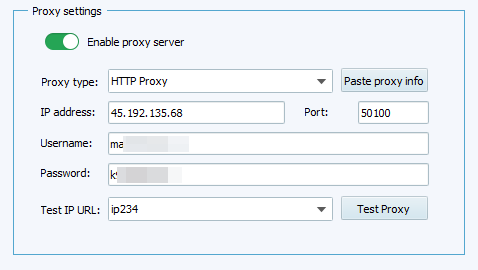
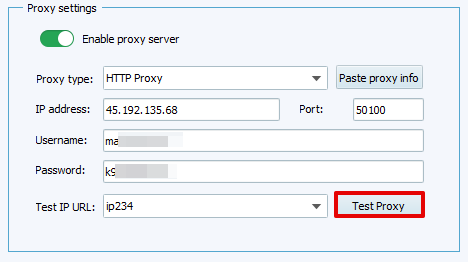
After entering all details, click the Test Proxy button. VMLogin will check if the server is valid and functional.
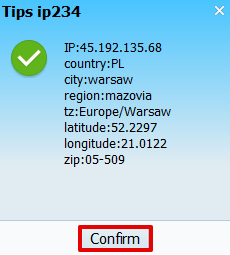
Once the test completes and shows success, click the Confirm button. This closes the test window and applies the settings within the profile editor.
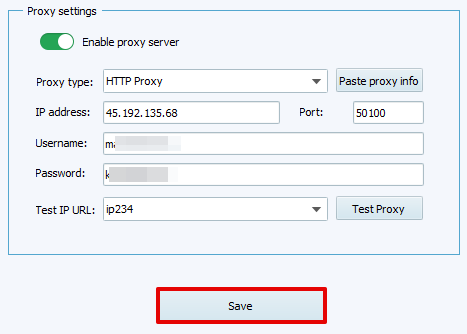
Click the Save button to finalize the configuration. This ensures that the information is stored and linked to the browser profile.
Saving completes the core steps of proxy settings VMLogin integration.
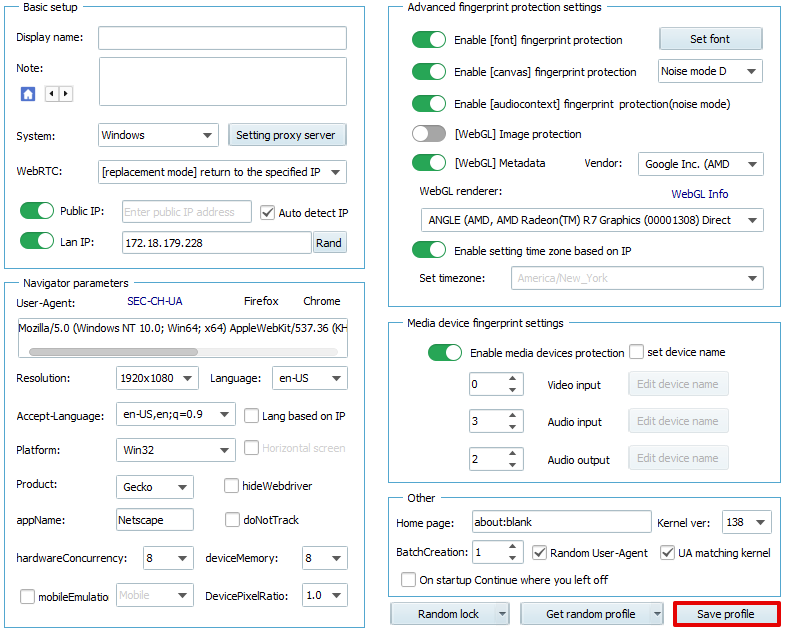
Return to the full profile configuration screen. Enter any remaining parameters like browser language, resolution, and timezone. Then click Save Profile in the corner of the window.
VMLogin supports several proxy server types and connection protocols. Choosing the right combination depends on your use case, whether it's social media management, scraping, ad verification, or multi-account operations.
These types define the source and behavior of the IP address you connect through:
And here are the protocols supported by any type:
In general, VMLogin browser use proxy configurations involving SOCKS protocol types are recommended when you need a more robust, encrypted connection with less packet loss.
Using a proxy in VMLogin helps protect your data, isolate sessions, and reduce the risk of detection or bans. Setting it up is straightforward with its built-in network and proxy settings VMLogin interface. By following the steps outlined, you can enable proxy VMLogin browser support for each of your profiles, giving you more control, flexibility, and anonymity.
Comments: 0