
 en
en  Español
  中國人
中國人  Tiếng Việt
  Deutsch
  Українська
  Português
  Français
  भारतीय
  Türkçe
  한국인
한국인  Italiano
  Indonesia
  Polski
 ClonBrowser is a versatile anti-detect browser designed for managing multiple accounts securely without risk of detection or blocking. It allows each profile to have a uniquely configured digital fingerprint and proxy server settings, enhancing account credibility on platforms like Facebook, TikTok, Amazon, and others. Additionally, ClonBrowser incorporates a Robotic Process Automation (RPA) system for automating a wide range of user tasks efficiently.

To set up a proxy server in ClonBrowser and link it to a profile, follow these steps:
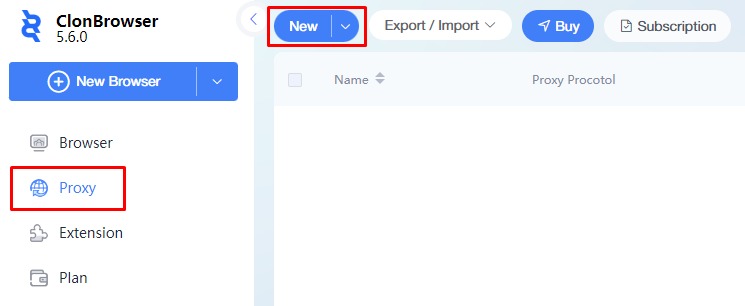
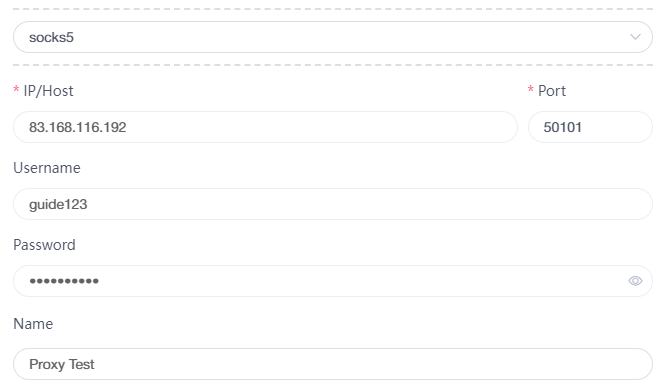
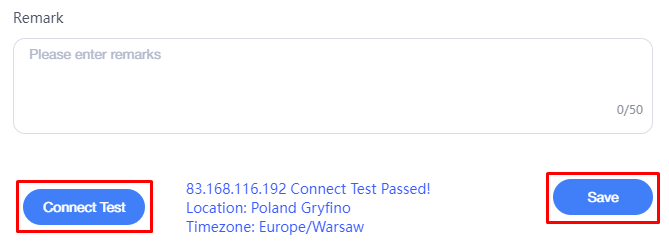

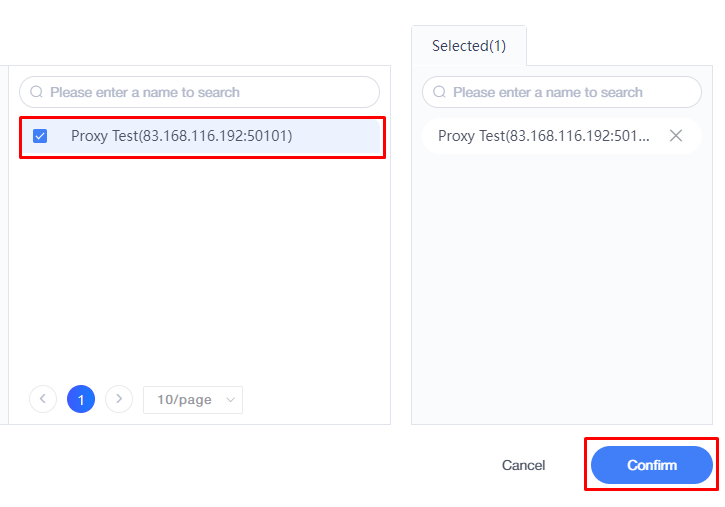
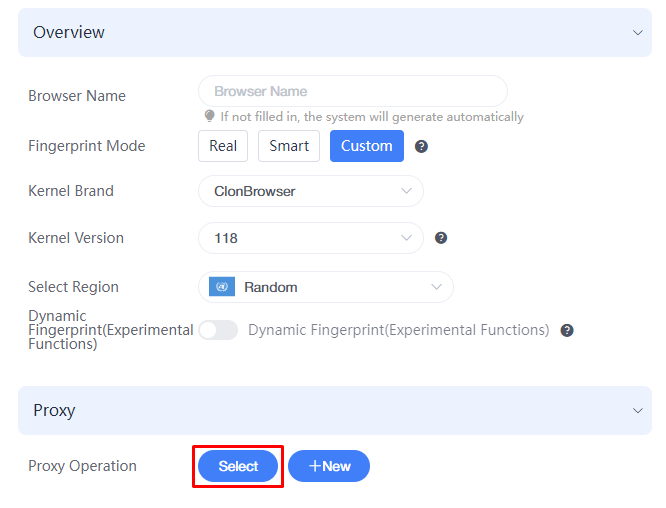

This completes the proxy setup. Using a proxy server alongside the browser's digital fingerprint capabilities greatly enhances security and functionality, reducing the likelihood of profile blocking.
Comments: 0