
 en
en  Español
  中國人
中國人  Tiếng Việt
  Deutsch
  Українська
  Português
  Français
  भारतीय
  Türkçe
  한국인
한국인  Italiano
  Gaeilge
  اردو
اردو  Indonesia
  Polski
 Indeed, iOS proxy settings come in handy when addressing common browsing challenges on mobile devices. Some popular ones include the need to maintain privacy, accessing restricted content, or increasing security with anonymity. The safe node also helps users who use Wi-Fi in public networks. It is especially crucial for mobile devices.
So, if you are an iPhone or iPad user, you need to understand how to configure its connection settings on your device. It will surely offer you more control over your internet experience. Let’s find out how to do it.
You can use a simple manual method for the setup. In Apple devices, you can use the following quick steps. They will guide you on how to configure a proxy iOS Wi-Fi network.
Without any delay, take a look at these simple steps and get more control over your online browsing experience. See how to set proxy in iOS:
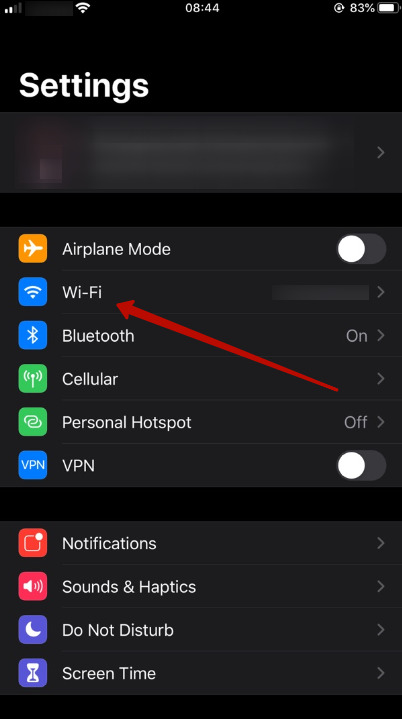
Let’s begin with the first step. You need to start by navigating to “Settings” on your phone. Now, tap on “Wi-Fi”. Please ensure that you are connected to the Wi-Fi network that you want to use with the new node.
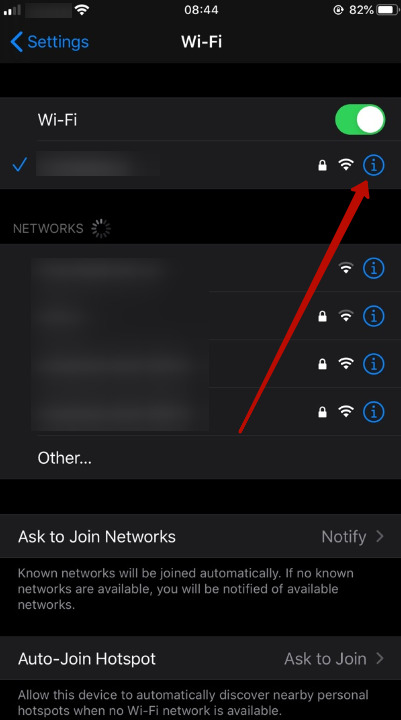
Next, hit the small “i” icon. You can see it next to your network. It will open the configuration page for you.
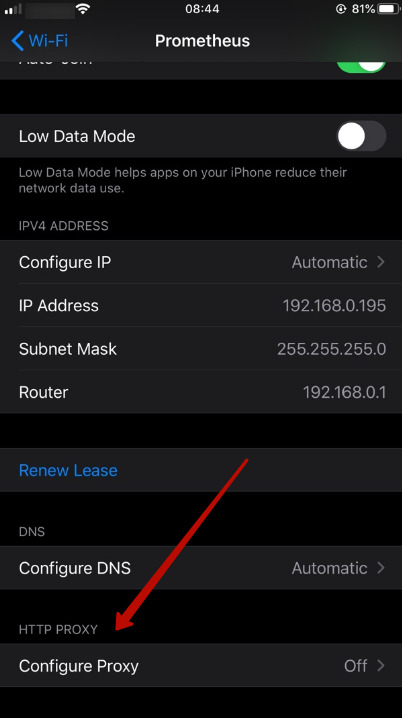
After you are inside the network settings, you need to scroll down. Do it until you see the “HTTP Proxy” section. It is the place where all server-related configurations are made. One point to understand here is that it stays off by default. So, when you tap on it, you can see more options.
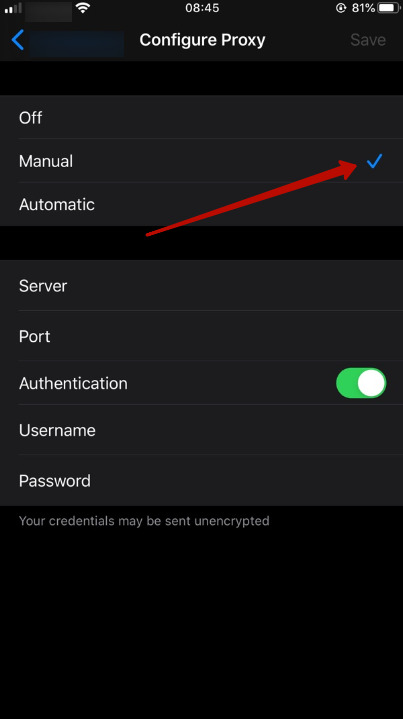
In this step, you need to choose the option “Manual”. It will enable you to input details manually. In this mode, you will enter the specific IP address and port number of your intermediary. You need to add the one that you were provided with.
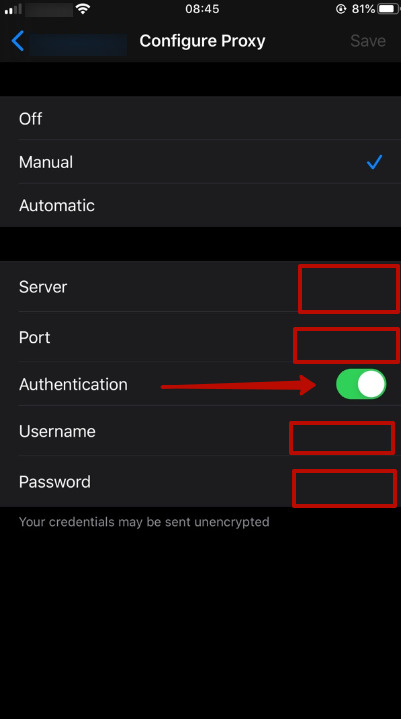
Finally, your new setup may require authentication. If this is the case, you can see the fields where you can enter a username and password. It will be below the IP and port on the screen. Enter your credentials to get access. When the login information is incorrect, the intermediary server will not work. And you may lose internet connectivity.
This is also the time to learn how to turn off the server on your Apple device. But, before heading straight to the steps, first understand the reasons to turn it off. Proxy on iOS may be worth disabling if it slows down your connection, causes website or app access issues, triggers errors due to outdated settings, or if you're on a trusted network like home Wi-Fi where it's not needed.
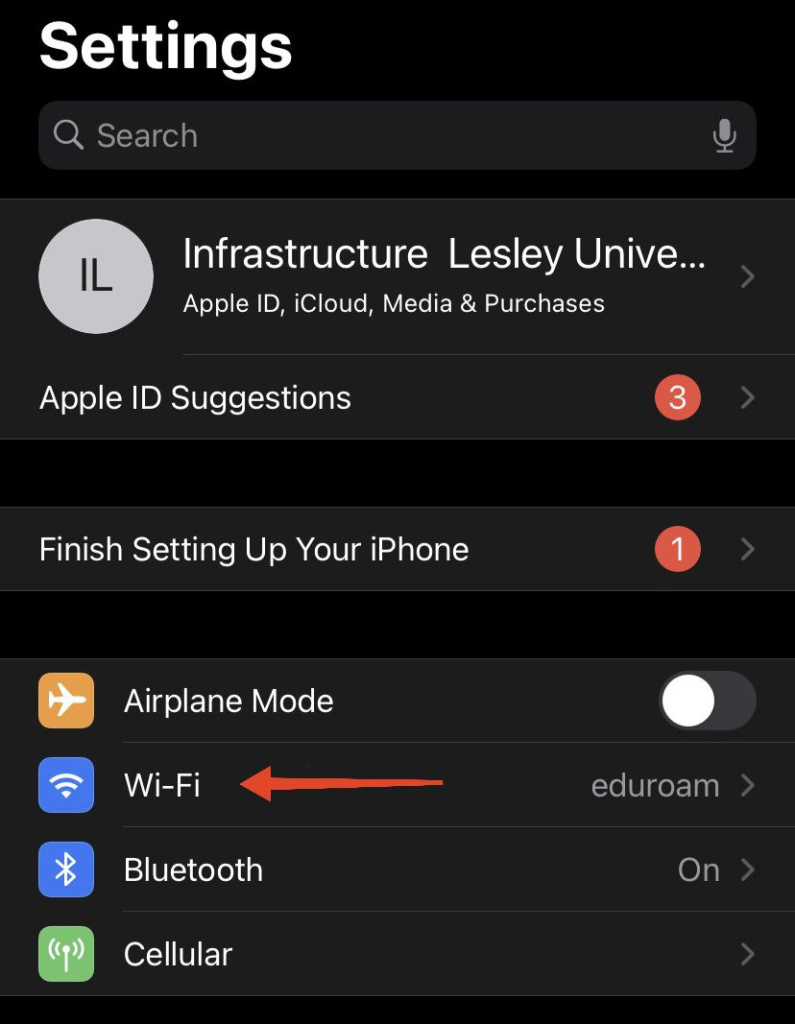
Move to the “Settings” app. It looks like a gear icon. Once you are inside the Settings menu, you find “Wi-Fi” and tap on it. You may see all the Wi-Fi networks that your device can detect. It is where you need to manage your network connections. Please ensure that you are connected to the right Wi-Fi network before you proceed.
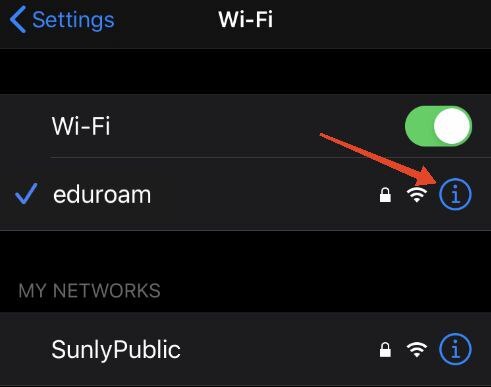
In this step, tap the small circle icon with an “i” next to the network name to open detailed Wi-Fi details. Here, you’ll find options like DNS and iOS proxy settings – only change them if you're confident.
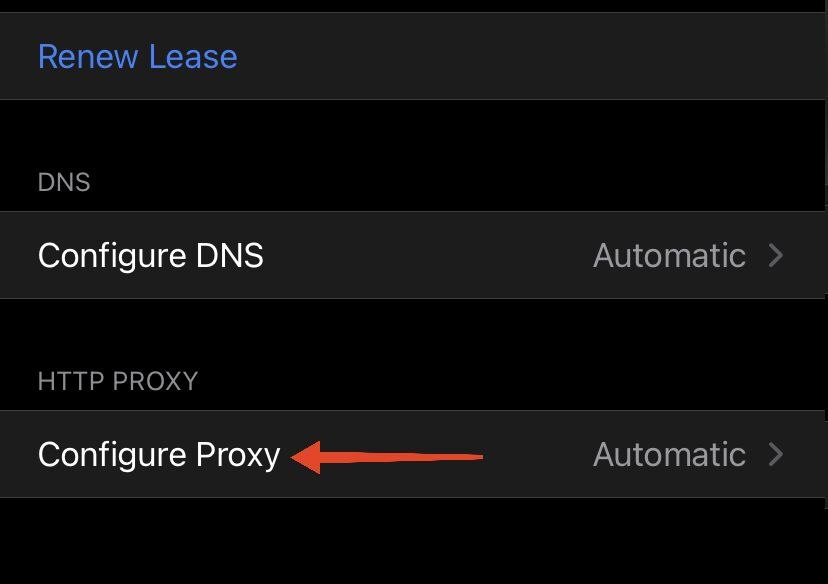
When you tap the “i” icon, scroll all the way down until you find the option displayed on the screenshot above. This setting controls whether it routes traffic through a server. The SOCKS5 proxy iOS setup isn't supported through native settings, which can lead to issues like slow browsing or limited access to certain websites. To properly use such a type, it’s best to rely on third-party apps such as Shadowrocket that allow full configuration and stable performance.
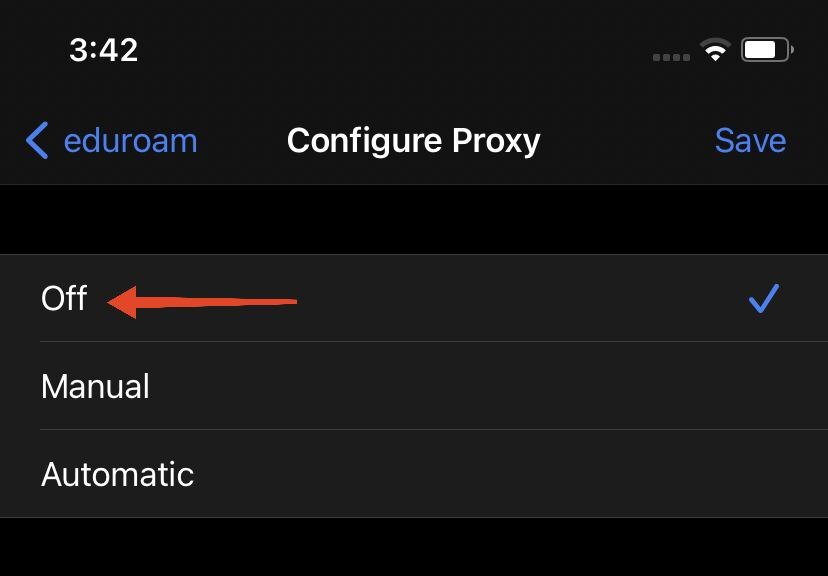
When you tap on this, you will see three options. The following are the three:
If either Manual or Automatic is selected, your iPhone might be routing internet traffic through an intermediary. This may cause connection issues in certain cases. So, disable its use by simply tapping “Off”. Once you select it, any previously setups for that specific Wi-Fi network will turn off.
There is no need to save anything. Your changes will be automatically implemented. Now, you may return to using your internet as usual.
Finally, you understand that configuring iOS proxy settings is a simple process. It enhances the security of your device. You will also get excellent access to various resources you may need. In short, manual configuration gives you complete control, whether you need it for privacy, performance, or regional access.
One thing you need to remember is that you are using reliable server services. If you want an ultimate solution, you can buy proxy server plans that meet your needs - for reliable residential options, choose here. Then, with the right setup of the best proxy for iOS, you will get started with enjoying smoother browsing. And don't forget that when you want to use free proxy iOS, it might lead to some sort of connection issues as well as lower-grade protection.
Comments: 0