
 en
en  Español
  中國人
中國人  Tiếng Việt
  Deutsch
  Українська
  Português
  Français
  भारतीय
  Türkçe
  한국인
한국인  Italiano
  Indonesia
  Polski
 Postern proxy application helps in creating connections on Android devices which help in switching IP locations of its users. The app facilitates a proxy to monitor all traffic from the device and has customization options which allows users to set rules to switch the IP only when specific applications are being used or particular websites are being opened. Using a Postern proxy server can be beneficial for those who want to make their online experience be secure and confidential as well as bypass any regional restrictions. For stable long sessions and predictable routing, ISP proxies can be a practical choice for Postern setups.
In the next blocks, we will guide you on how to add proxy in Postern app.
In Postern, proxy setup starts from installing the app itself, and it might require some effort. The application has to be downloaded from the official website of the app in the form of an .apk as it is not listed on the Play Store. Once done, follow these instructions for proper Postern proxy integration:
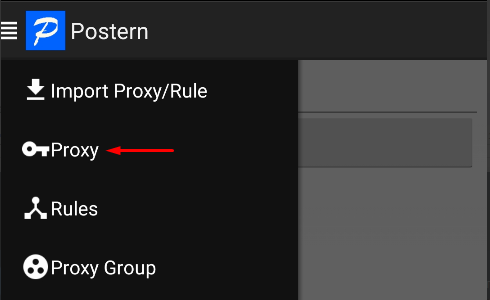
Postern proxy settings are reachable from the main menu. To start off, open the application and tap on the “Proxy” option.
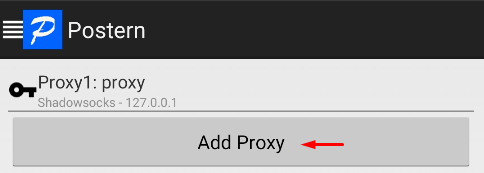
Now, tap on the “Add Proxy” button to start adding one.
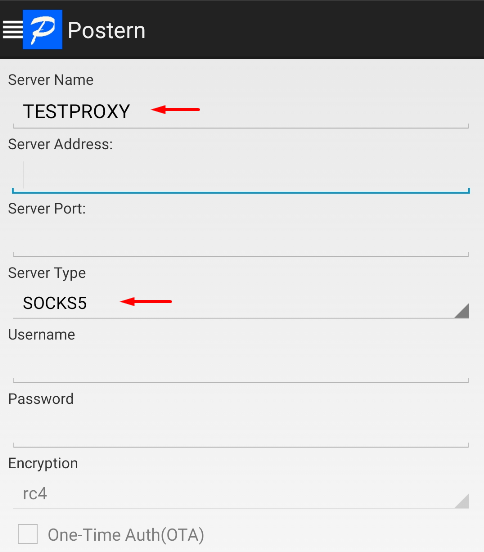
The next step is to fill in the name of the profile in the uppermost field, followed by selecting one of the protocols listed in the “Server Type” field. For this specific guide we’ll be using SOCKS5 as an illustration; if you want a dedicated endpoint, you can buy socks5 proxy access from a trusted provider.
Next, you need to specify the IP address as well as the port number associated with it. While using private proxies, you need to fill in your username and password in the designated fields as well.
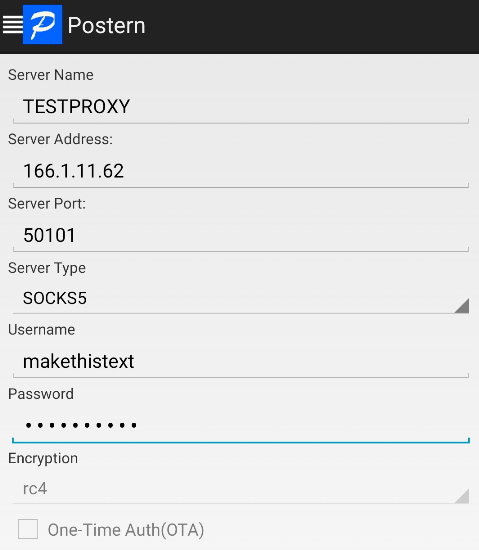
Upon inputting the specific information required, you have to click on the “Save” button, and then the configuration is retained.

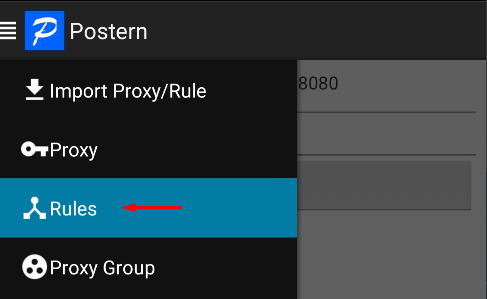
Now you have to go back to the main page of the application and navigate to the “Rules” section to add a rule on how you intend on connecting the server.
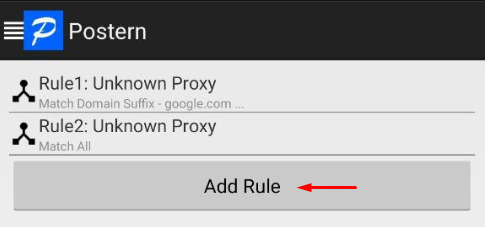
In the window that appears, tap on the “Add Rule” button.
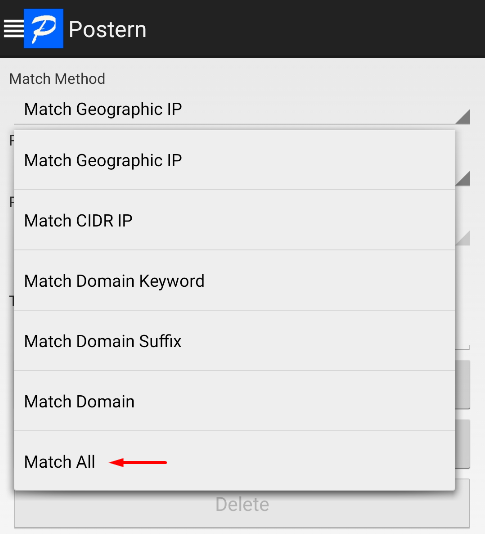
Here, select from the list in the “Match Method” field which rule the proxy would follow to operate. In our case, we would proxify the whole device, meaning the rule is “Match All”.
To complete this step, you need to click on “Proxy/Tunnel” in the “Rule” field, which allows the application to send traffic through the selected server. If you need automatic IP changes for certain apps or sites, rotating residential proxies can be paired with these rules to rotate in the background. Furthermore, select the previously created one from the options provided in the “Proxy/Proxy Group” field.
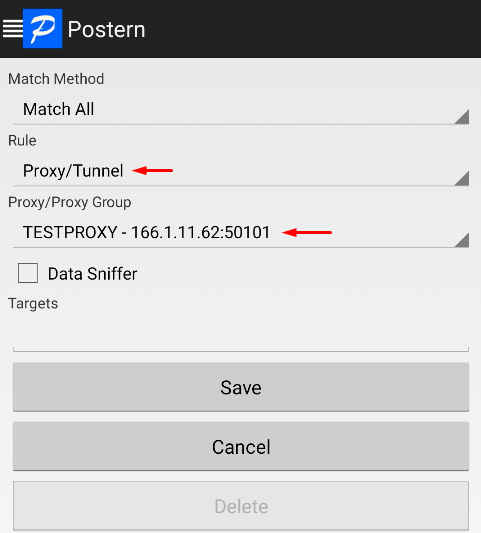
Tap the “Save” button. The next step is to check your IP address using an online checking service. If you configured an IPv6 proxy, make sure the checker shows the expected IPv6 address for the configured server. The result of the check must match the IP address of the configured server. It is important to mention that there are hundreds of IP checking websites available online.
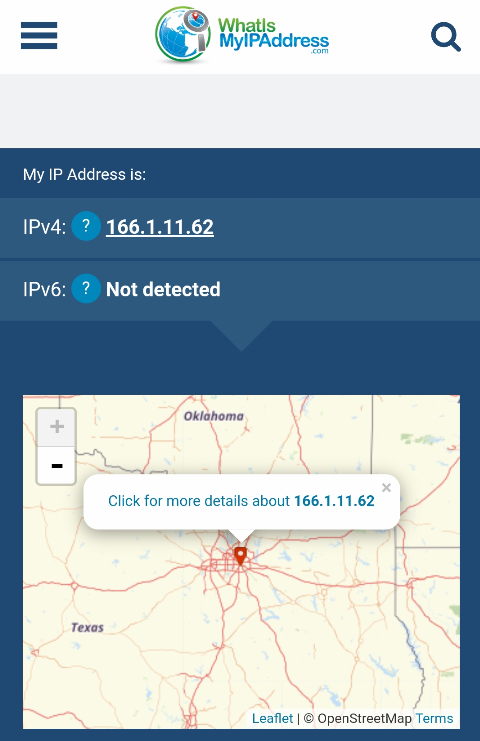
The final stage of the process has been reached. All done! Your proxy for Postern is now properly configured.
The following include some of the problems that an individual might face when using Postern, along with some solutions to the problems presented:
By addressing these common issues, using proxy, Postern handling might become a lot easier.
The Postern application is a convenient way to set up private proxies on the Android system to bypass blocking and perform various work tasks. But, keep in mind free proxies are not as productive, because the connection can be unstable. In this case, it’s recommended to use private proxies from well-known providers. If you specifically need a mobile-network footprint, 4g proxies can be used as an alternative for certain tasks. The article showed a case of how a private proxy is set up and this, in turn, allows for the user to surf the internet anonymously at a high speed.
Comments: 0