 Proxy for Telegram
 Proxy for LinkedIn
 Proxy for Ebay
 Proxy for Twitter
 Proxy for TikTok
 Proxy for Google
How to Set Up and Use Nginx Proxy Manager Effectively

As part of modern web development and systems administration, Nginx Proxy Manager setup is indispensable. It facilitates automated SSL certificate issuance and reverse intermediary server configuration via a user-friendly interface, thus easing the burden of complex configuration systems. This gives an edge to web developers of all degrees of seniority. Let us first focus on what NPM entails, how it differs from standard Nginx proxy, and what issues it solves.
What is Nginx Proxy Manager?
To get the most out of this tool, it is important to first clarify the differences between the original Nginx, with which it is often confused, and the concept of a reverse proxy.
A cloud-based reverse proxy server facilitates a myriad of critical functions that include traffic filtering, load balancing, and concealing the actual workings of the internal servers from the client. This improves external security, internal reliability, and overall performance. So put simply, reverse proxies are server-side solutions as opposed to forward proxies which operate on the client-side.
It serves as software for a reverse and mail type intermediary server, a load balancer, and an HTTP cache. Nginx Proxy Manager is an application built off of the original Nginx’s source code. It acts as an additional management layer that administers the reverse functions.
This approach should not be confused with the direct proxies sold by us at Proxy Seller, which operate client-side and are used to route outbound traffic through a specific IP address. For example, ISP proxies provide stable static IPs and are typically chosen when predictable connectivity and long sessions matter. Residential proxies use IP addresses from real home networks and suit scenarios requiring a more natural traffic profile. These solutions are used for web access control, automation, data parsing, and managing outbound connections, not for handling inbound server traffic, as with Nginx Proxy Manager.
Differences Between Nginx Proxy Manager and Nginx
Along with the shared architecture and design principles, Proxy Manager differs from standard Nginx in several important ways. The differences are compiled in this comparison table summarized below.
| Feature | Proxy Manager | Nginx |
|---|---|---|
| Management Interface | Offers a visual GUI that simplifies intermediary server configuration | Managed via CLI using directives like proxy_pass, which require deeper technical skills |
| SSL Management | SSL certificate uploading and renewal is automated | Requires manual intervention from a system administrator |
| Configuration Access | Limited | Full access via terminal |
| Updates | Irregular | Regular updates and strong community support |
| Functionality | Some features only available in specific builds | Built-in tools suitable for complex and custom implementations |
| Scalability | Limited for large-scale, complex infrastructures | Better suited for scalable enterprise environments and high-load systems |
Nginx Proxy Manager Capabilities
Before configuring proxying in this tool, it’s better to review its functional capabilities. Key features include:
- Configuring intermediate servers is done through a proper interface and without the need for tedious config file edits, making it simple.
- Streamlined setup for reverse proxies helps newcomers configure the system faster.
- Efficient automation through Let’s Encrypt allows users to track and renew their SSL certificates automatically.
- Logs and various intermediary server statistics can be viewed directly through the UI.
- Direct, controlling down to the last detail over whether or not redirects will occur, manipulation of domain names, handling of HTTP requests;
- Cutting off access to certain web assets through the use of permissions enhances web resource security.
Clearly, the tool not only aids in configuring the reverse proxy in Nginx, but also enables the administrator to restrict access to web assets securely.
Example Use Cases for Nginx Proxy Manager
The centralized management of various applications serves as one key functional example . This software solution offers a single control dashboard from which an administrator can manage:
- all domains;
- security certificates;
- reverse intermediary server settings.
As an example, a system administrator has the ability to add new sites, configure HTTPS, set redirects, and control access through a central management interface. Using a unified management interface decreases the chances of error and service disruption that manual configuration file edits introduce.
Moreover, Nginx Proxy Manager setup can enhance the security for cloud resources and servers by shielding them through some of its built-in capabilities like:
- traffic encryption between the user and server;
- filtering by IP address;
- settings for username/password restrictions on pages or directories;
- reverse proxying to shield the real server IP.
Consider a company with web apps (a WordPress site, REST API, control panel) hosted on a cloud VPS. To defend these apps from external threats and conceal the internal structure, a DevOps engineer configures the tool as described above.
Installation Requirements
Every operating system is compatible with this tool. In order to install and operate it, the following hardware configurations are recommended:
- Minimum 1 GB of RAM;
- A 4-core CPU or better;
- At least 15 GB attached free disk space.
In addition, one will need Administrator credentials. If logged in as a guest, one will need to reboot with those elevated rights or obtain them from the PC owner.
Setup Process: Nginx Proxy Manager Tutorial
- Visit the official developer website. Downloading and installing Docker along with Docker-Compose is recommended as a first step. Both packages must be saved on your computer.
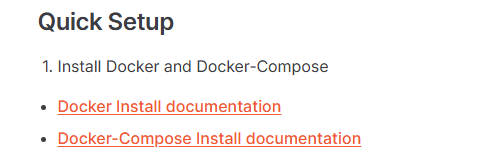
- Open the terminal and type the following command after everything has been downloaded:
sudo apt install docker.io -y - Now type this command to install Docker-Compose:
sudo apt install docker-compose -y - Use the following command to check for successful installation:
docker --version docker-compose --version - Type this to create a directory that will hold the tool. In Windows, new folder can be created by right clicking, in Linux:
mkdir ~/npm && cd ~/npm - Within this directory type the commands to create docker-compose.yml file. For windows, Right Click > New > Choose Notepad, then name the file:
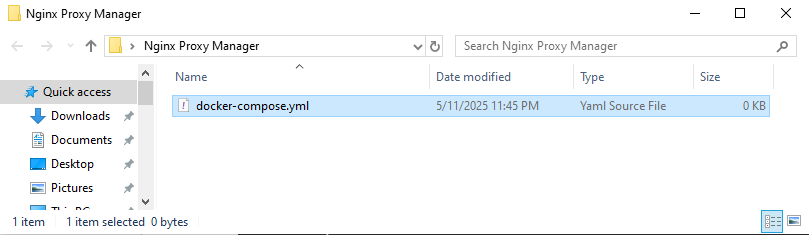
- Using Linux/Ubuntu:
nano docker-compose.yml - For either option, include the following data:
version: '3' services: app: image: 'jc21/nginx-proxy-manager:latest' restart: always ports: - '80:80' - '81:81' - '443:443' volumes: - ./data:/data - ./letsencrypt:/etc/letsencrypt - Save the file and start the container:
docker-compose up -d - Launch your preferred web browser and type in the server address with the port you configured. In this example, we used port 81:
https://IP-address:port - When the site is up, the login screen should appear. Use the default credentials from the developer's site to log in:
Email: admin@example.com Password: changeme - The system will ask you to change these following the first login attempt.
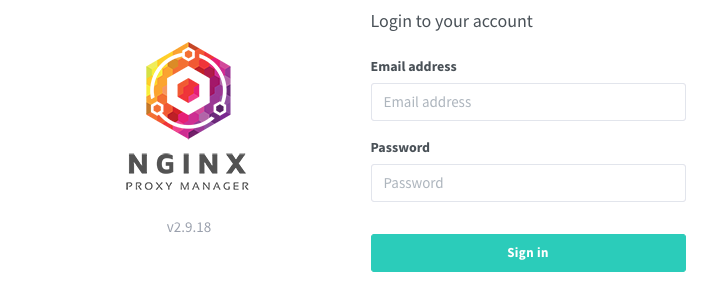
That’s it, the installation has been completed successfully.
How to Use Nginx Proxy Manager Properly
The configuration involves major three steps:
- Nginx reverse proxy manager configuration;
- SSL certificate installation;
- Authorization setup.
Let us consider how this can be implemented step-by-step.
Configuring a Proxy Host
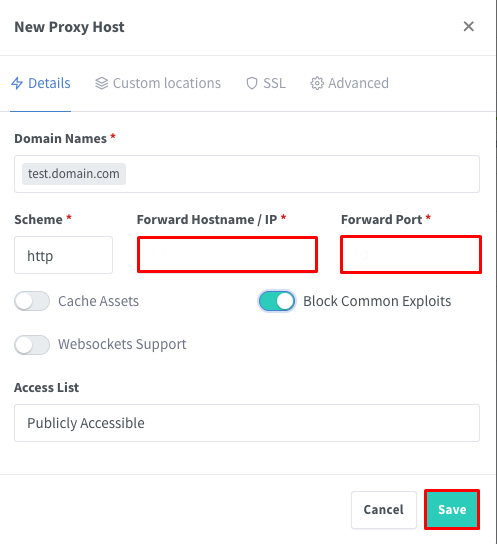
Navigate to the “Proxy Hosts” section, and from there select “Add Proxy Host”. A dialog with these entries will pop up:
- Forward Hostname/IP – internal name (e.g., 82.211.7.97) or an IP address.
- Forward Port – 80, 50100 or any other traffic directing port.
- Domain Names – active or inactive (test) domain, e.g. test.domain.com.
- Scheme – HTTP or HTTPS, determined by the internal server's connection type.
- Block Common Exploits – protect against most common vulnerabilities if checked.
- Websockets Support – check this box if your service runs on WebSockets.
Configuring an SSL Certificate
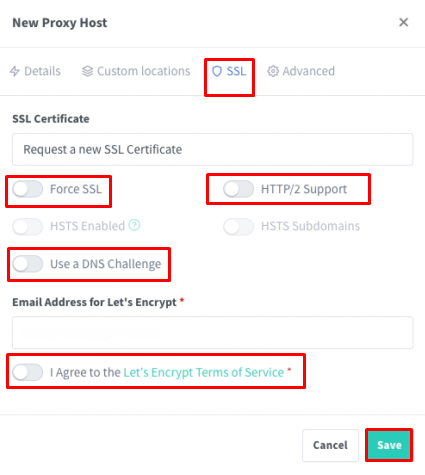
In the same window, navigate to the “SSL” section. Select “Request a new SSL Certificate” and enable the following options:
- Force SSL – enforce HTTPS for all connections.
- HTTP/2 Support – optional, for performance enhancement.
- Agree to Let’s Encrypt Terms of Service – mandatory for obtaining the free SSL certificate.
Click “Save”. The certificate will be automatically requested and installed.
Authorization
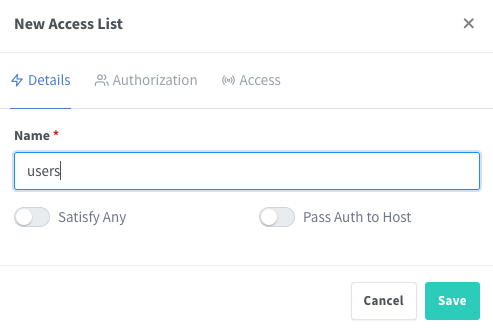
To create a new access list in Nginx Proxy Manager, go to the “Details” section. Assign a name like “users.” Note the “Satisfy Any” setting – if unchecked, users must fulfill all access conditions (authentication and IP match) which is more secure.
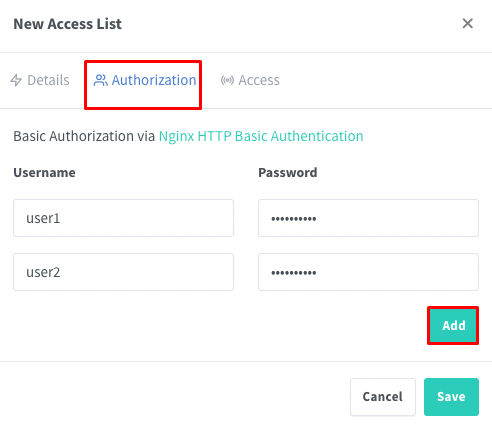
In the “Authorization” section, specify which users should have access and for each user set a username and password — this is basic HTTP authentication to access the site.
In the “Access” tab, enter IP addresses to be allowed or blocked access. This enforces access based on corporate network policies.
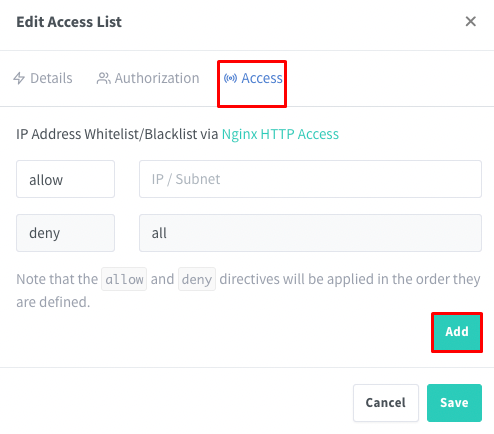
Once the access list has been created, navigate back to the settings for the target host and apply the newly created access list in the “Access List” field. From this point onward, user authentication will be required in relation to the site and access will only be granted if all conditions are fulfilled.
Conclusion
In reviewing this guide on Nginx Proxy Manager, it is evident that this is a multifunctional tool for setting up reverse proxies, managing SSL security, and controlling access to cloud resources. It is particularly useful for developers and systems administrators who require centralized and secure control of dozens of websites and services, as well as for personal use, like deploying a home server (NAS) or providing secure remote access to a local area network.
The core advantages of this manager include its broad compatibility with all operating systems, streamlined management that does not require command line interaction, and rapid configuration of proxies and SSL, which are some of its primary advantages.
PROXIES FROM $0.02/IP
Ready to put this into practice?
Pick a proxy type and location, and start using it within minutes.
Instant delivery
24/7 support
Refund policy
About the author