 Proxy for Telegram
 Proxy for LinkedIn
 Proxy for Ebay
 Proxy for Twitter
 Proxy for TikTok
 Proxy for Google
Setting up a proxy in the Surfinite anti-detect browser

Surfinite is an anti-detect browser tailored for secure profile management across various platforms, including social media, betting sites, and cryptocurrency exchanges. It features detailed digital fingerprint settings that enable the creation of unique profiles capable of bypassing various types of blocks. The browser also supports the integration of proxy servers, enhancing the trust factor of individual sessions.
It's important to use private proxy servers from reputable providers to ensure a high level of trust in accounts. Surfinite supports all popular connection protocols, including HTTP, HTTPS, SOCKS5, and SSH. Additionally, for proxies with IP rotation, a URL can be specified to change the IP address automatically.
There are two methods to add a proxy server in Surfinite:
- Integration via a separate tab, allowing selection during session creation;
- Direct data entry during profile creation.
This article will focus on the process of adding proxies using a specific tool called “Proxy List” available within the browser.
Step-by-step proxy configuration in the Surfinite browser
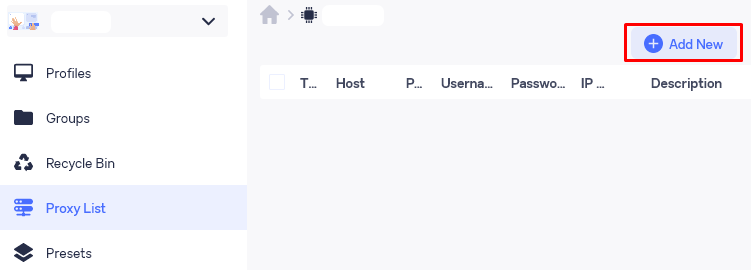
- Navigate to the “Proxy List” tab and click on the “+Add New” button located in the upper right corner.
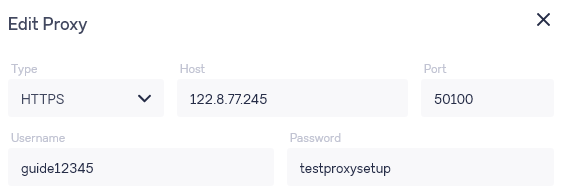
- In the pop-up window, select the connection protocol from the options provided. Below this, enter the IP address and port. If you are using a private proxy server that requires authorization, fill in the designated fields with the necessary login credentials.
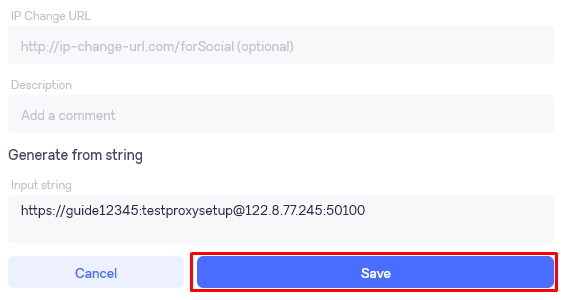
- If you're using a rotating proxy, specify the URL needed for changing the IP address. You can also add a description to help easily identify the proxy later. If needed, additional data can be entered in a single line at the bottom of the form. Once all the necessary data has been entered, click the “Save” button.
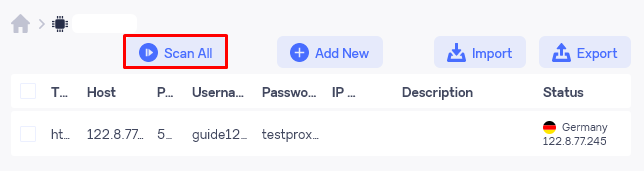
- Your new proxy server will now be listed in the “Proxy List” tab, where you can also test its functionality using the built-in proxy checker.
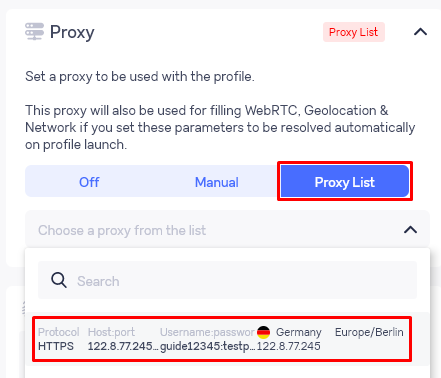
- When creating a new profile in the future, go to the “Proxy” section, select the “Proxy List” option, locate the proxy server you added, and assign it to the profile.
In conclusion, the integration of anti-detect browser technologies with proxy servers enables the creation of secure profiles, effectively helping to avoid unwanted blocking by target resources.
PROXIES FROM $0.02/IP
Ready to put this into practice?
Pick a proxy type and location, and start using it within minutes.
Instant delivery
24/7 support
Refund policy
About the author