/如何正确地 置并使用Proxifier

评论: 0

Proxifier程序是 接代理到不支持此功 的 件。在它的帮助下 你可以使用任何 互 网在中介服务器基础上 作的 件 浏 器、信使、 户推广 件等。 个代理 件将帮助你 使用中 服务器 你电 的有效数据来保 网络上的工作。

下 你会发现在Proxifer中为所有网络 接或个别程序 置代理的 细步 明。

在Proxifier中正确 置使用代理的 指南

在Proxifier中对所有网络 接 Proxifier 置

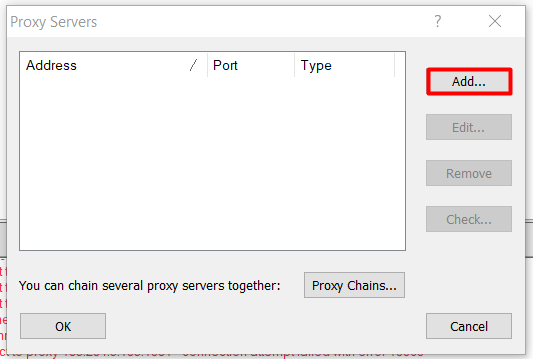
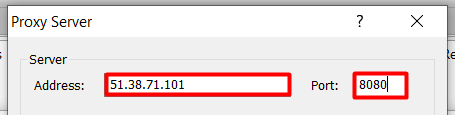
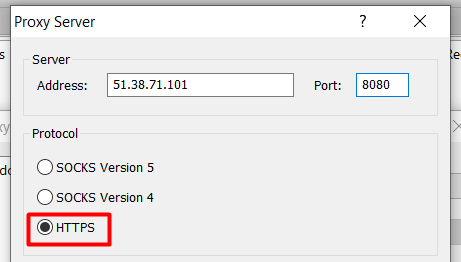
开始使用 个工具 从互 网上下 并在你的电 上 它。 循 个步 的指示

  1. 打开 "代理服务器..." 标签。
  2. 到 "简介" 分。
  3. Screenshot_1.png

  4. 按 "添加" 按 。

    Press the «Add» button

  5. 在 由字段中 入你代理服务器的IP地址和端口。

    Enter the IP address and port of your proxy server

  6. 择你代理服务器的协 。

    Select the protocol

  7. 如果你的代理支持 登录和密码 授权 在 "启用" 复 框中打上标 并 入登录名和密码来 代理。

    Put the mark in the «Enable» checkbox and enter the login, password to access the proxy

  8. 按 "检查" 按 测 代理服务器的 作。

    Press the «Check» button to test the work of the proxy server

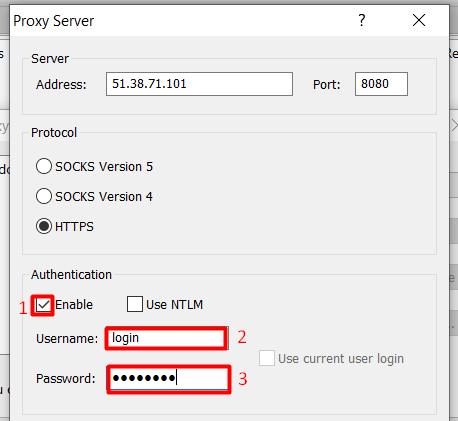
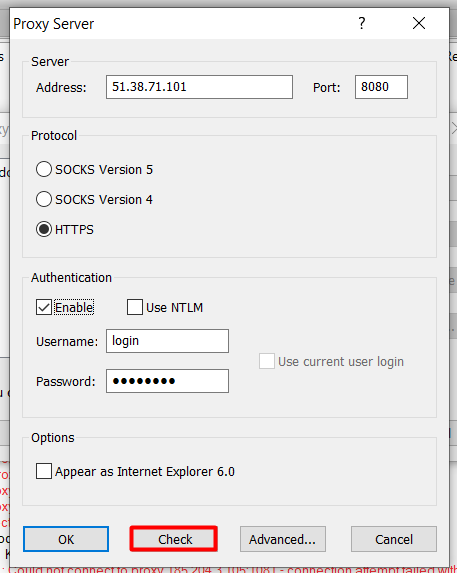
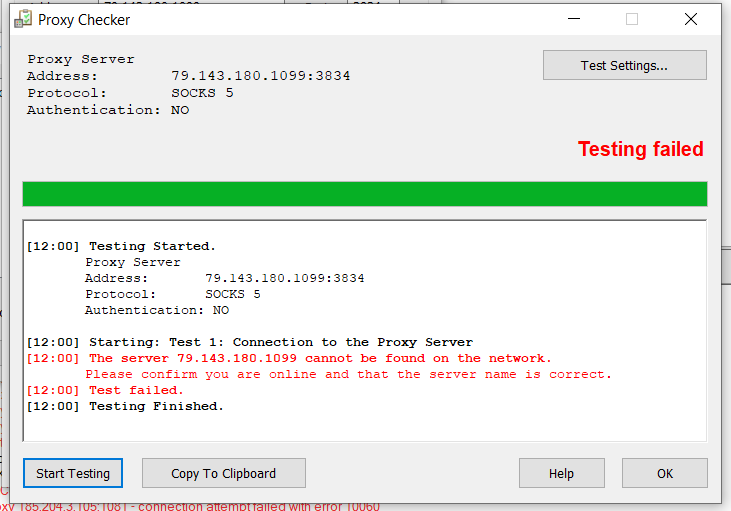
    如果你在做完测 后看到 "测 失 " 红 信息 意味着数据不正确或代理不 作。你 更换服务器或 整IP地址、端口、用户名和密码。

    If you see «Testing Failed» after doing the test, you need to replace the server or adjust the IP address, port, username, and password.

    如果代理测 成功 么你会看到 亮的绿 文。

    If the proxy testing is successful, then you will see the highlighted green inscription.

  9. 当测 完全成功后 按 "确定" 按 。

    Press the «OK» button

  10. 按 "是" 按 样 接的代理服务器就会 为所有程序执 。

    3.png

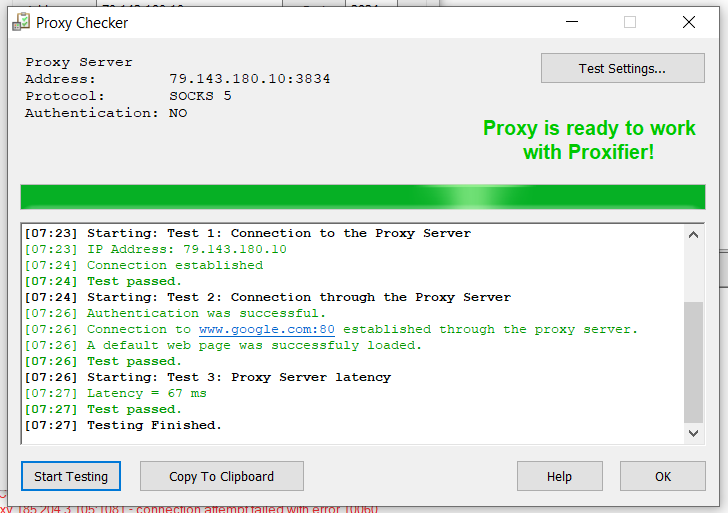
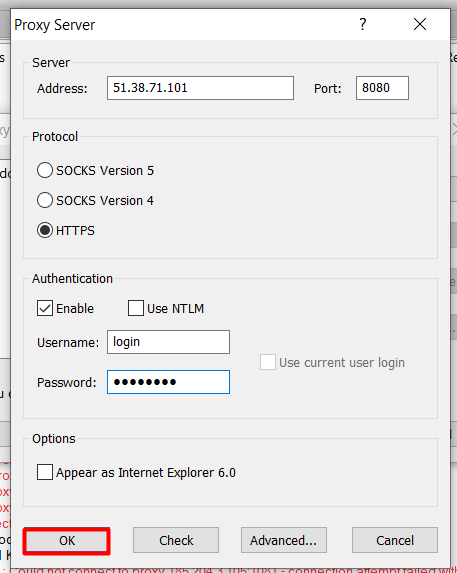
现在 所有的网络 接 将 添加的代理服务器传 。

个别程序的Proxifier代理 置

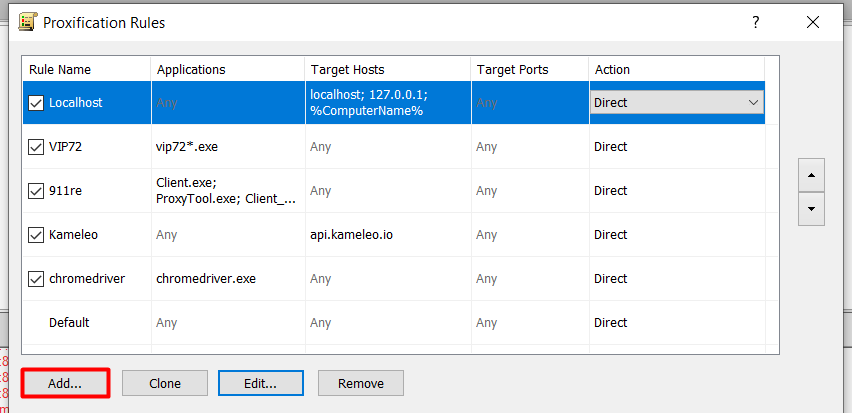
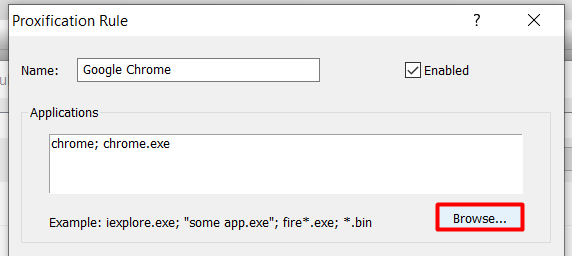
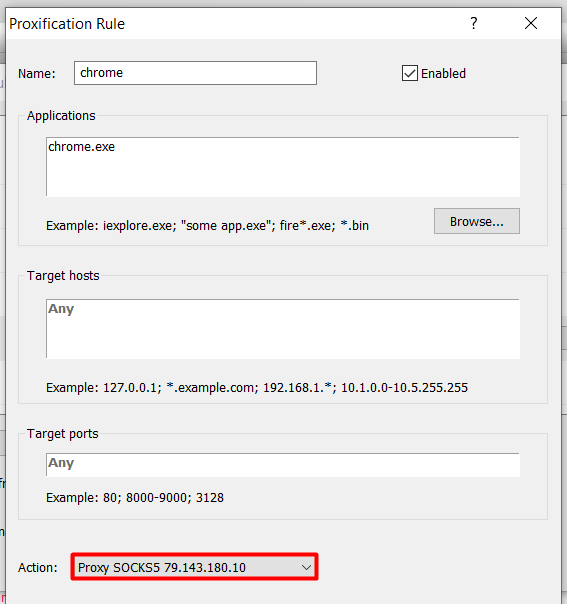
你 为一个特定的程序分 一个单独的代理吗 就按照上 的 明添加服务器 然后再按照 个步 操作

  1. 点击 "档案" 类别。
  2. 打开 "代理 则..." 标签。

    Screenshot_2.png

  3. 在打开的窗口中按 "添加" 按 。

    Press the «Add button»

  4. 入新代理的名称。例如 我们将 置一个只对Google Chrome浏 器工作的服务器。

    Type in the name of the new proxy.

  5. 按 "浏 " 按 。

    Press the «Browse» button

  6. 择文件来启动你 的应用程序 例如 Google Chrome浏 器 并按下 "打开" 按 。

    Screenshot_3.png

  7. 在 " 动" 从下拉列 中 择你 的代理服务器。

    Select the proxy server you need from the drop-down list

  8. 按 "确定" 按 。

    Press the «OK» button

  9. 再按一次 "确定" 按 保存更改并 出主 单。

    Press the «OK» button once again.

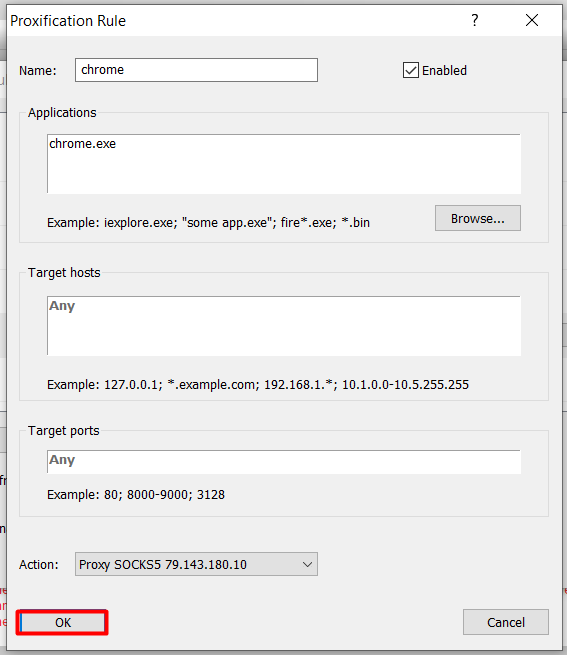
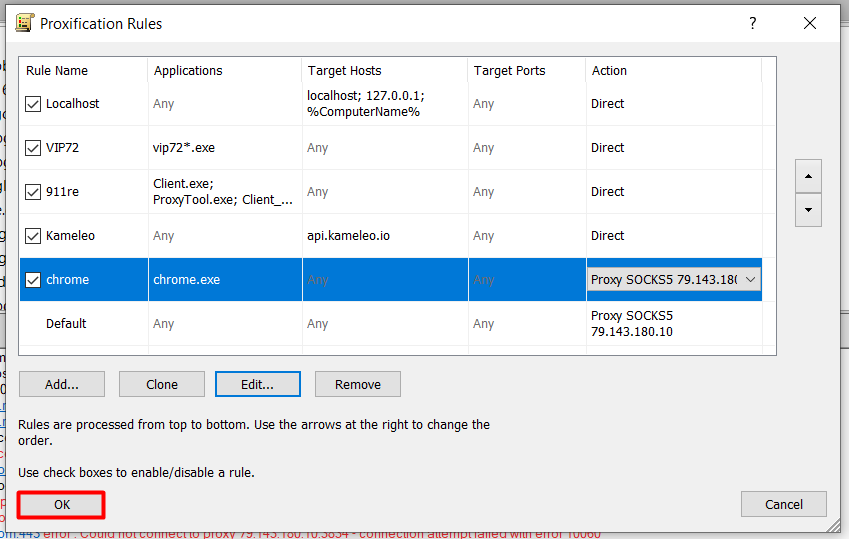
代理设置完成。运行配置代理服务器的程序(在我们的案例中是 Google Chrome 浏览器)。要检查连接情况,请访问检测您 IP 地址的网站,例如我们的 工具,用于检查 "我的 IP"。此外,还可在 Proxifier 主窗口中获取所使用应用程序的代理信息。

10.png

根据同样的原理,您可以将代理服务器连接到任何浏览器、信使、促销软件或其他程序上。

评论:

0 评论