如何正确地 置SwitchyOmega

评论: 0

文章的内容::

    SwitchyOmega —— 是你的浏 器的一个扩展。 管理和切换多个代理服务器。 扩展的 置相当简单 但 多人在使用时 临着 。我们 步了 如何 置SwitchyOmega。吧

    1. 下 扩展程序后 SwitchyOmega 置标签将 动打开。在欢 窗口中按 "下一步" 按 。

      Press the «Next» button

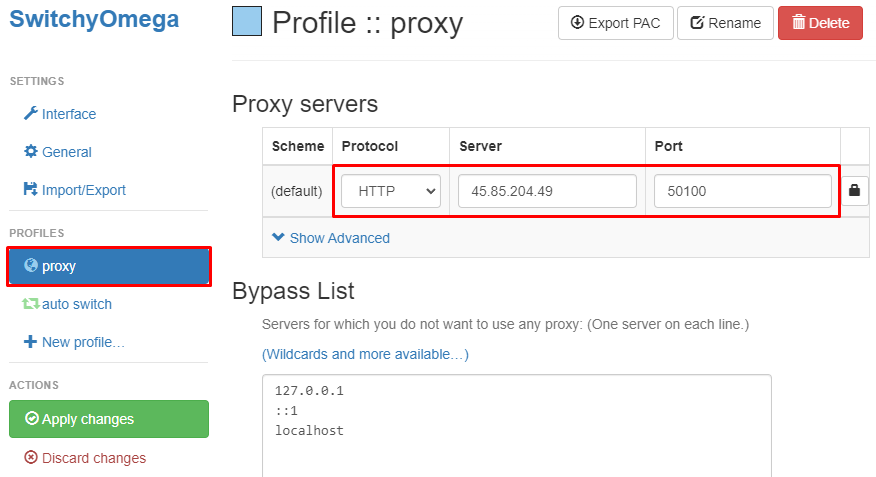
    2. 在指导窗口中多次按 "下一步" 它们没有意义。之后 你会 入 "档案" 卡 有 动创建的 "代理" 置文件。

      Press multiple times «Next». Come into the «PROFILES» tab with automatically created «proxy» profile

    3. 因此 从 "协 " 标 下的下拉框中 择 代理 售商推 的HTTPS为了与SwitchyOmega合作的协 。

      Choose the HTTPS

    4. SwitchyOmega 与IP 或与登录和密码的代理服务器。因此 如果你 没有 买任何 现在是时候从Proxy-Seller 得一些真正的好代理服务器。“服务器” 字段 你代理服务器的IP地址 端口字段是任何类型的代理服务器的共同。我们将使用我们的一个代理服务器作为一个例子。

      The «Server» field requires the IP address of your proxy server, and the port field is common for any type of proxies

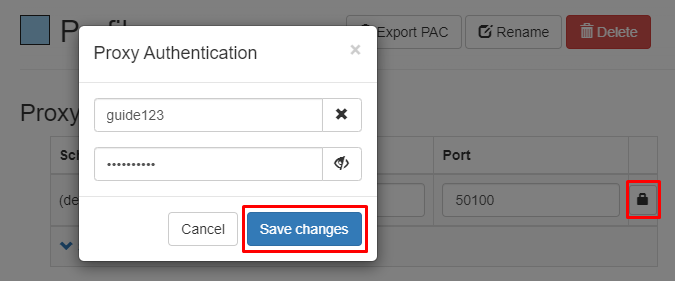
    5. 填完 些字段后 我们了 一个真正 的 。如果你 买了IP 的代理服务器 就不 做 一段 但如果你有代理服务器的登录和密码 你必 按 " " 按 有一个 图标。

      Press the «Authentication» button

    6. 出现 "代理 " 窗口。 入 买的代理服务器的登录名和密码 按 "保存更改" 按 。

      Enter the login and password from the purchased proxy server and press the «Save changes» button

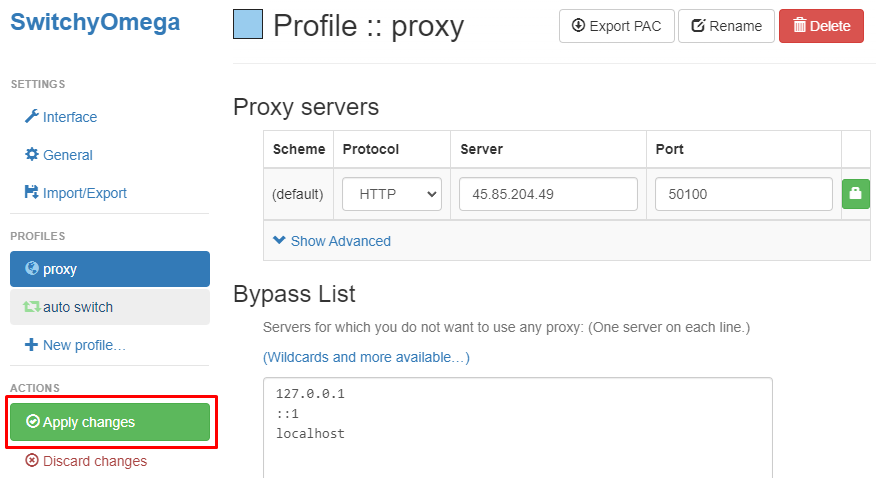
    7. 如果 是正确的 将是绿 亮的。在 " 动" 卡中按下 "应用变化"。

      Press the «Apply changes» in the «ACTIONS» tab

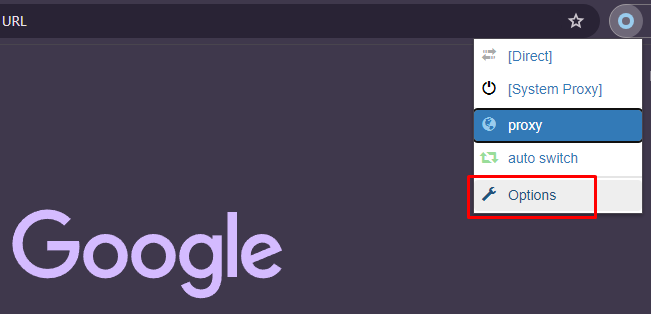
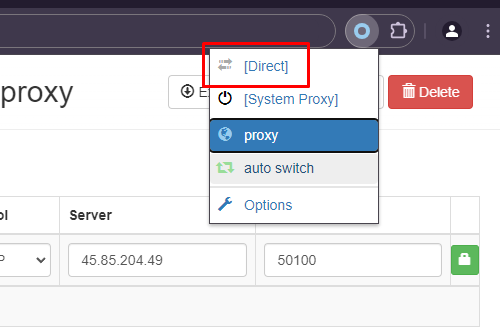
    8. 此后 打开一个新的浏 器标签。用 标左 点击SwitchyOmega图标 择 置的 置文件 "代理"。

      Open a new tab of your browser. Press SwitchyOmega icon and choose the configured profile «proxy»

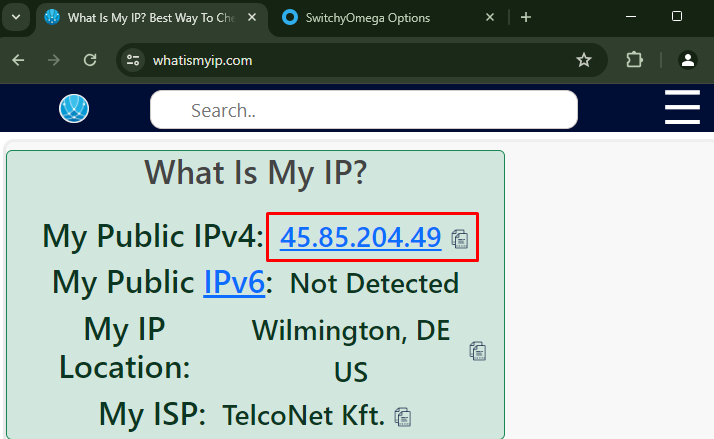
    9. 在 之后 确定你的扩展功 是否正常工作。 我们 入whoer.net网站 检查IP的变化。

      Enter the whoer.net website to check the IP changes

    置完成了! 如果你 临任何 再次检查 置教程 并注意代理服务器的

    评论:

    0 评论

    Tools

    关于我们

    加入