How to Disable IPv6 Traffic on my Windows PC

Comments: 0

IPv6 refers to a set of protocols. It is used on the global network to exchange information and is by default included in new versions of Windows. More often this protocol does not interfere with operation. However, sometimes problems arise (for example, the sound disappears during calls), and then a decision is made to disable IPv6 on the computer.

Let`s see how this is done on three popular versions of Windows.

How to disable IPv6 on Windows 7

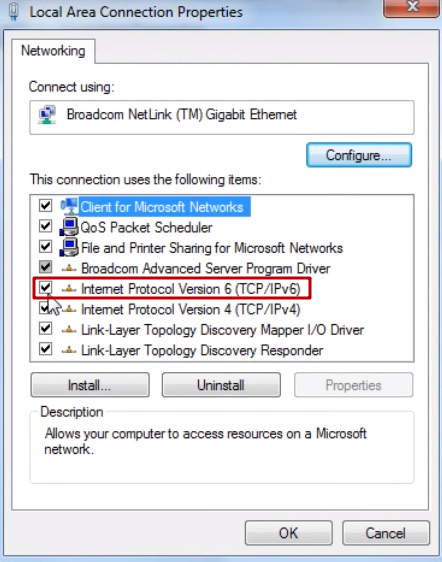
You can open the network interface properties and uncheck the IPv6 mark. However, the developers of the operating system are not advised to do so. Because programs that use interface tunneling with loopback may not work correctly.

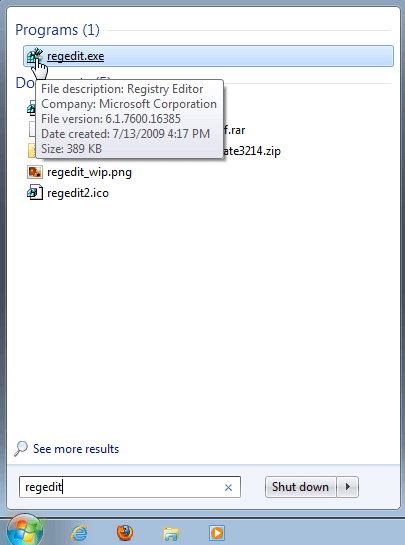
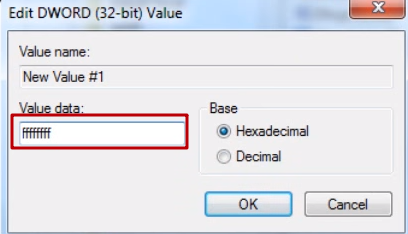
It is recommended to disable the protocol using the registry. The following steps must be completed.

  1. Run regedit.exe. Press the "Start" button and type in.

    Run regedit.exe. Press the «Start» button and type in

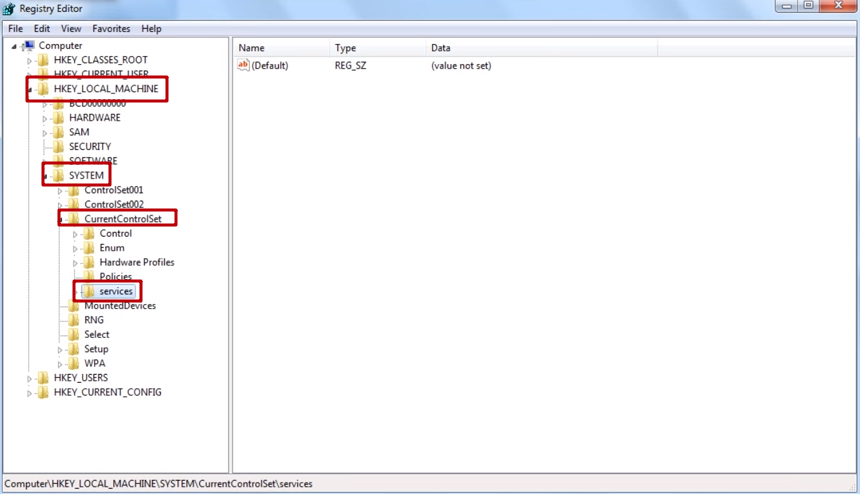
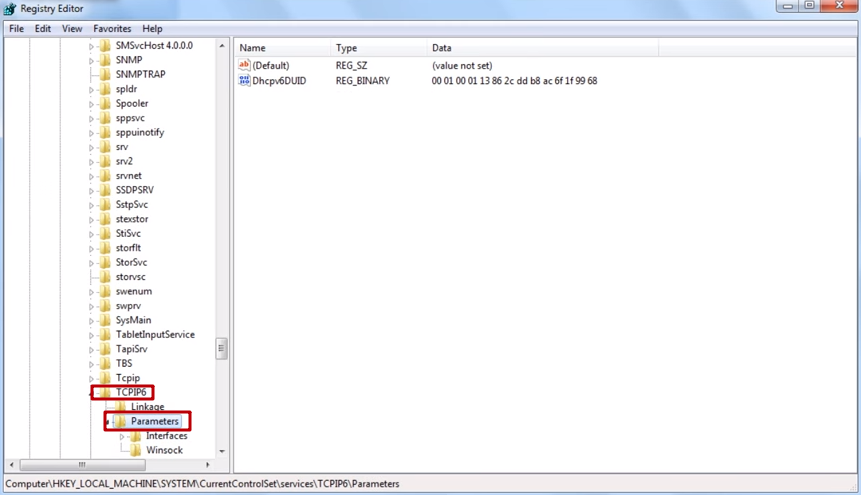
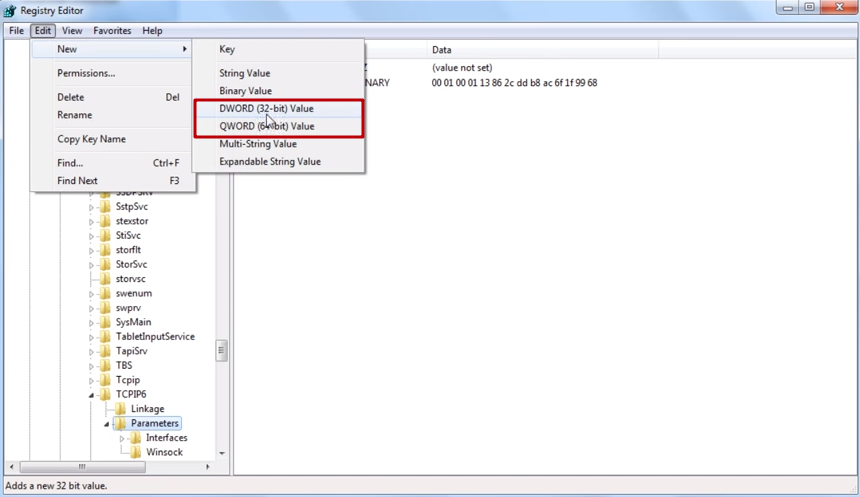
    The registry editor window opens, divided into two parts.

    We pass one by one to the indicated sections

  2. We pass one by one to the indicated sections.
  3. Next, select TCPIP6 \ Parameters.

    Select TCPIP6 \ Parameters

  4. In the top of the registry editor, press the Edit menu category - New - and select DWORD (64/32 bits, depending on your OS) - DisabledComponents.

    Press the Edit menu category - New - and select DWORD - DisabledComponents

  5. We set the value of this parameter (ffffffff), but not in decimal, but in hexadecimal.

    We set the value of this parameter (ffffffff), but not in decimal, but in hexadecimal

  6. Perform a reboot.

Do not be alarmed if, after booting the computer, you see that the IPv6 checkmark is still in the properties of the network interface. You did everything right and the protocol is disabled. You can verify this by running ipconfig –all. This command will display the IPv4 address.

You can verify this by running ipconfig –all

How to disable IPv6 on Windows 8

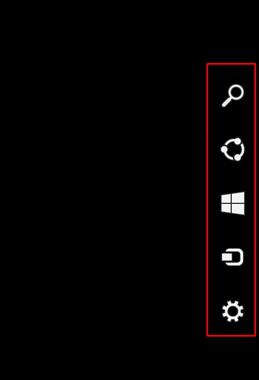
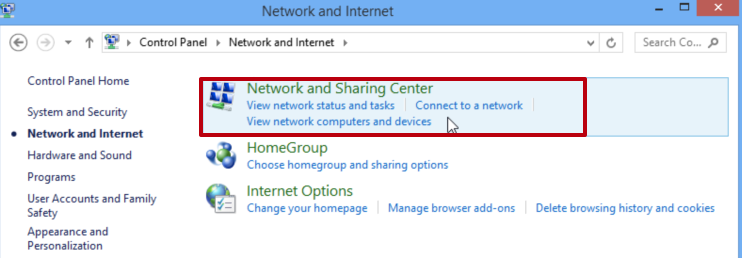
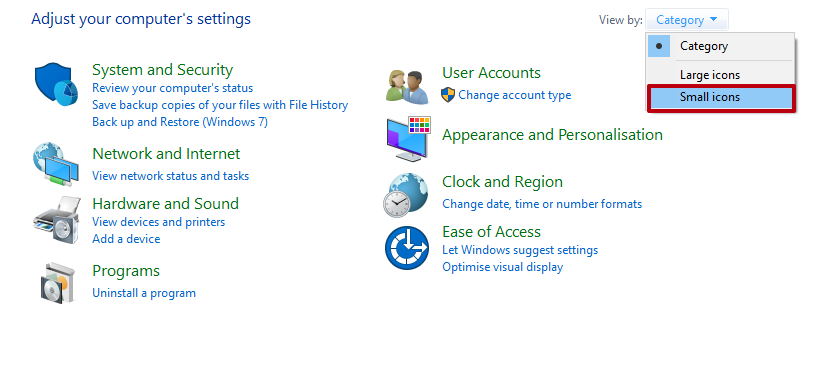
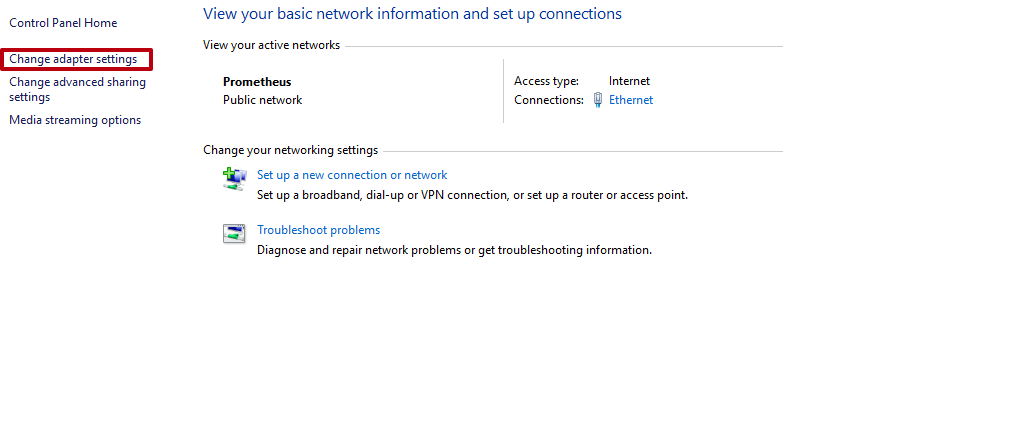
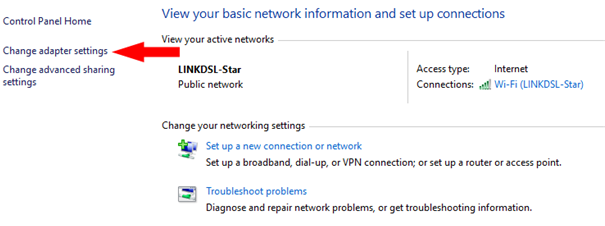
Now we’ll look at how to disable IPv6 on Windows 8. Here we show you 3 ways.

  1. The first method is the same as on the "seven". A slight difference lies in the initial stage. This is due to the fact that on the "eight" at the bottom left there is no familiar Start button. Press the key combination Win + R (this can be done in the seventh version of the OS). Then everything is the same.
  2. In the second method, you need to set the mouse pointer in the window interface mode in the lower right corner until the side menu appears.

    Set the mouse pointer in the window interface mode in the lower right corner until the side menu appears

  3. We click on the magnifying glass icon and we see the following picture on the screen.
  4. Click on the magnifying glass icon

  5. Click on the “Control Panel” and open it. The same panel can be called up via the Win + R key combination and by typing in the Control Panel line.
  6. Click on the «Control Panel» and open it. The same panel can be called up via the Win + R key combination and by typing in the Control Panel line

  7. In the "Control Panel" window, select "Network and Internet".
  8. 1.png

  9. In the next window - "Network and Sharing Center".
  10. Go to «Network and Sharing Center»

  11. Next - the wireless network (Ethernet) / Properties / uncheck IPv6 and click OK.
  12. download (8).png

  13. Here you will again have to open the "Control Panel". In the "Category" select “small icons”.

    Open the «Control Panel». In the «Category» select «small icons»

  14. In the next window, click on "Network and Sharing Centre".
  15. 3.png

  16. In the window, we already opened select “Change adapter settings” on the left menu list.
  17. Select «Change adapter settings» on the left menu list

  18. Next - as in the previous method.
  19. download (9).png

  20. Click "OK" and restart the computer.

How to disable ipv6 on Windows 10

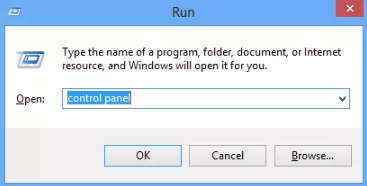
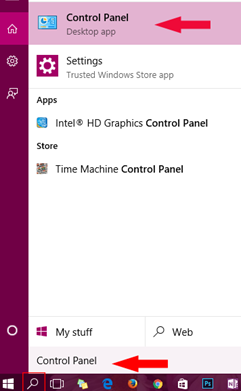
Finally, we’ll figure out how to disable IPv6 on Windows 10. In principle, there is no serious difference from the “seven” and the “eight”. Almost everything is similar. Disabling IPv6 Windows 10 involves the following steps:

  1. Open the familiar panel.

    Open the familiar panel

  2. In it, click on "Network and Internet".

    Click on «Network and Internet»

  3. Next - “Change adapter settings”.

    Press «Change adapter settings»

The further process is the same as on Win-8.

After all the manipulations associated with disabling the protocol, the computer must be restarted. Also, you can read detailed instructions for configuring up a proxy on Windows 10.

We hope that this article will help our readers to easily disable IPv6, and you will succeed the first time!

Comments:

0 comments