 Proxy for Telegram
 Proxy for LinkedIn
 Proxy for Ebay
 Proxy for Twitter
 Proxy for TikTok
 Proxy for Google
Setting up a proxy in Burp Suite for testing purposes

Burp Suite is a comprehensive web application security testing tool designed to uncover vulnerabilities. Widely used in the information security field, it is a top choice for conducting penetration tests and security analyses. To unlock the full potential of Burp Suite, delve into its features and capabilities:
- It functions as a proxy server, intercepting and analyzing HTTP traffic between the browser and web applications.
- The Burp Suite scanner automates application injection to detect vulnerabilities.
- The program generates a site map, displaying all available pages and web application resources for easier analysis.
- It supports the development of detailed scripts and extensions that can be customized to specific needs and tasks.
The Intruder, Repeater, and Sequencer tools are essential components of Burp Suite, performing key software testing tasks.
- Intruder automates attacks on web applications, such as password guessing and vulnerability testing for input data and request parameters like URL parameters.
- Repeater allows information security researchers to run manual queries against a web application and analyze responses in real time. It's useful for running multiple sequential queries with minor changes and analyzing session differences.
- Sequencer assesses the predictability of generated tokens, session keys, or other data used in application security.
Burp Suite's tools simplify web application security testing and uncover potential vulnerabilities and operational issues.
Video guide for setting up a proxy in Burp Suite
Step-by-step proxy setup in Burp Suite
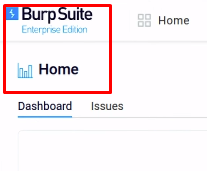
To set up a proxy in Burp Suite Enterprise Edition, which supports private HTTP proxies, follow these steps:
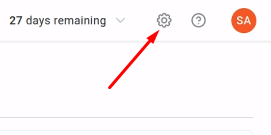
- From the program's main menu, access the settings section by clicking the gear icon in the upper right corner.
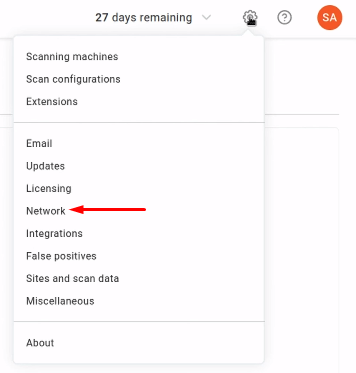
- From the menu that appears, choose “Network”.
- In the following window, turn on the toggle switch next to the “Use a HTTP Proxy Server” option.
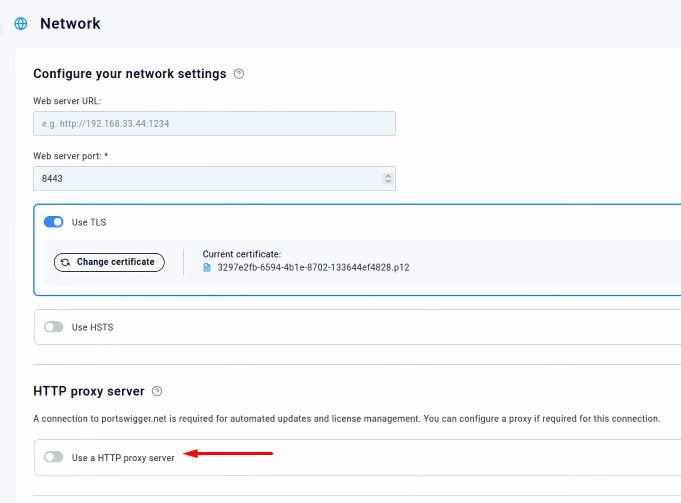
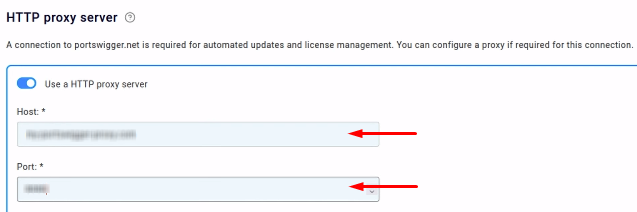
- Enter the IP-address and port number.
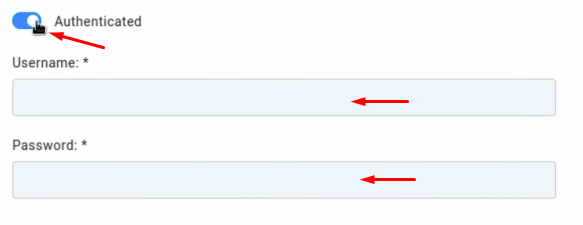
- Toggle the "Authenticated" button and enter your username and password if you are using private proxies.
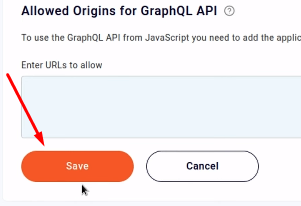
- Click on the “Save” button.
After configuring a proxy in Burp Suite this way, internet access will be routed through the specified proxy server, allowing you to bypass restrictions and access more networking opportunities.
PROXIES FROM $0.02/IP
Ready to put this into practice?
Pick a proxy type and location, and start using it within minutes.
Instant delivery
24/7 support
Refund policy
About the author