How to change User Agent in Chrome, Firefox, Safari, and Opera

Comments: 0

A User Agent in a browser is a line of code that the browser sends to the server when a user visits a website. The line is part of the fingerprint and contains the following information:

  • Browser type: Mozilla, Chrome, Safari, or other;
  • Software version: for example, 89.0 for Firefox or version 96.0 for Chrome;
  • OS: Windows, macOS, Android, or other;
  • Processor: for example, Win64 (for 64-bit versions of Windows) or ARM;
  • The language in which the browser operates.

Here's an example of what the User Agent line might look like:

1.png

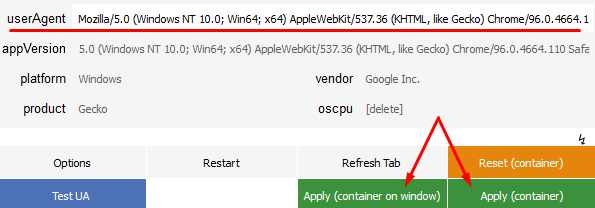
In this example, the “Mozilla/5.0” segment doesn't directly relate to the Firefox browser; instead, it signifies compatibility with protocols from the Mozilla Foundation. The subsequent segment, “Windows NT 10.0; Win64; x64,” indicates the usage of a 64-bit Windows 10 operating system. Details about the WebKit rendering engine follow. The last two segments indicate the use of Chrome version 96.0.4664.110, with a mention of Safari for compatibility purposes.

Have you ever wondered why websites seem to know what device and browser you're using? It's all thanks to the User Agent—a code snippet that your browser shares with websites you visit. But why does this matter, and who needs to know your User Agent?

  • Server-side Content Adaptation: Web servers use the User Agent to tailor content delivery, ensuring compatibility with your specific browser and operating system. For instance, this information helps servers decide whether to redirect you to a mobile version of a site.
  • Analytics for Website Owners: Website owners gather User Agent data to analyze their visitors' devices and browsers. This helps them optimize their websites for the most popular platforms.
  • Development and Testing: Developers and testers rely on the User Agent to configure and test websites across different browsers and devices, ensuring a consistent user experience.
  • Content Filtering: Web servers can use User Agent data to block content for specific browsers or operating systems.

Now that we understand the importance of the User Agent, let's explore when and how it should be changed.

Why change your User Agent

There are several common scenarios where changing your User Agent can be beneficial:

  • Testing Website Display: You may want to see how websites appear under different conditions, such as on different devices or browsers;
  • Bypassing Restrictions: Some web services restrict access based on the browser or operating system. Changing your User Agent can help you bypass these restrictions;
  • Accessing Specific Content: Changing your User Agent can allow you to access content intended for a different device. For example, you can view the mobile version of a site from your desktop;
  • Simulating Other Browsers: This can be useful for operating with older websites, testing user experiences, and troubleshooting display issues.

While some believe that changing your User Agent can enhance security and anonymity, this alone is not enough. For complete anonymity, it's recommended to use proxies or VPN services. To entirely change your fingerprint, consider using an anti-detection browser, which can make websites perceive you as a different user.

Now, let's explore how to change your User Agent in different browsers.

How to change User Agent in Chrome

To change the User Agent in Chrome using the command line, follow these steps:

  1. Press the “Win” + “R” keys simultaneously to launch the “Run” dialog box.

    2en.png

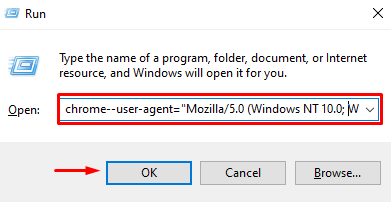
  2. In the “Open” field, type chrome--user-agent=, followed by the new User Agent parameters in quotes. Click “OK” to confirm and apply the changes.

    3en.png

  3. Launch your Chrome browser. Websites will now recognize your visit as if you were using the specified browser, device, and operating system.

How to change User Agent with an extension in Chrome

An alternative method for changing the User Agent is to use a specialized browser extension, such as “User-Agent Switcher for Chrome”. Here's how to do it:
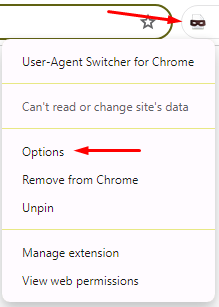
  1. Install the extension and right-click on its icon. Select “Options” from the drop-down menu.

    4en.png

  2. In the new window, you'll see a list of pre-configured User Agents for different browsers and operating systems. You can choose one from the list or create your own. To create a new one, use the following fields shown in the screenshot below:

    5.png

  3. Enter the name of the new configuration in the first field. In the next field, enter the User Agent data in the standard format. The group to which this parameter will belong is determined automatically. Add an indicator if necessary, then click the “Add” button.

    6.png

  4. The new configuration will be displayed in the specified group.

    7.png

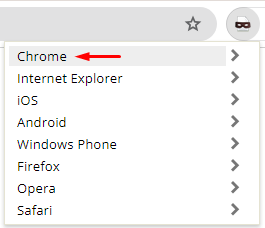
  5. Open a new browser tab and click on the extension icon. Select the “Chrome” group from the drop-down menu.

    8.png

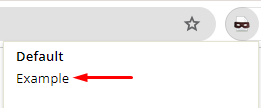
  6. Choose your new User Agent from the list.

    9.png

  7. The page will automatically reload, and the extension icon will show an indicator for your new User Agent.

    10.png

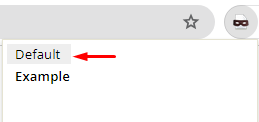
  8. To stop using a custom User Agent, simply select the “Default” option from the drop-down list.

    11.png

How to change the User Agent in Firefox

There are several options for changing the User Agent in Firefox. Let's first look at the method through the address bar, which is suitable for newer software versions (newer than 34). Here's how to do it:

  1. In the URL bar, enter “about:config” and press “Enter”.

    12en.png

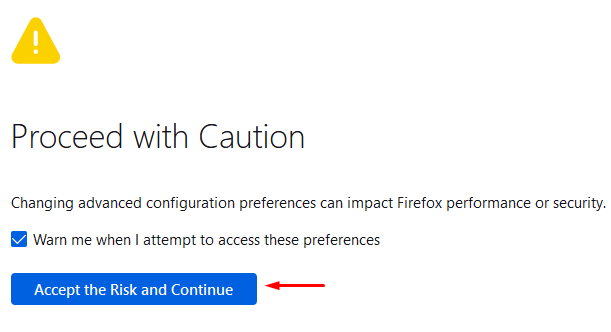
  2. Accept the risks.

    13en.png

  3. In the search field, enter the parameter name “general.useragent.override”. Once it appears, switch the indicator to “String”.

    14en.png

  4. Click the “+” icon to add a new User Agent. Enter the desired User Agent data, then check the box to apply the settings.

    15en.png

  5. Websites will now display content as if you were visiting from the specified browser and device. To revert to your previous settings, simply click the “trash can” icon next to the option.

    16.png

How to change User Agent with an extension in Mozilla

For older versions of the browser or as an alternative method, you can use addons like “User-Agent Switcher and Manager”. Here's how to do it:
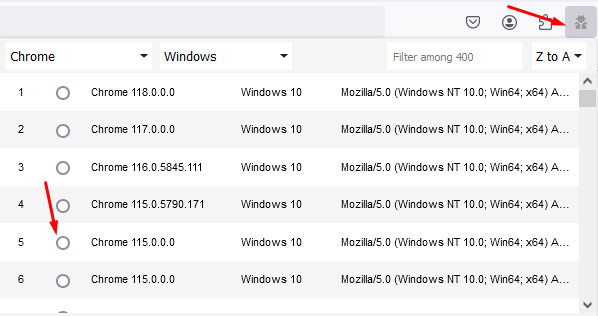
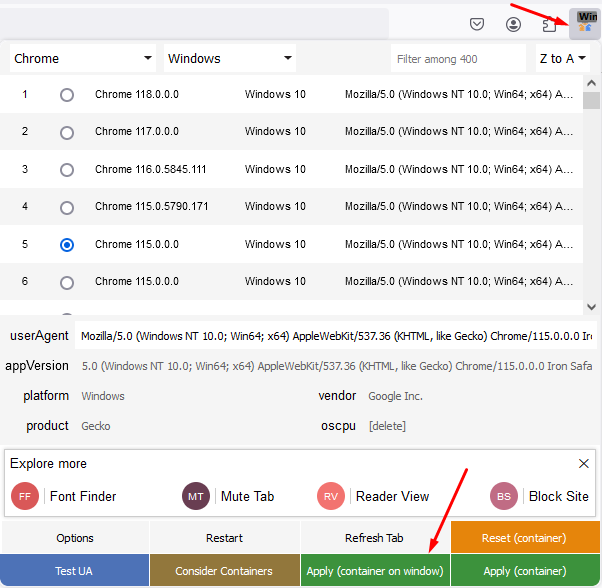
  1. Install the add-on and click on its icon to open a list of pre-configured User Agents. Select the one you need.

    17en.png

  2. Click on the “Apply (container)” button to apply the new settings to all tabs, or “Apply (container on window)” to apply them to a specific window. An activity indicator will appear on the extension icon.

    18en.png

  3. You can also add your own custom settings. Enter them in the “UserAgent” field and click one of the apply buttons.

    19en.png

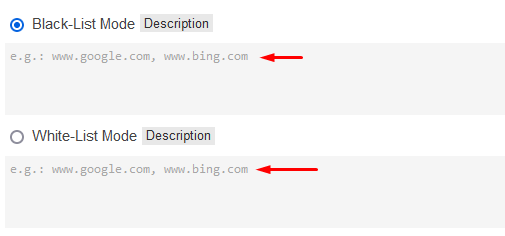
  4. To revert to default settings, press the orange reset button. The application also allows you to create black and white lists for sites and configure other settings. To do this, navigate to the “Options” section.

    20en.png

    21en.png

How to change the User Agent in Safari

A convenient method for changing the User Agent in Safari is through the browser configuration. Follow these steps:
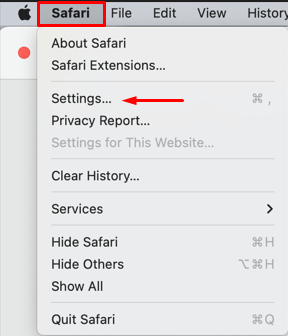
  1. Open Safari and navigate to the “Settings” menu.

    22en.png

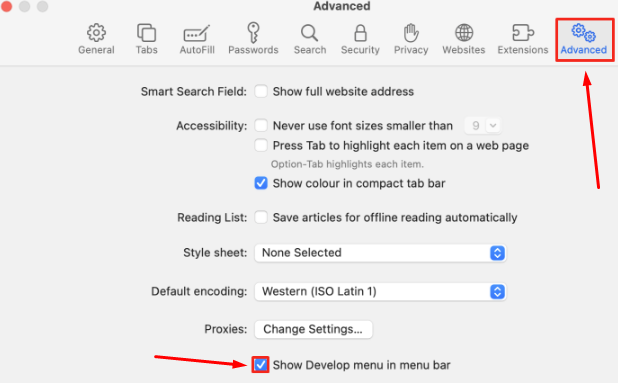
  2. Click on the “Advanced” tab. Check the box next to “Show Develop menu in menu bar”.

    23en.png

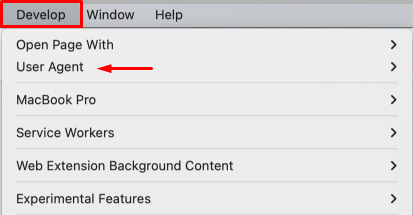
  3. Close the “Settings” window and go to the “Develop” menu in the menu bar. Select "User Agent" from the dropdown menu.

    24en.png

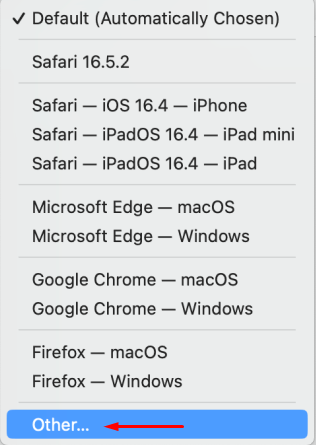
  4. In the list of User Agents, you can choose a predefined User Agent or select “Other” to enter custom parameters.

    25en.png

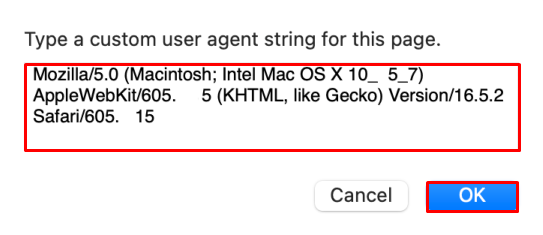
  5. Replace the current data with your new User Agent information and click “OK”.

    26en.png

After making these changes, websites will recognize your browser as the one specified in the User Agent settings.

How to change the User Agent in Opera

Changing the User Agent in Opera can be done through the developer tools. Here's how:
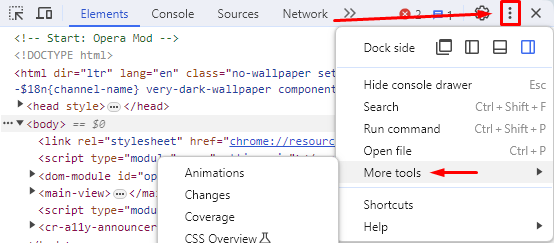
  1. Open the developer tools by pressing “Ctrl + Shift + I”. In the window that appears, expand the menu indicated by three dots and choose “More tools”.

    27en.png

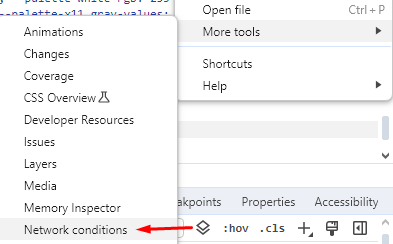
  2. In the new menu, select “Network conditions”.

    28en.png

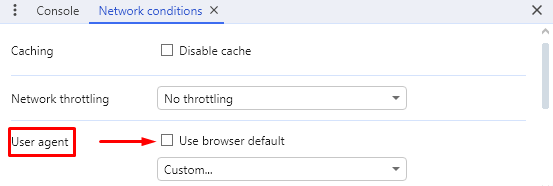
  3. In the bottom menu that appears, uncheck the “Use browser default” option in the “User Agent” category.

    29en.png

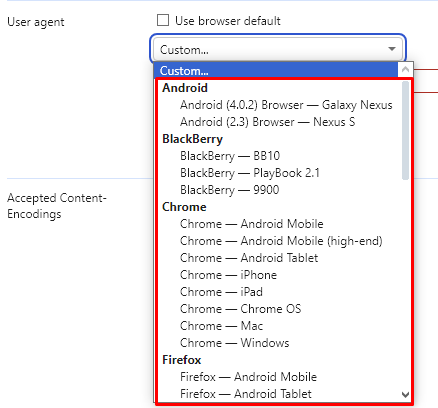
  4. You can now choose a predefined User Agent from the “Custom…” menu.

    30en.png

  5. Additionally, you can enter your own settings in the field below.

    31en.png

The changes will be applied automatically, and the content in the new tab will be displayed according to the new User Agent.

How to change User Agent with an extension in Opera

The Opera add-on store offers many extensions for changing the User Agent. Here's how to do it using the “Random User-Agent” add-on.
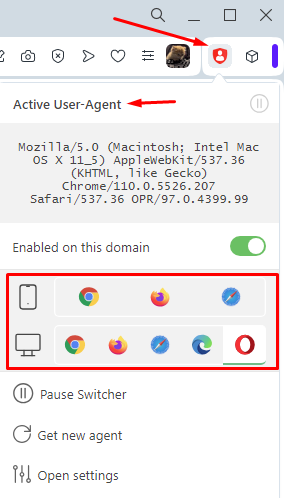
  1. Install the extension and click on its icon on the browser's top bar to open the menu. The extension displays the current User Agent. You can select a new option below by choosing a browser in the desktop or mobile device category.

    32en.png

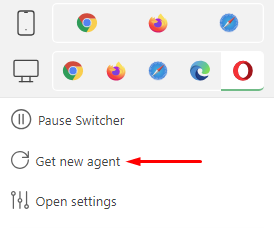
  2. Click on the “Get new agent” button to install a random User Agent when needed.

    33en.png

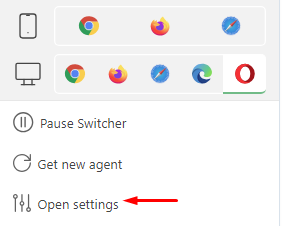
  3. To set your own settings, click on “Open settings”.

    34en.png

  4. In the “Basic Settings” category, activate the item as shown in the screenshot.

    35en.png

  5. Enter the desired User Agent in the field (or multiple User Agents if you want them to change).

    36en.png

  6. In this settings category, you can configure the rotation time of User Agents or disable the function if you only use one.

    37en.png

That’s it. The extension will use only the User Agent you specified.

In conclusion, we've explored how to change the User Agent in popular browsers. Once you've applied the new settings, web servers will perceive your browser as originating from a different operating system, browser, or device, leading to corresponding adjustments in how sites are displayed. This method is entirely safe and not in violation of any search engine policies.

Comments:

0 comments