Setting up a proxy in MASQ anti-detect browser

Comments: 0

MASQ is an anti-detect browser that enables users to hide their digital identity and maintain confidentiality online. MASQ browser offers around 5 million real digital fingerprints, making it an excellent option for arbitrage as it allows simultaneous operation of multiple profiles with maximum protection from tracking.

By configuring proxy servers in the web browser, users can reroute traffic through a specified IP address to secure their internet connection. IPV4, ISP, mobile, and residential proxies are suitable for working with the anti-detect browser and creating accounts. Let's delve into the detailed setup of a private proxy server in the MASQ browser to replace the user's IP address and protect against tracking.

Proxy configuration in MASQ anti-detect browser

Follow these step-by-step instructions to set an IP address and create a profile in the web browser.
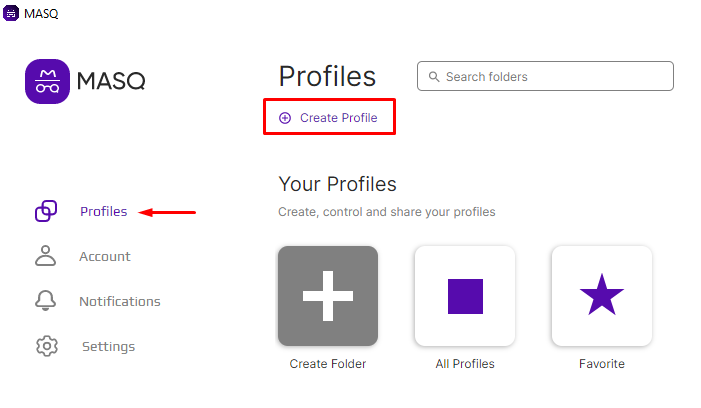
  1. Install and open MASQ browser. To create a profile, press “Create Profile” on the main page of the “Profiles” section.

    1.png

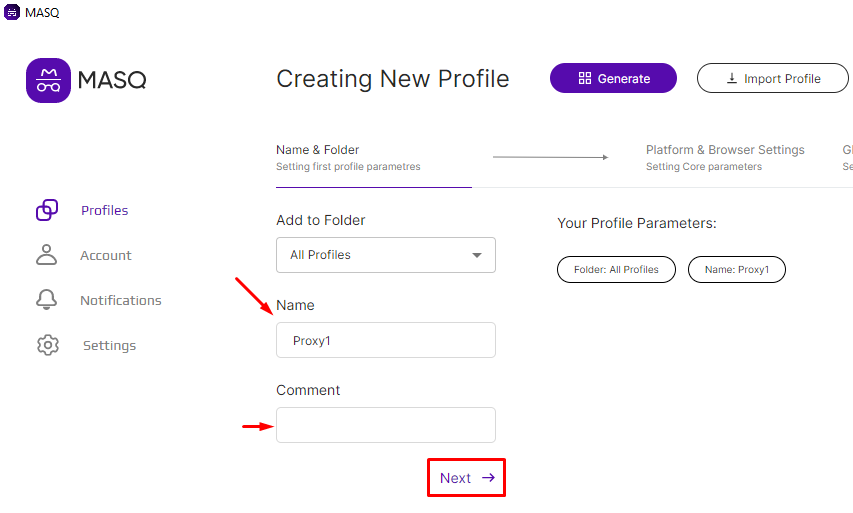
  2. Assign a name to the profile in the “Name” line and, if necessary, leave a comment in the “Comment” line. Press “Next” to continue setup.

    2.png

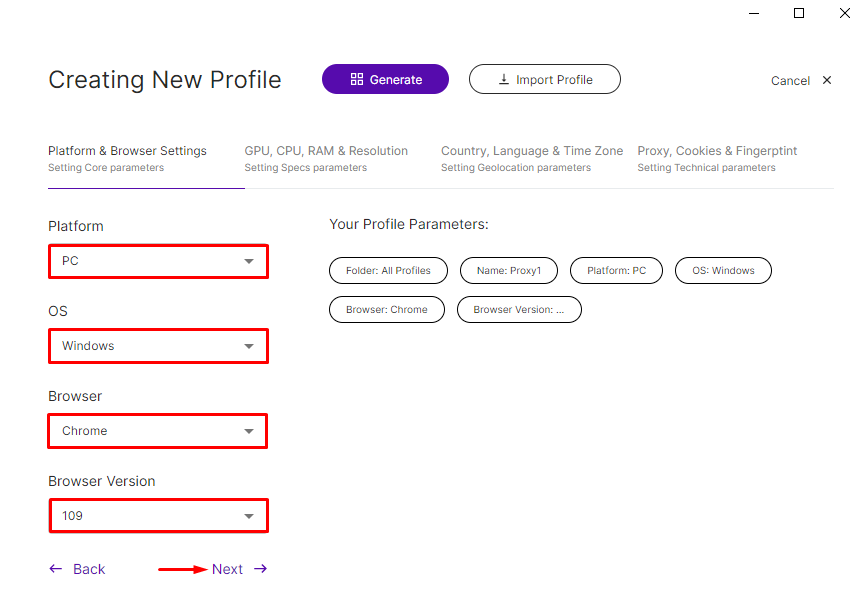
  3. In the opened window, you can set parameters for the profile's fingerprint. Choose the desired device, operating system, browser, and its version. Press “Next” to continue.

    3.png

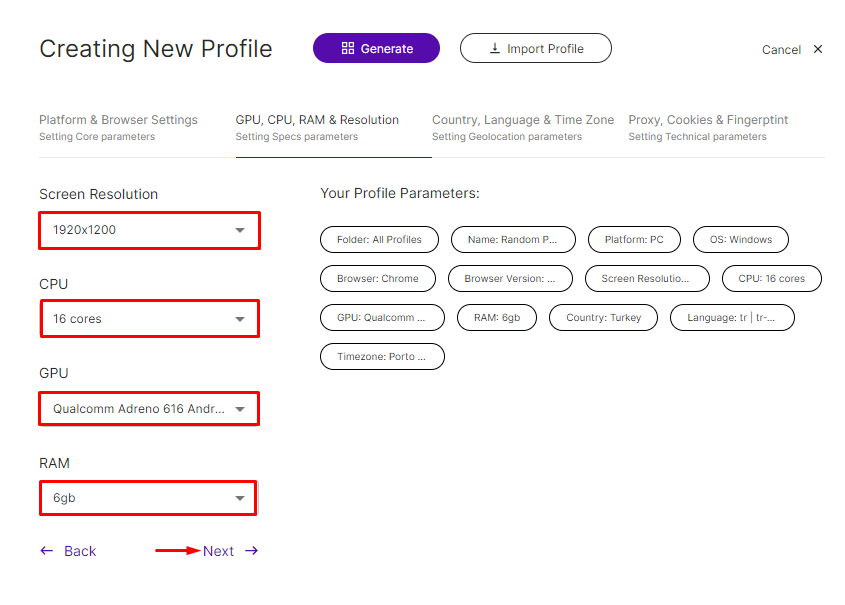
  4. On the next page, you can set additional digital fingerprint parameters: screen resolution, CPU cores, graphics card, and RAM. Press “Next” to proceed.

    4.png

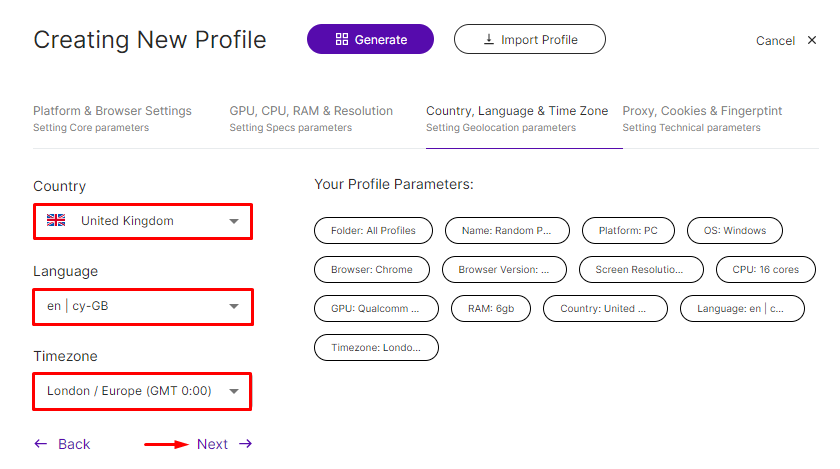
  5. The final step in setting up the digital fingerprint involves choosing the country, language, and time zone. After setting the required geo, press “Next” to move to proxy settings.

    5.png

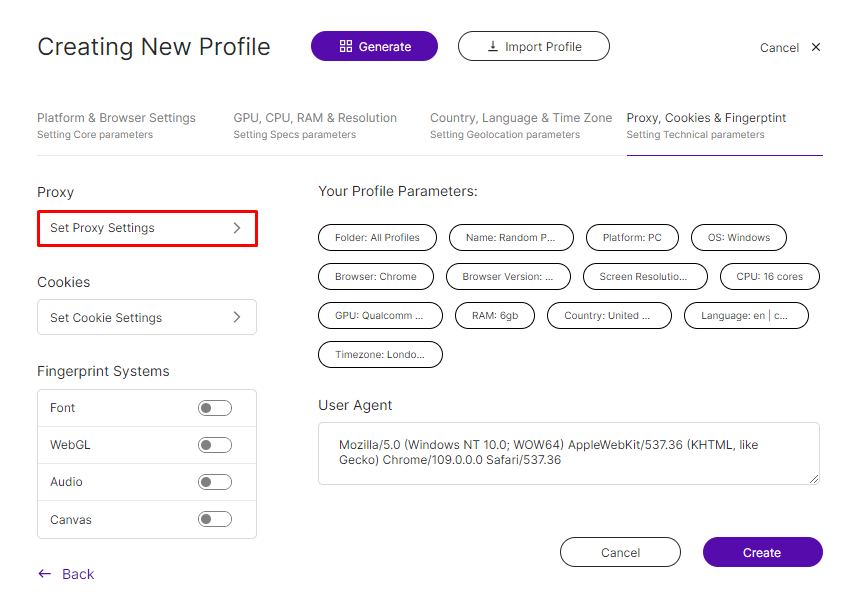
  6. In the opened window, you’ll see the field for editing “Cookie” files, additional fingerprint parameters, and the current User Agent of the profile. To go to the advanced proxy settings, press “Set Proxy Settings”.

    6.png

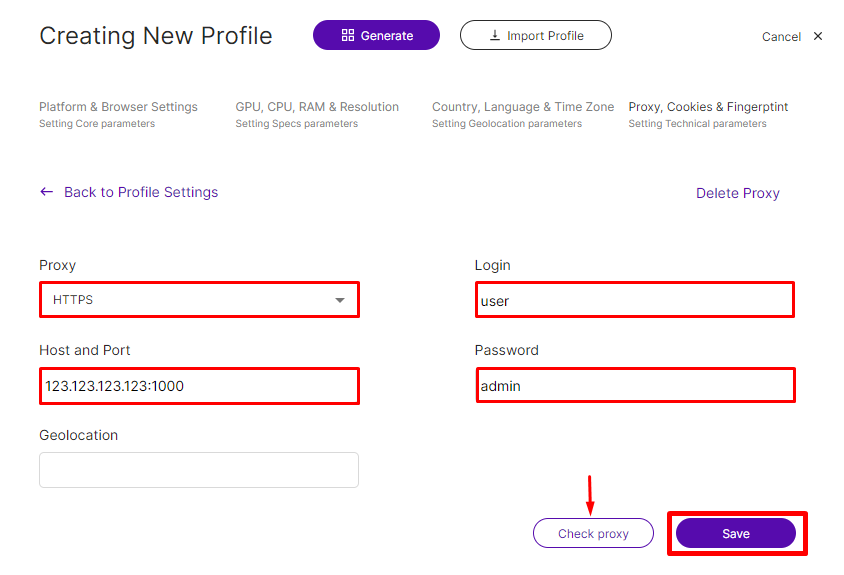
  7. In the popup window, select the connection protocol and enter the proxy server details: IP address and port, username, and password if using private proxies. You can check the connection with the “Check proxy” button, a successful connection will be indicated by a popup notification. Press “Save” to complete the setup.

    7.png

    8.png

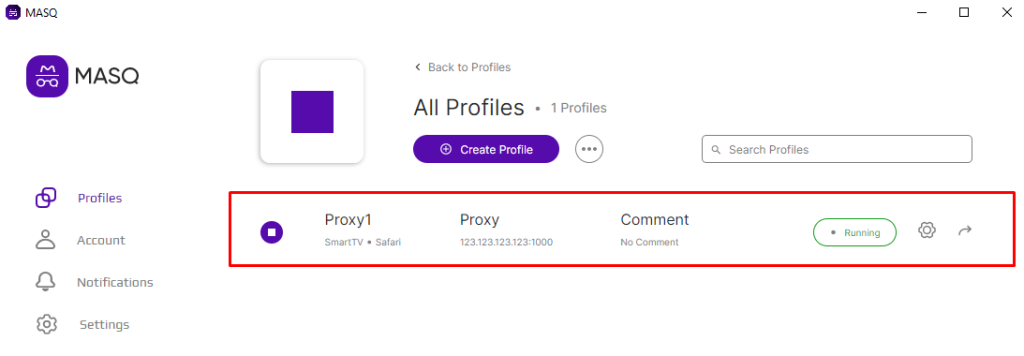
  8. The new profile will appear on the main page in the “Profiles” section.

    9.png

The setup of the profile and IP address in the MASQ anti-detect browser is complete, and user data is protected. To create more profiles, repeat the similar actions.

Comments:

0 comments